
Run script connector
What is the run script connector?
The Run script connector allows you to run JavaScript code in response to a trigger or a previous action step in your App's integration. The JavaScript code interacts with the data from these steps and generates an output that the remaining actions can consume. This connector does not support any trigger event for now.
For example, consider you have a board form for tracking externally reported events, and you want to individually contact customers through email only after the incident ticket is closed. For this to happen, the board and email connector must communicate with one another. The Run script connector maintains a constant communication channel by retrieving only the necessary email addresses from the board and forwarding them to the Email connector action step. The code connector's output will be an array of objects containing email strings. When the integration is enabled, separate email notifications are sent when incidents are closed.
Actions supported in Run script connector
Action |
Description |
Run JavaScript code |
This action runs an inserted JavaScript in response to a trigger from any of the previous steps. |
Configuring Run script connector
- In your Kissflow account, open the app builder. Click the left navigation menu and click Logic > Integration > + icon to create an integration. Provide a name and description for your integration.
- In the editor, select a trigger step. You can also use the search to find a trigger directly. For instance, use a webhook from a third-party application or a trigger from one of the flows in Kissflow.
- Click the Add button (
 ) to add an action. Search for Run script connector and select Run JavaScript code as the action.
 - Click Edit on the JavaScript code editor, the full-screen editor opens.
- Input Data (Left panel): Configure custom input data by mapping fields from previous triggers or actions. You can apply formulas to transform this data before it enters your code.
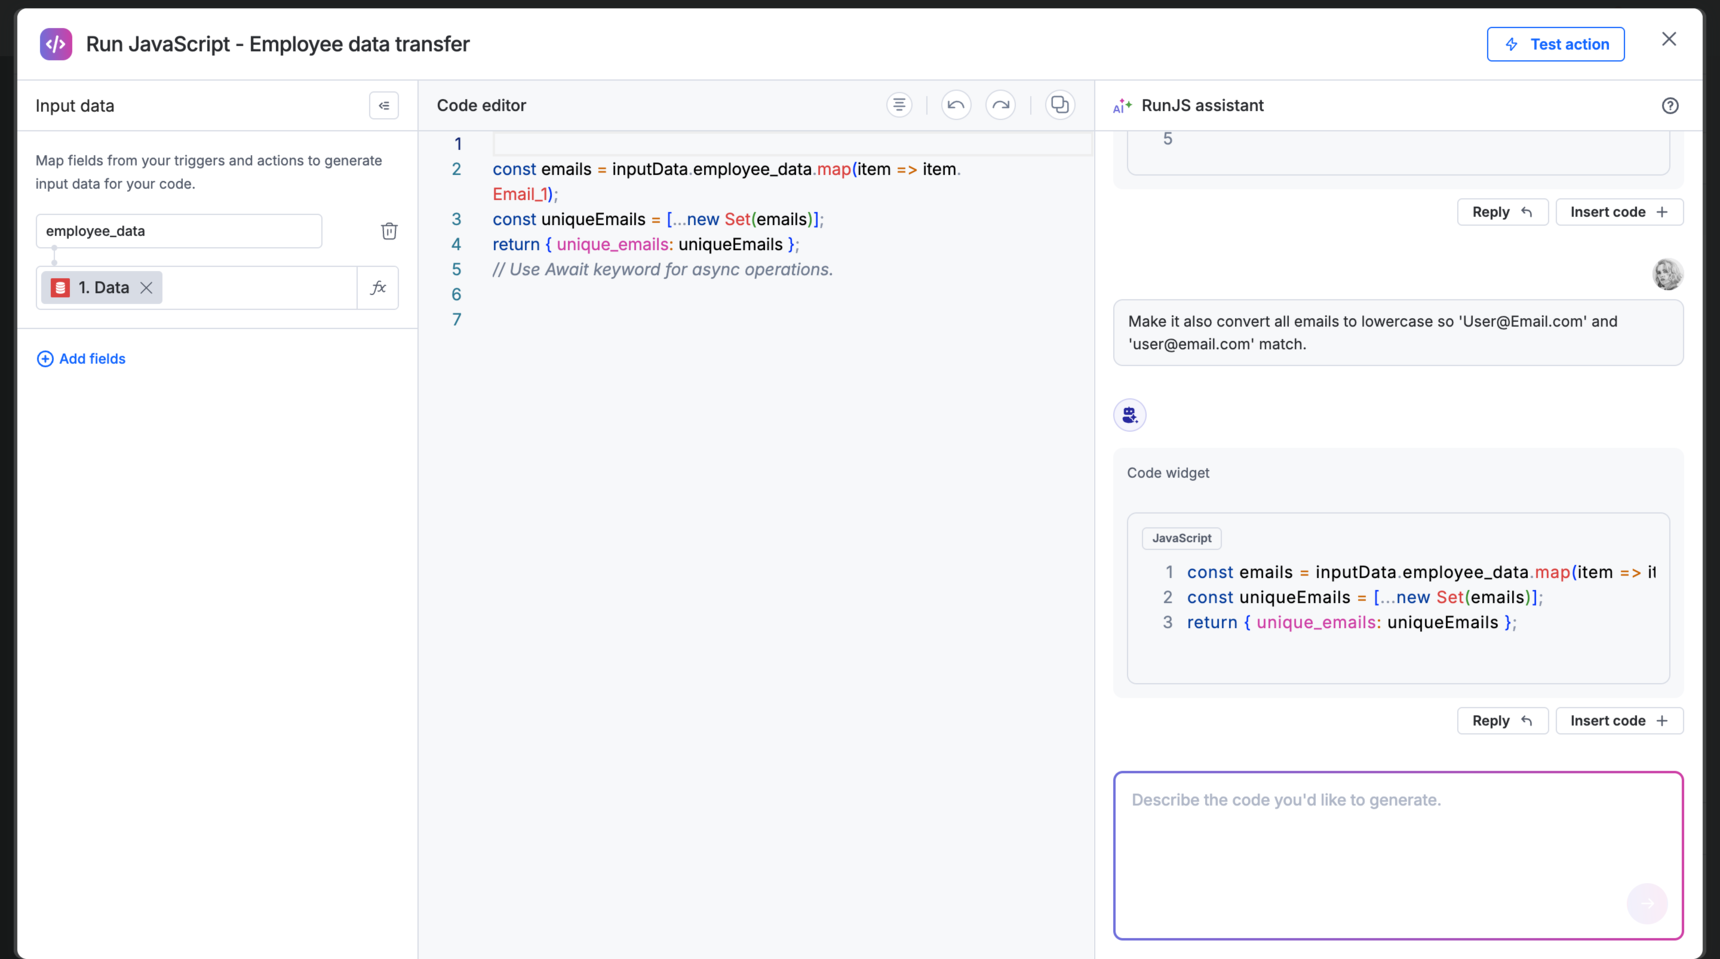
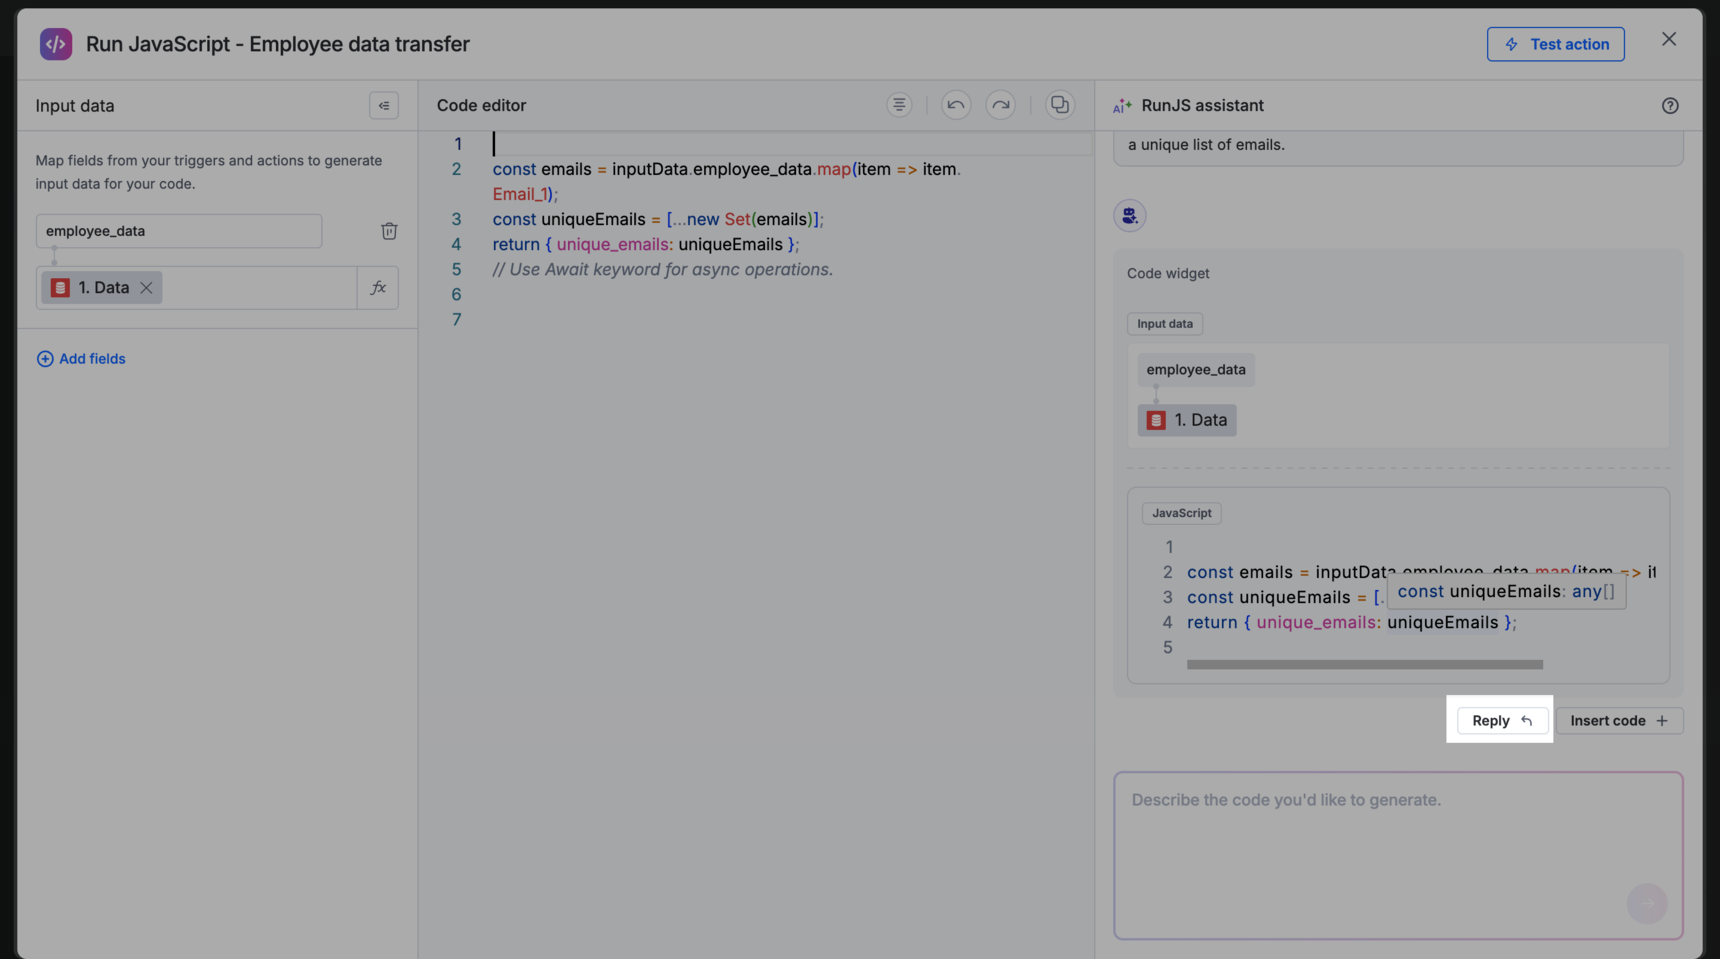
- Code editor: The main workspace where you can draft your script. Write custom vanilla JavaScript from scratch or use the RunJS assistant to generate the code for you
- RunJS assistant (Right panel): The interactive chat interface for generating and refining code.
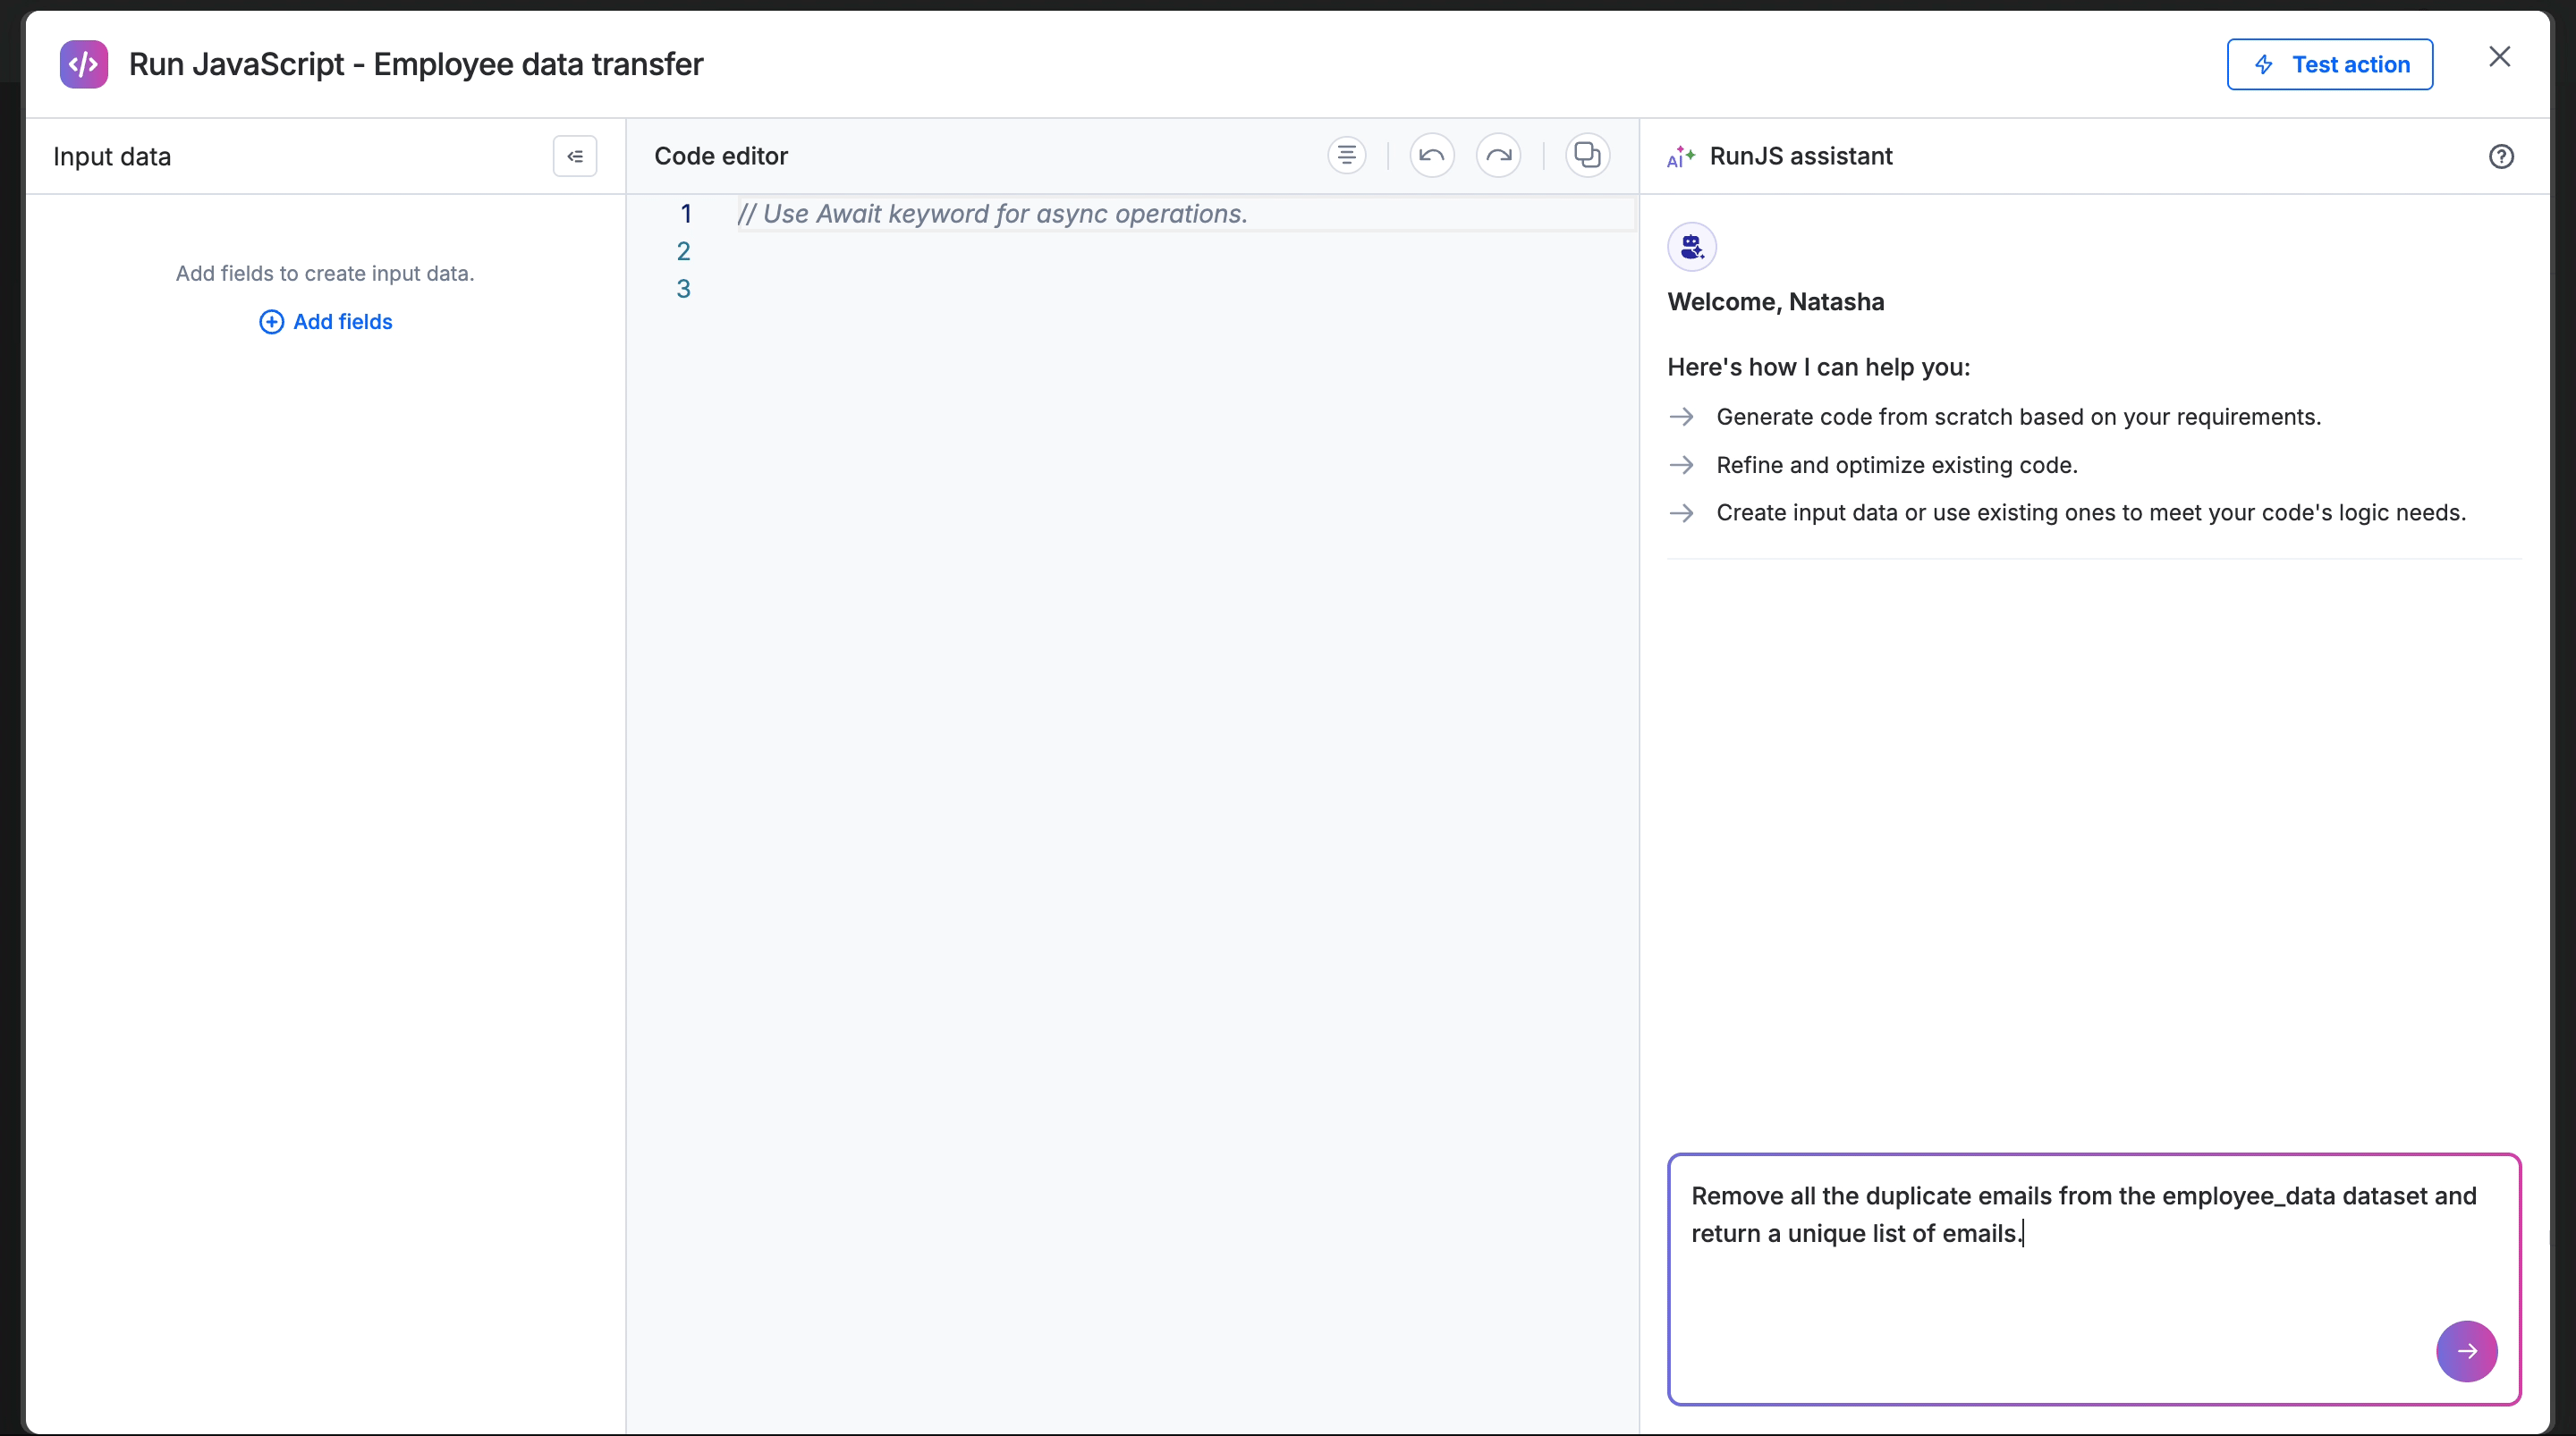
How to use the RunJS assistant
Adding input data
You can pass dynamic data into your script by defining key-value pairs in the Input data section. These fields map values from previous steps (triggers or actions) to a global inputData object. For example, if you map a field as email, you can access it within your code using inputData.email.
Generating code from scratch
In the RunJS assistant chat on the right, describe the logic you want to achieve (For example, Remove all duplicate emails and return a unique list).
The RunJS assistant will generate the code block for you.
It can automatically identify and create necessary Input data fields or use your existing ones.
If you are satisfied with the result, click Insert code to paste it directly into the center editor. Use the Undo and Redo controls in the code editor at any time to navigate through your recent code changes and restore previous versions.
Note:
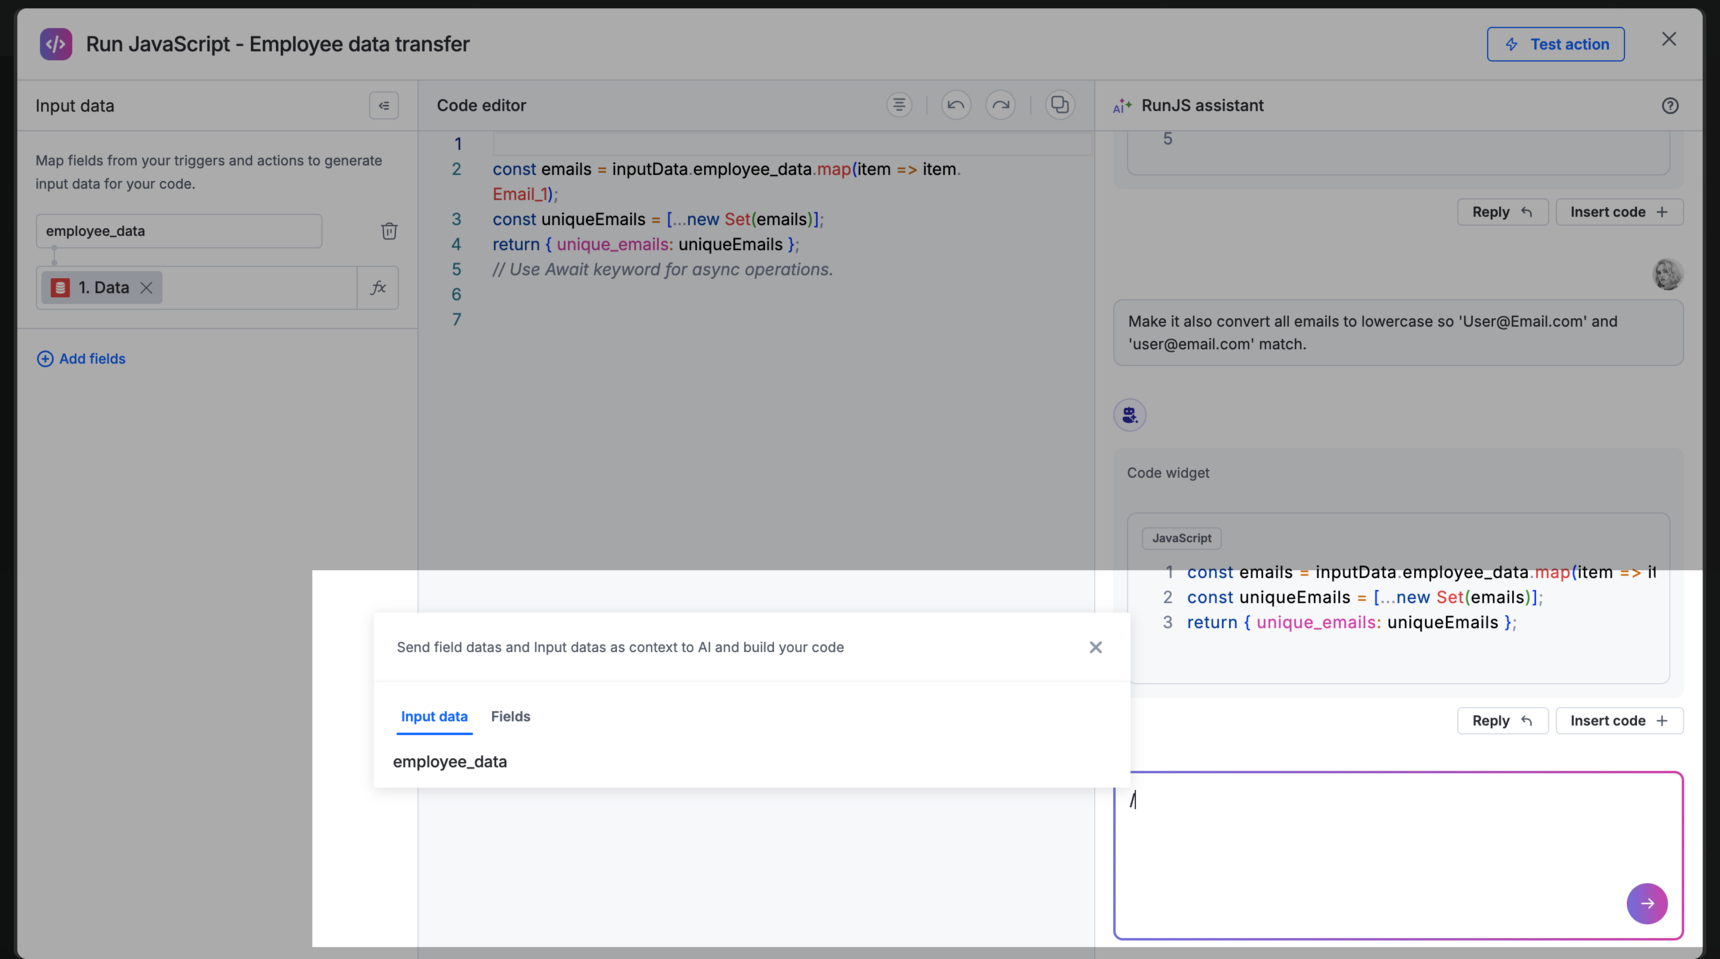
To make your prompt more precise, type / to trigger a dropdown of available fields and configured input data. Selecting data here ensures the assistant incorporates your specific data into the generated script.
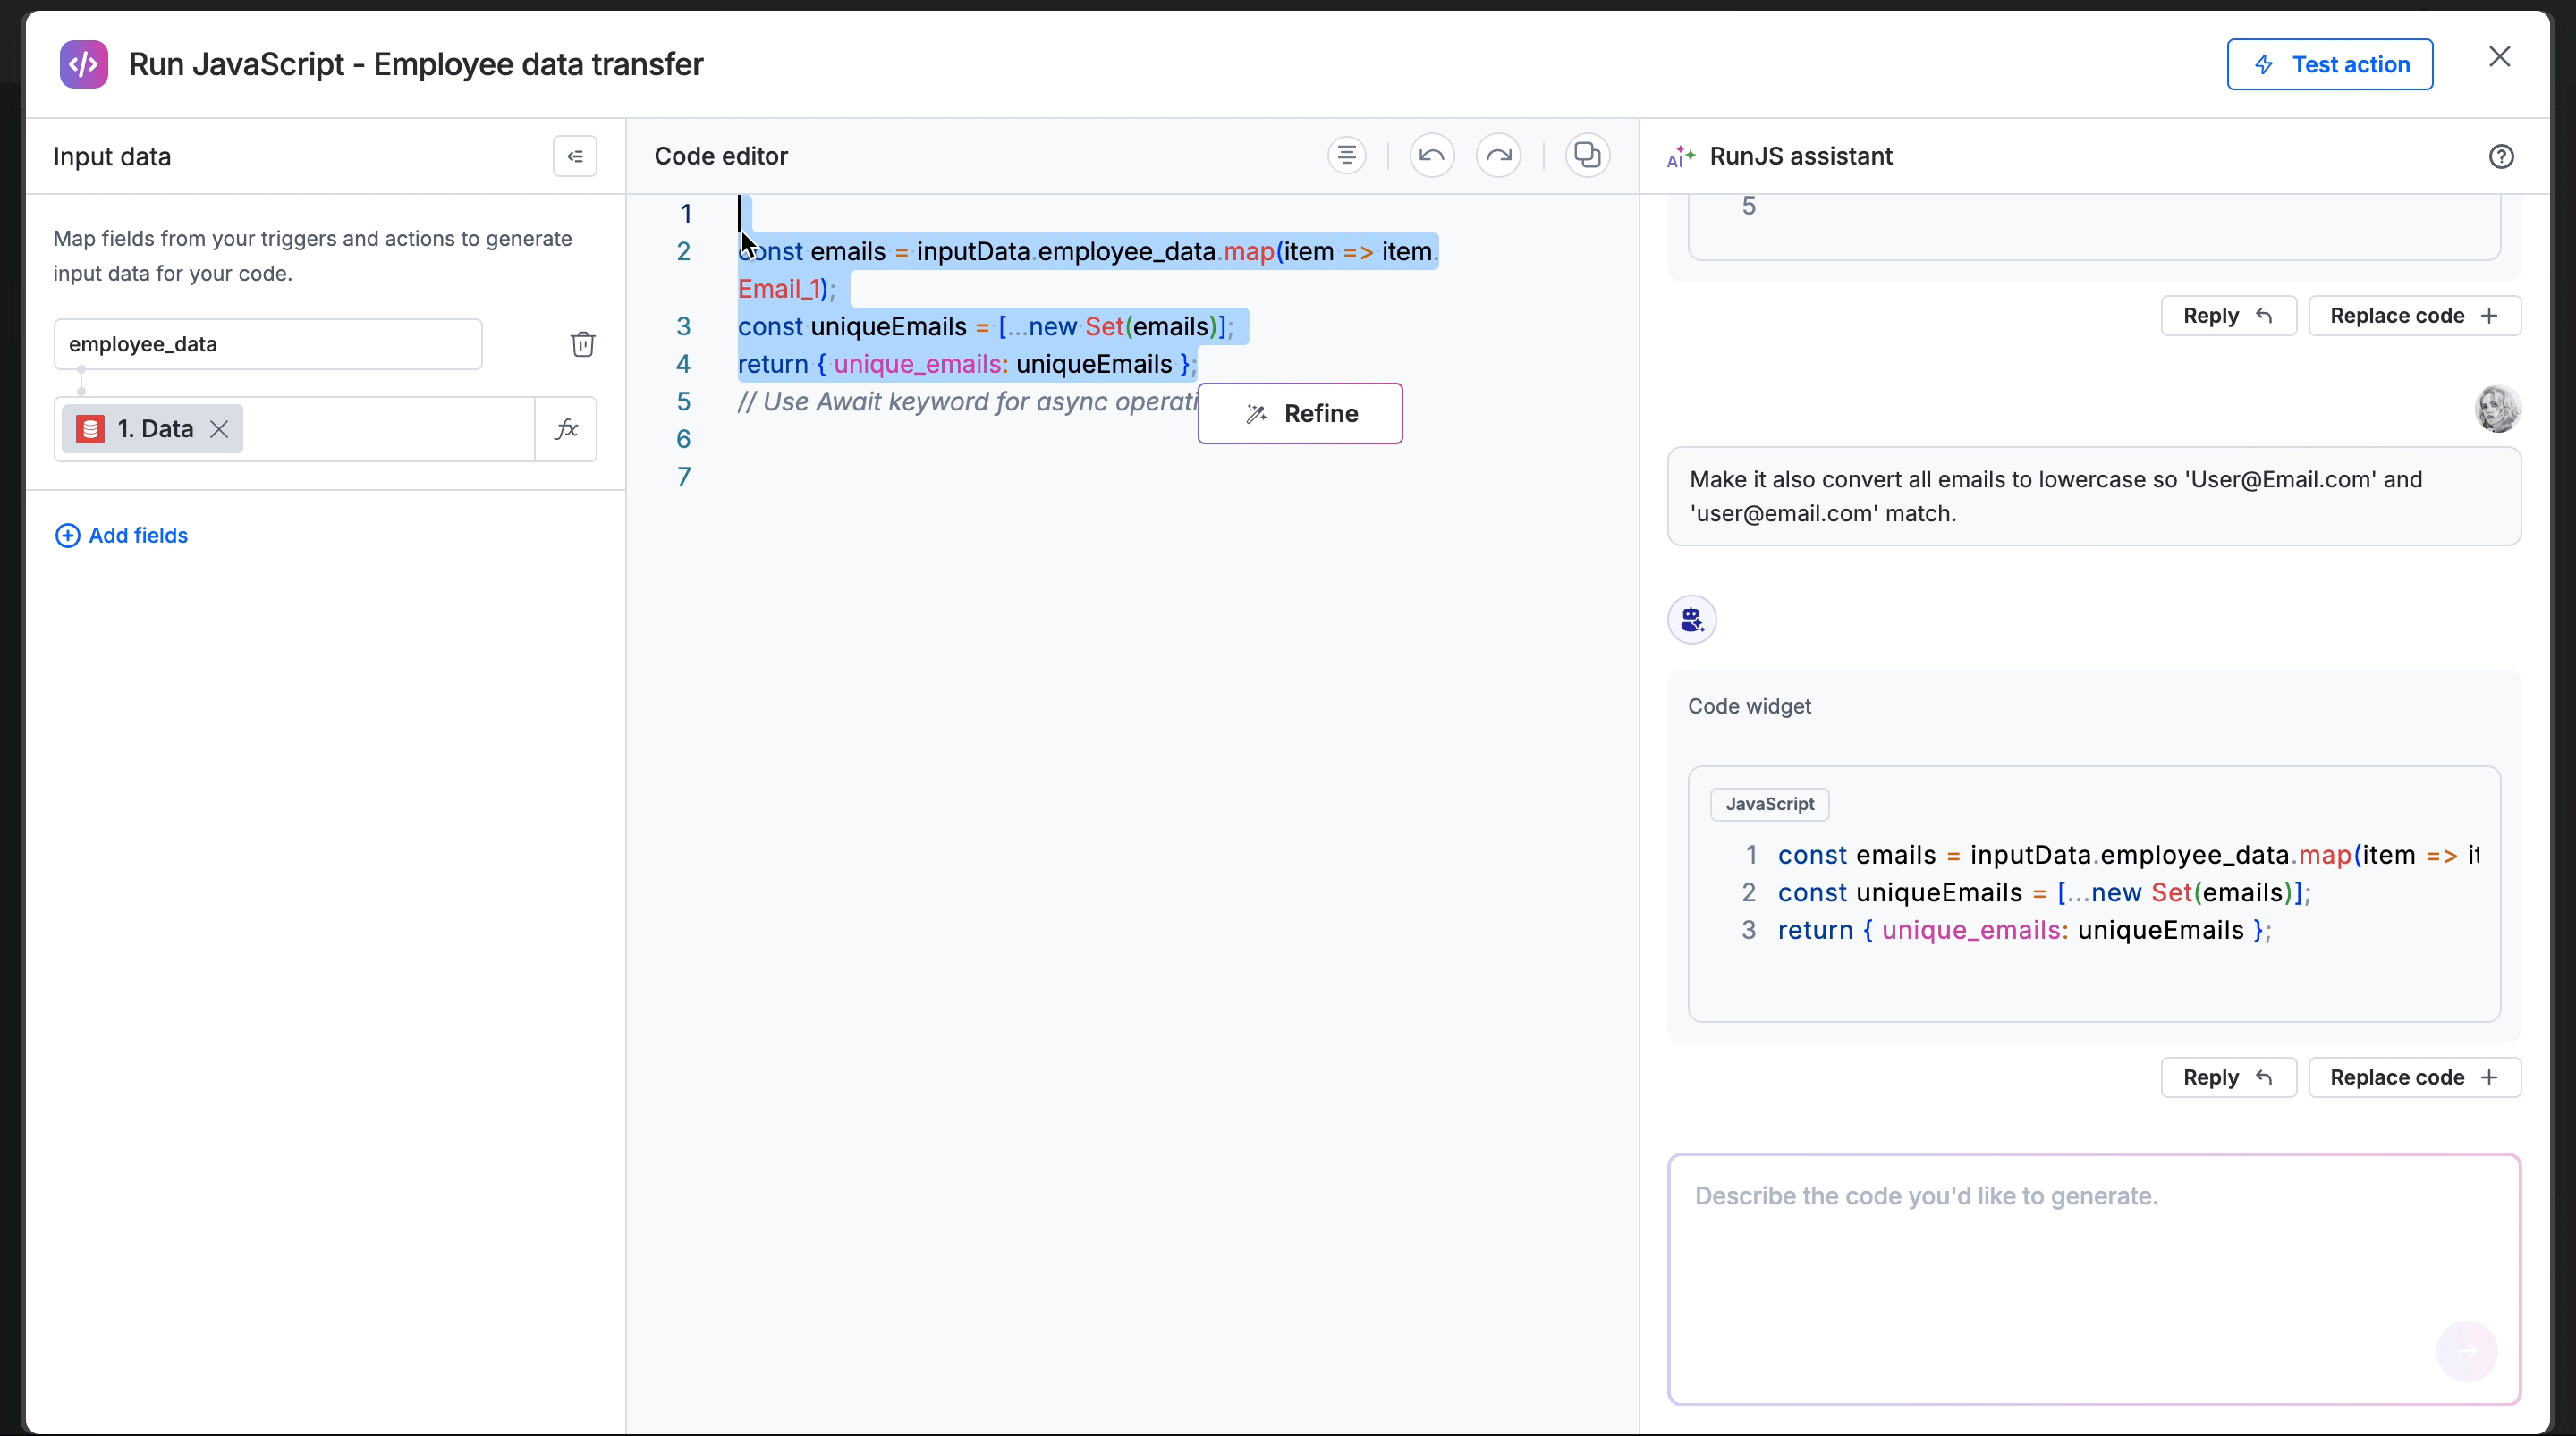
Iterative edits
If the generated code needs any changes, click Reply on the specific chat bubble to provide additional instructions.
Refining existing code
To edit existing code in the editor that needs optimization or changes:
Highlight the specific lines of code in the code editor.
Click the Refine button that appears.
The code will be pulled into the RunJS assistant chat. Type your prompt (For example, Refine this code so that it also converts all email addresses to lowercase before deduplicating, ensuring 'User@Email.com' and 'user@email.com' are treated as the same) to modify it.
Select the code to be replaced again and click Replace code below the code widget to update the editor with the new version.
Testing and saving
Before finalizing your integration, you can verify your logic within the editor. Click Test action at the top right to run the code against your sample data.
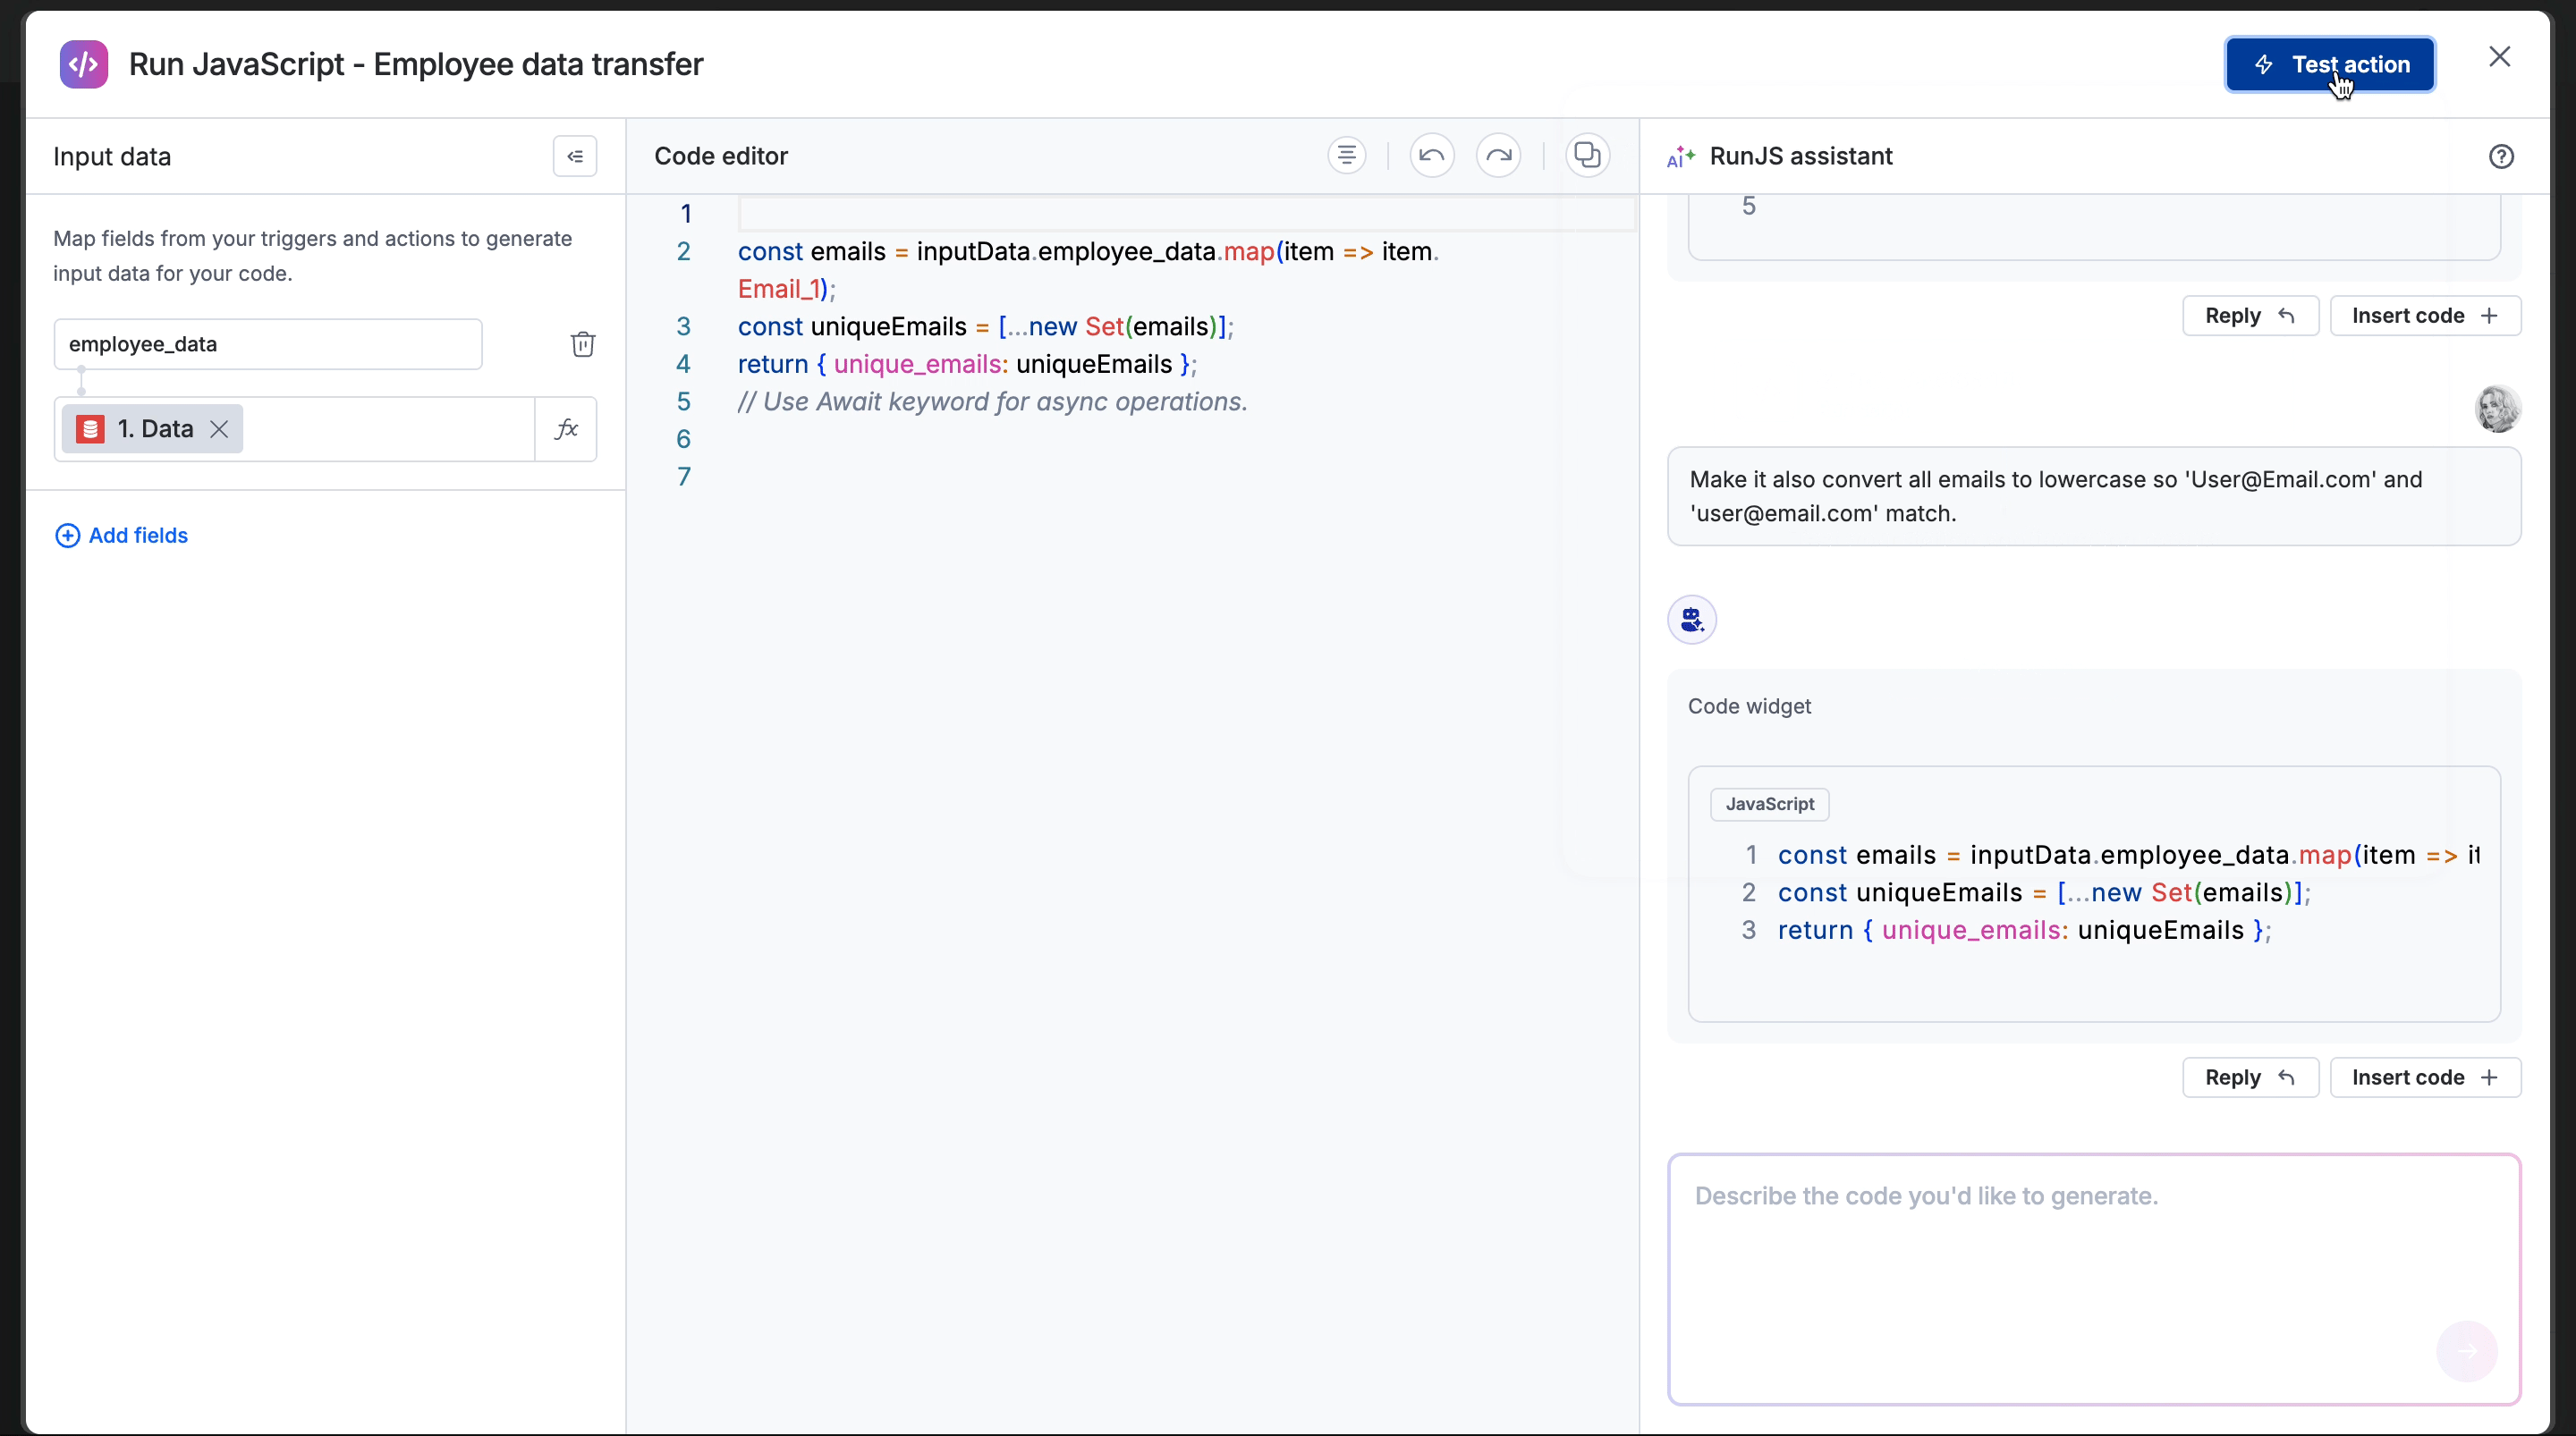
If test is successful, close the code editor and you'll be taken back to the integration configuration page. Choose when this step happens and click Next.
Finally, review the output and click Done.
Note:
- The Run JavaScript action executes as an isolated, third-party script. It cannot access Kissflow's built-in system variables, for example,
kf.account._id,kf.context, form fields, or user info.
Any data you need, such as an Account ID or field value, must be explicitly declared or passed into the script as an input. This isolation is by design for security and consistency.
- Similarly, App variables are not supported inside the Run JavaScript action.
Supported functions
The JavaScript Software Development Kit (SDK) for Kissflow Low-code includes all the supported functions and code snippets you can incorporate into your application while integrating with other services.
Using the connector
After configuring your connector, turn ON the toggle button in the upper-right corner of the editor to activate the integration. When the configured action is triggered, the output data from the code connector is sent as input to the integration's subsequent steps.