Scheduling reports in Analytics
Automate your data delivery by scheduling reports to be sent directly to your team’s inbox. Whether it’s a daily sales update or a monthly board presentation, scheduled reports ensure your stakeholders have the latest insights without manual effort.
Creating a schedule
Go to the Analytics page and click the Scheduled reports tab at the top.
Click the + Schedule report button.
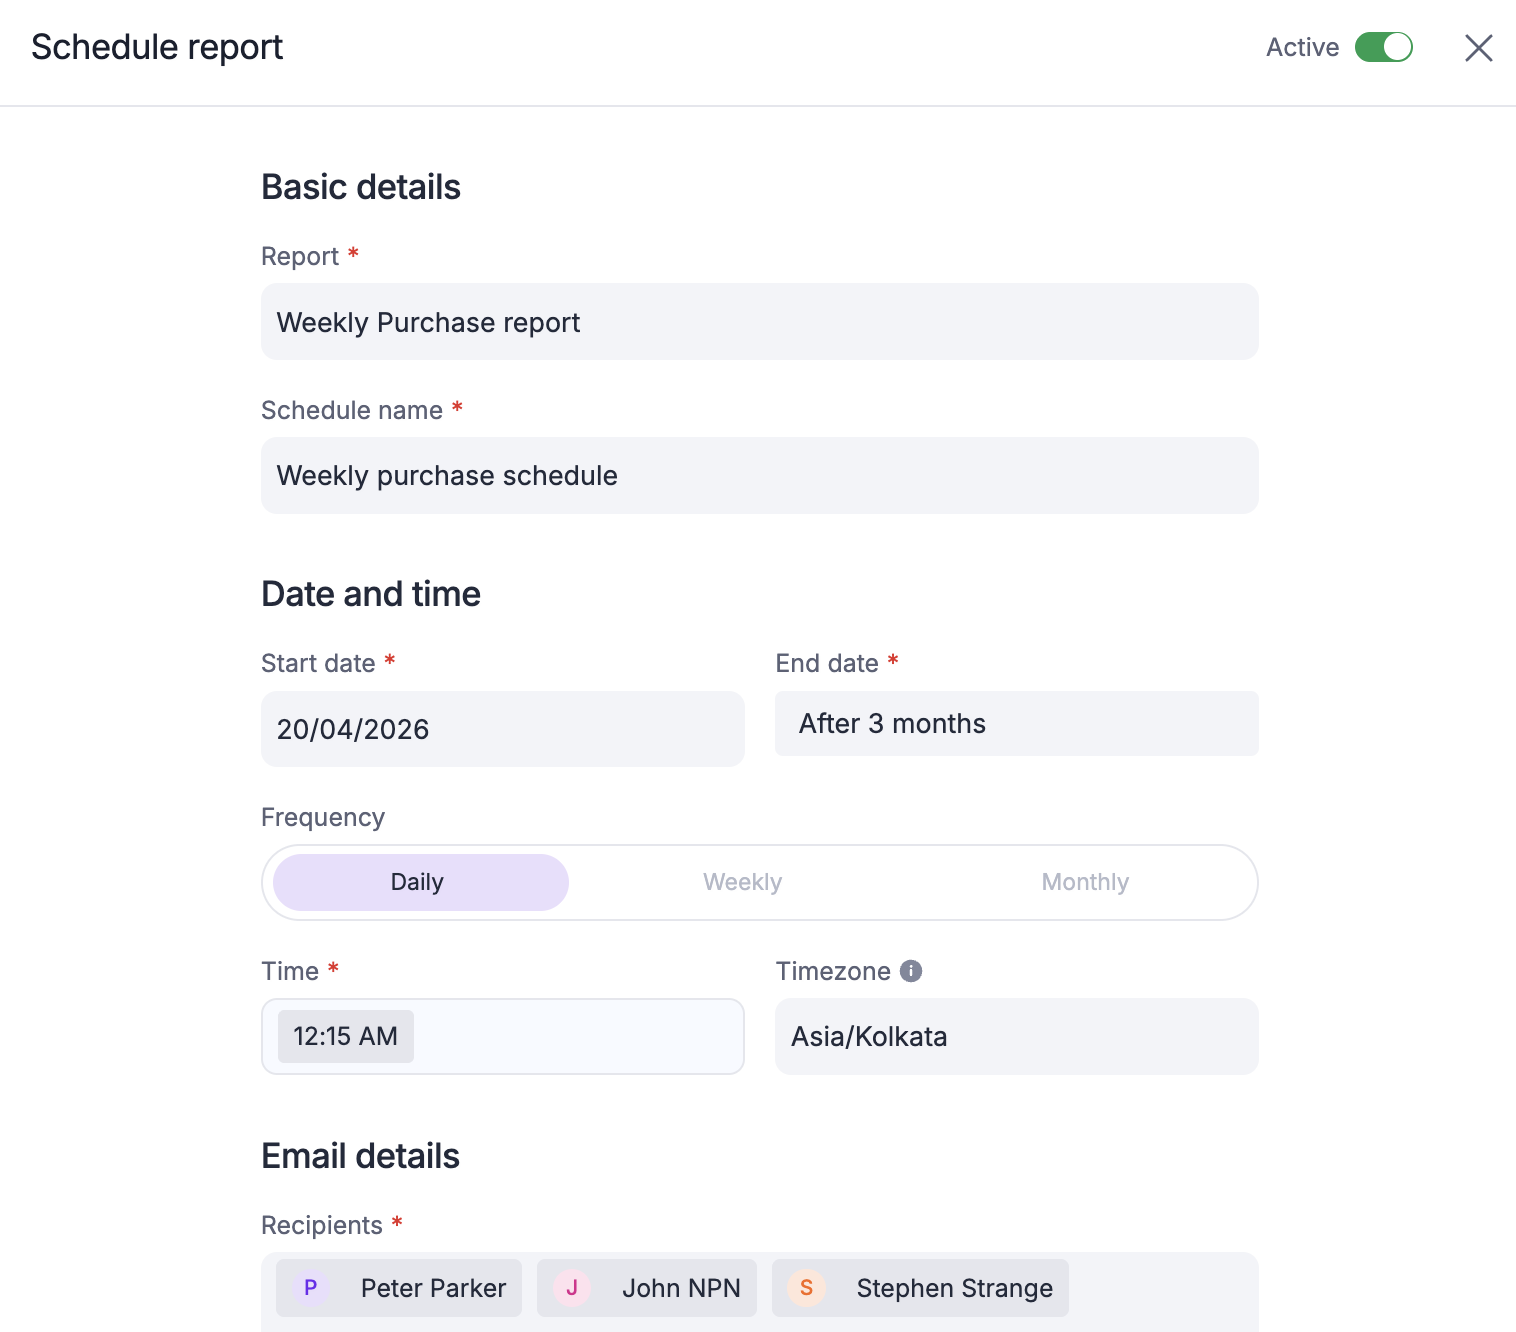
Under Basic details, select the report you want to send and give your schedule a title.
Set a Start date and an End date.
Configure the Frequency (Daily, Weekly, or Monthly), Time, and Timezone.
Note:
If you select Weekly or Monthly, you must specify the days or date for delivery.
The system defaults to the timezone in your personal settings. If that isn't set, it uses your account’s default timezone.
Recipients: Add up to 40 users.
Subject and Body: Enter a subject line and a message to provide context for your team.
Attachments: Select your preferred file format (CSV, XLSX, PDF, or PNG).
File size: Attachments must not exceed 10MB.
Visuals: In PDF and PNG formats, charts display the top 20 results to ensure readability.
Check Skip email if there is no data in the report to prevent sending blank reports when no new data is found.
Click Schedule to finalize.
Note:
Each report can only have one active schedule at a time.
Managing scheduled reports
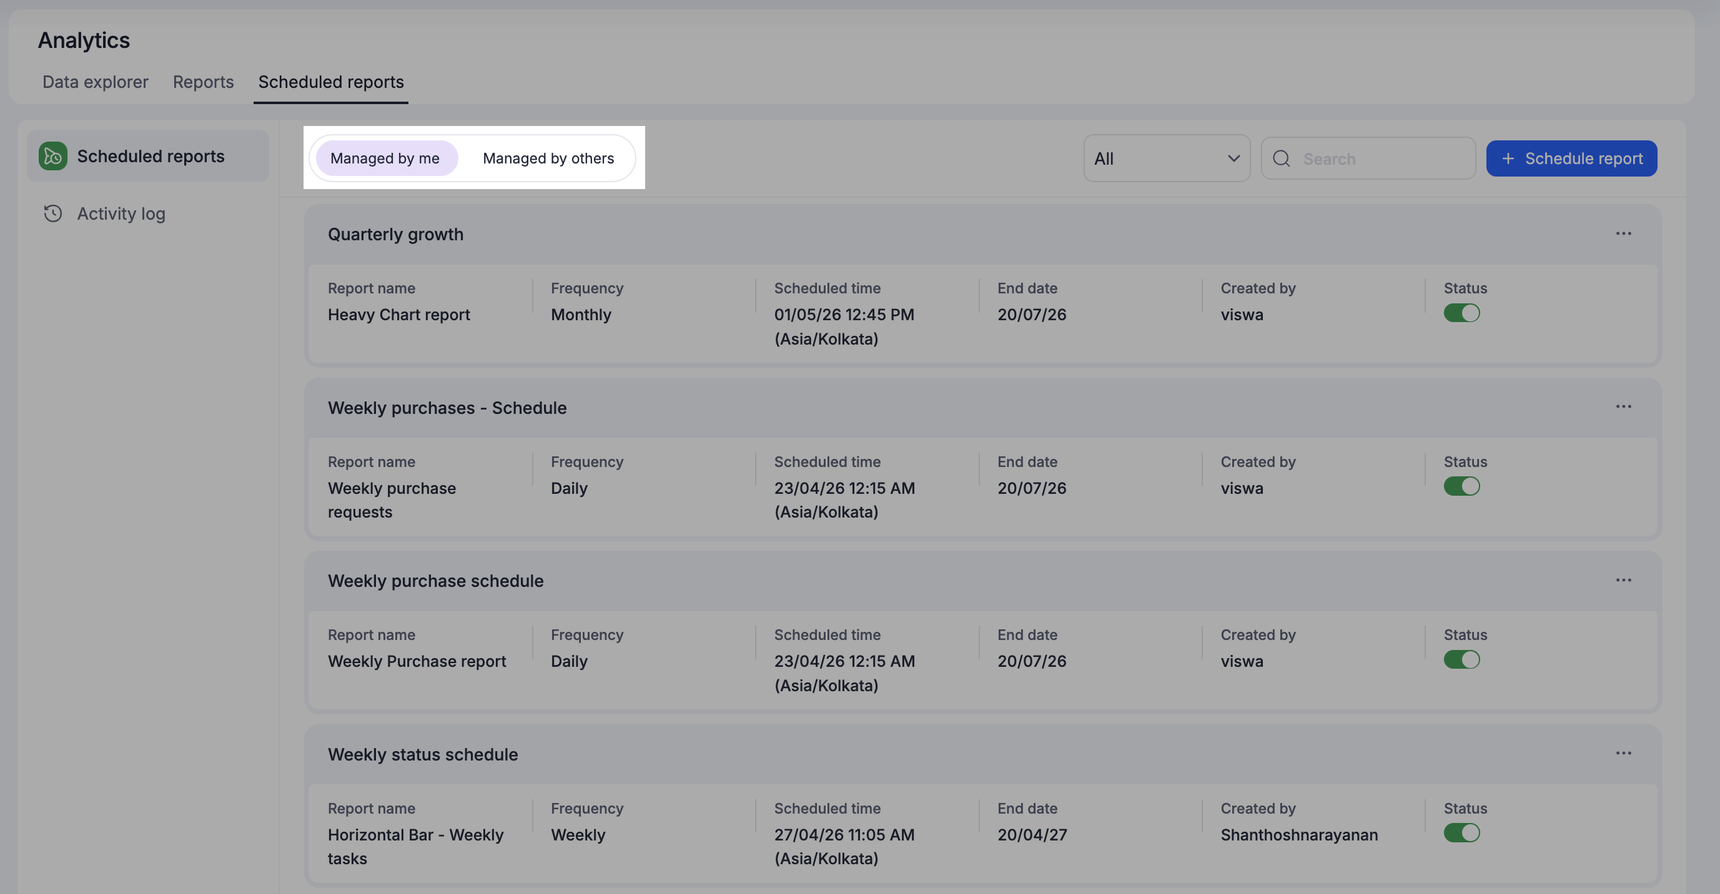
The dashboard is divided into two views:
Managed by me: Displays schedules for reports where you are an admin of the report.
Managed by others: Allows Super admins to oversee all schedules.
Editing a schedule
To make changes, click on a schedule and click Edit at the bottom right.
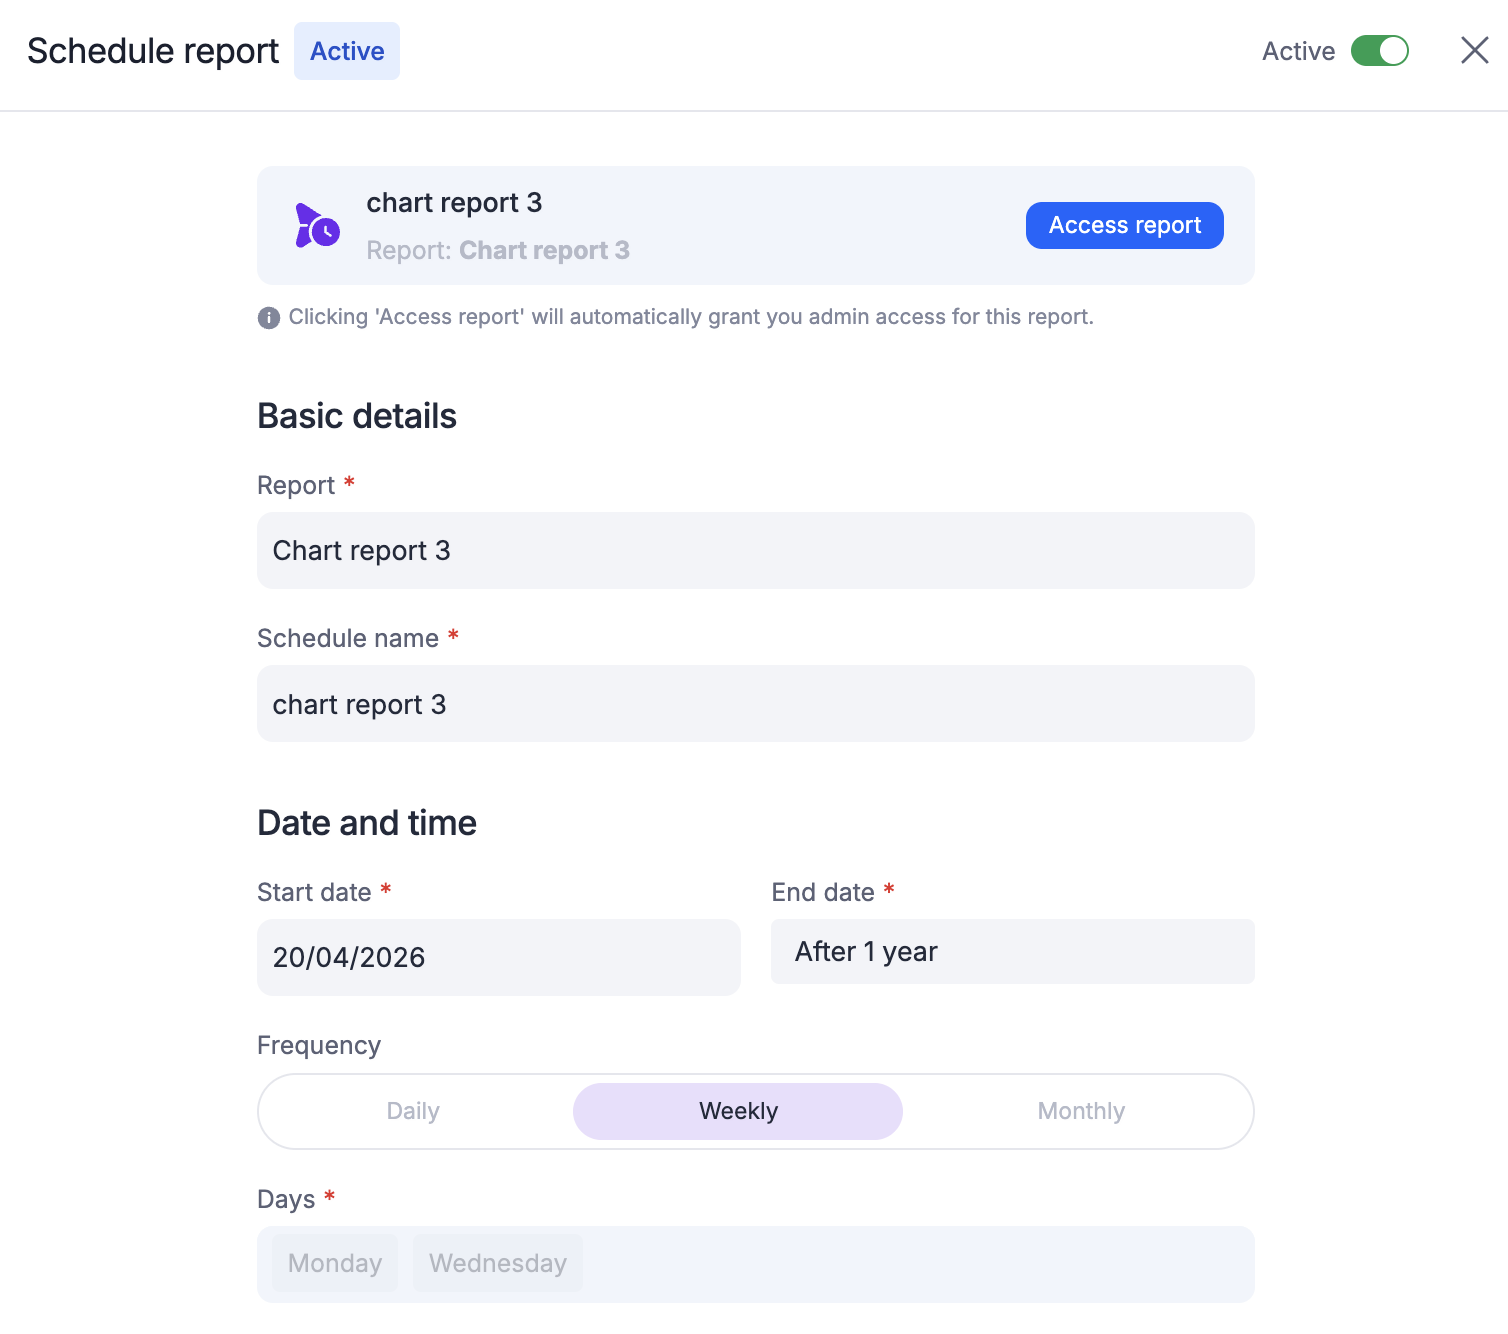
Super Admin access: If you are a Super Admin, clicking Access report will automatically grant you admin access to that report so you can modify the schedule.
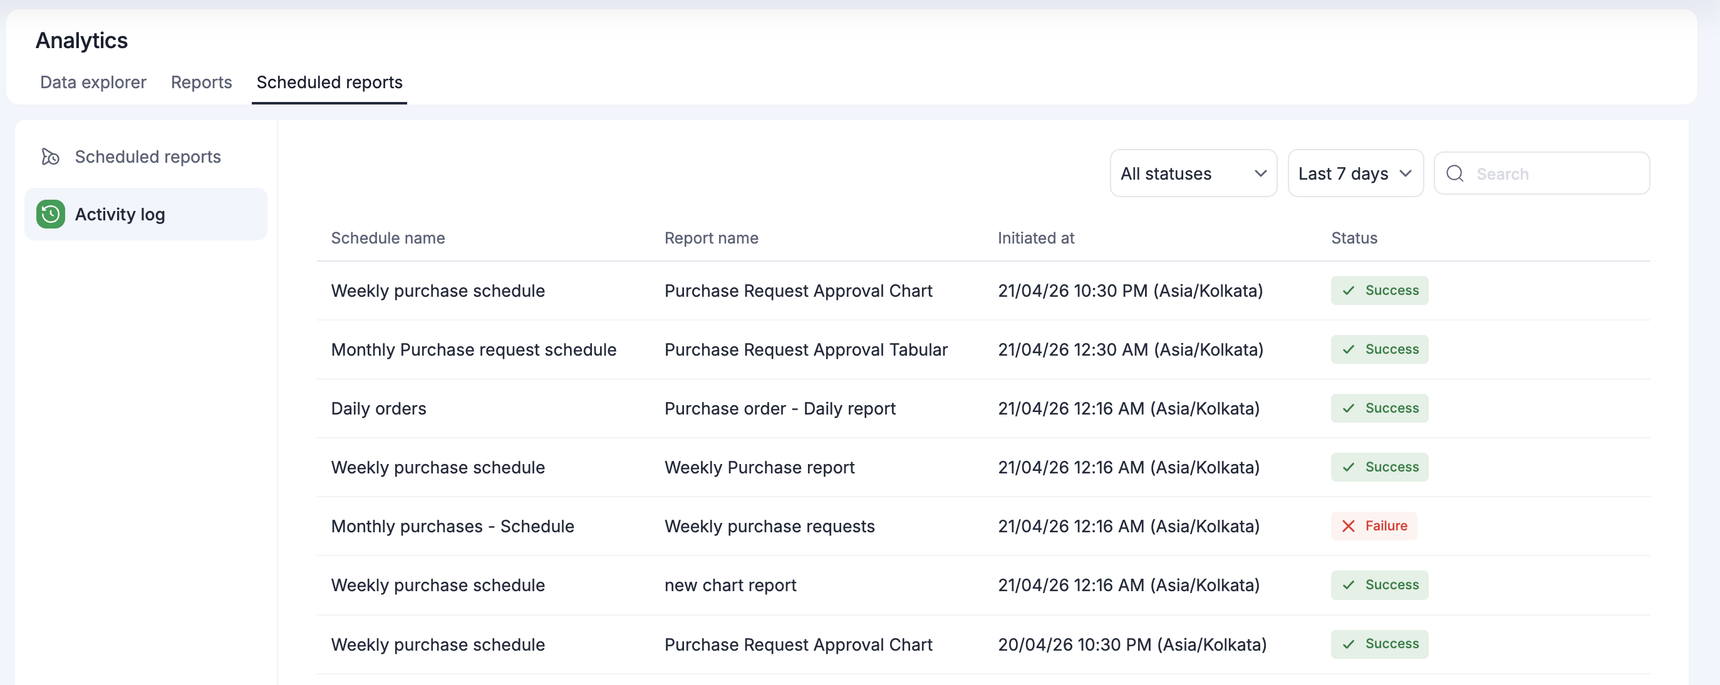
Tracking schedule activity
The Activity log tab provides a historical record of your deliveries. You can track exactly when a report was sent and its delivery status to ensure your team is getting the data they need.