
Admin notification settings
Admin notification settings
The Notification settings section allows Super Admins to customize account notification preferences according to their communication needs.

Global notifications
Click your profile picture > Account administration > Notification settings. Super Admins can choose to turn on or off the email, web app and push notifications from the account for all its users.
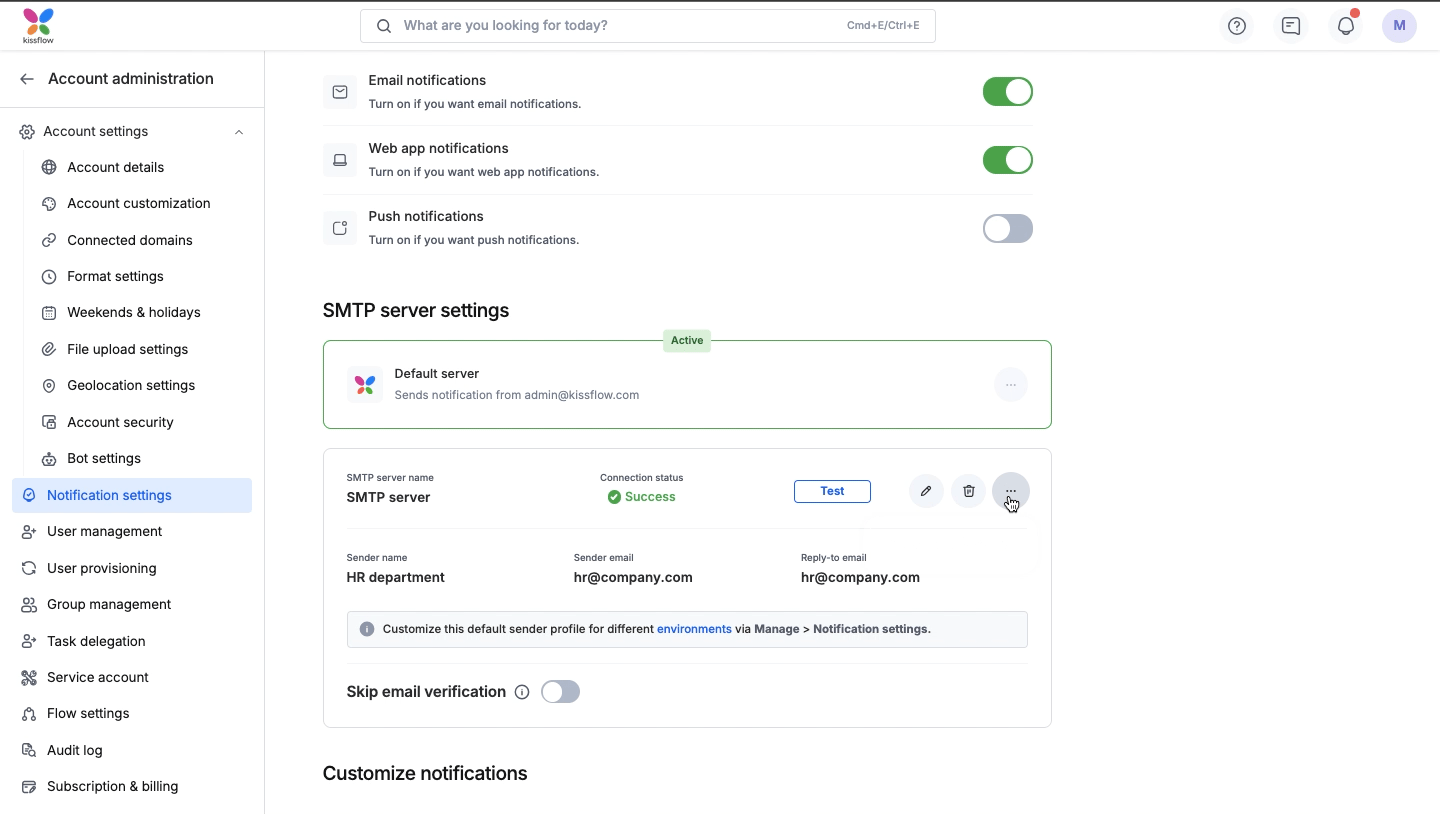
Email notifications: Toggle this switch ON to receive notifications via email.
Web app notifications: Toggle this switch ON to receive notifications within the web application.
Push notifications: Toggle this switch ON to receive push notifications.
Note:
To ensure you receive critical updates and important information, the below essential system notifications are prioritized and will be sent to you regardless of your channel settings.
Notifications
Trigger
User activated
When a user’s account is activated.
User deactivated
When a user’s account is deactivated.
Resend email verification
When the verification email is resent.
Email address updated
When a user’s email address is updated.
User created
When a new user is created.
Reset password
When a user’s password is reset.
2FA status changed
When a user’s two-factor authentication status is changed.
Two factor verification
When two factor authentication is enabled with email code.
Domain verification
When a verification email is sent to connect a domain.
Waiting for admin approval
When a user creates a process/board/dataset
Export
When any export related to a user, board, dataform, dataset, or report is carried out.
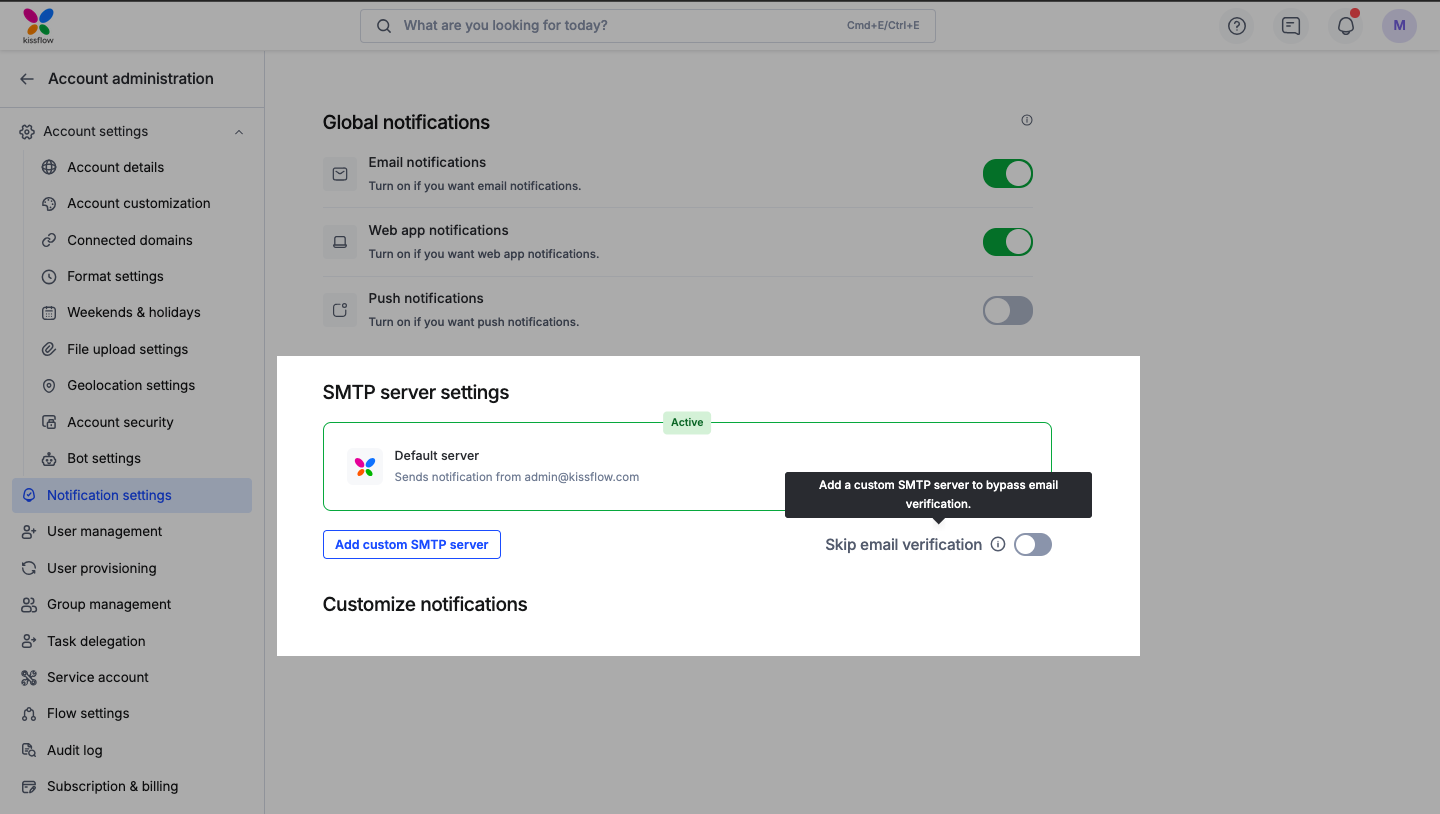
SMTP server settings
Super Admins can configure a custom SMTP server to route notification emails. By default, Kissflow uses its own server to send notification emails. However, configuring a custom SMTP server is required if you wish to route emails through your own infrastructure or if you need to skip email verification.
Navigate to your profile icon at the top right corner of the screen and click Account administration > Notification settings > SMTP server settings to manage these preferences.
Adding a custom SMTP Server
You can switch from the default Kissflow server to a custom server to gain greater control over email deliverability.
Click Add custom SMTP server.
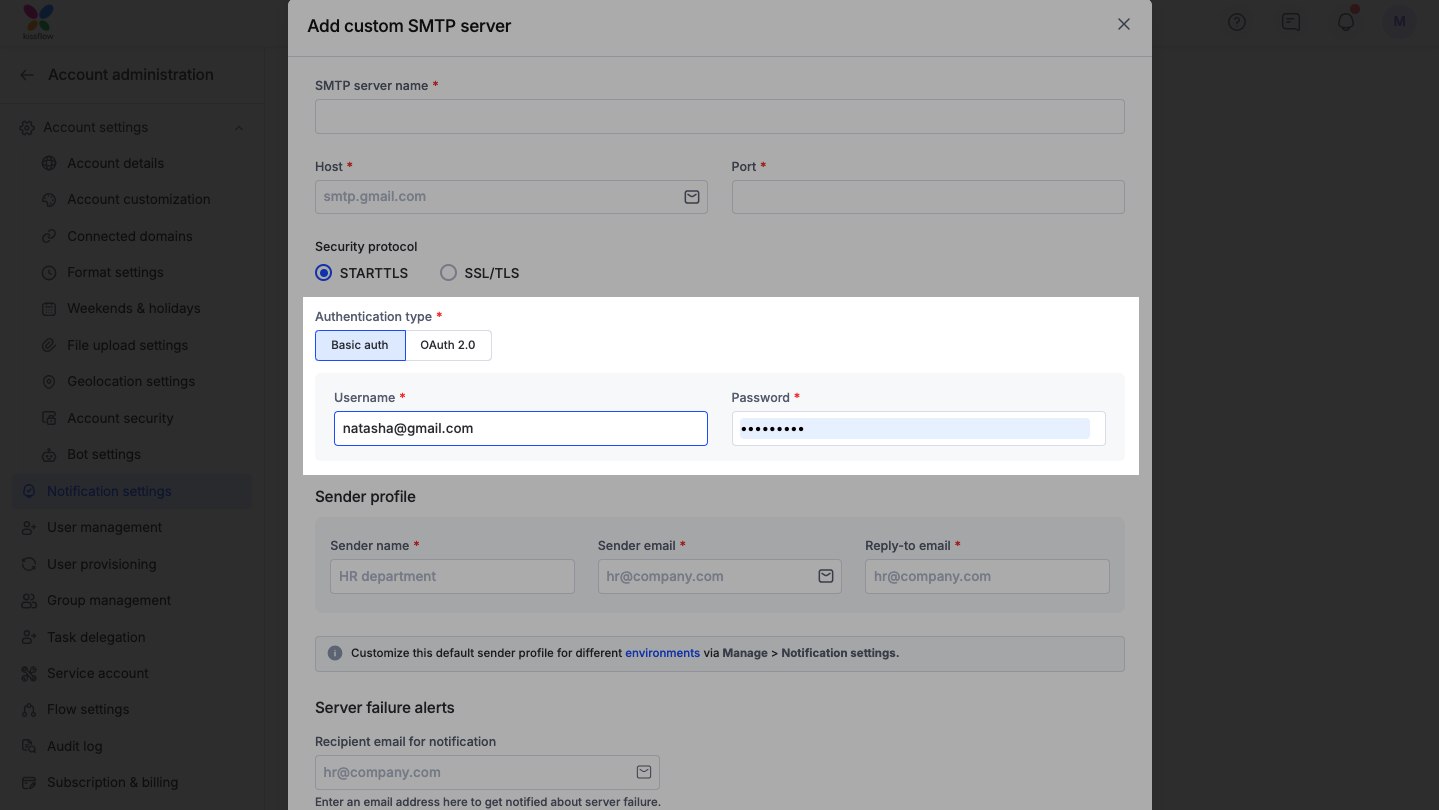
In the popup window, fill in the server details:
SMTP server name: Enter a name to identify this server configuration.
Host: Enter your SMTP server host address.
Port: Enter the port number.
Security protocol: Select either STARTTLS or SSL/TLS.
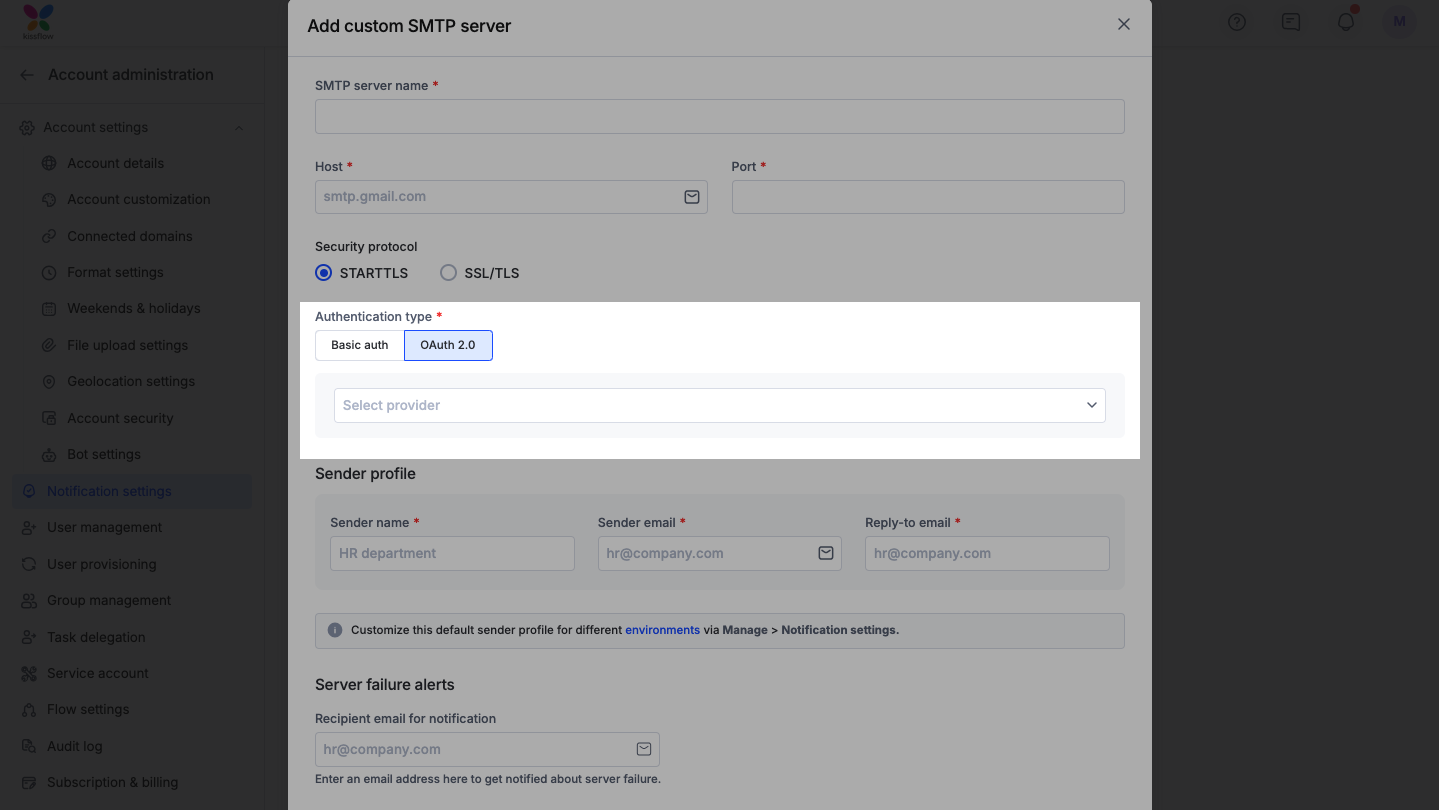
Authentication type: Choose the method that matches your email server's requirements:
Basic auth: Select this to authenticate using traditional credentials. Enter the Username and Password of your SMTP server.
OAuth 2.0: Choose your email provider (Google or Microsoft) from the dropdown menu. Note that you will be prompted to sign in and authorize Kissflow to access your email account to complete the setup.
Sender profile: Configure the Sender name, Sender email, and Reply-to email.
Default behavior: The sender profile configured here is applied as the default for all your app environments (Development, Test, and Production).
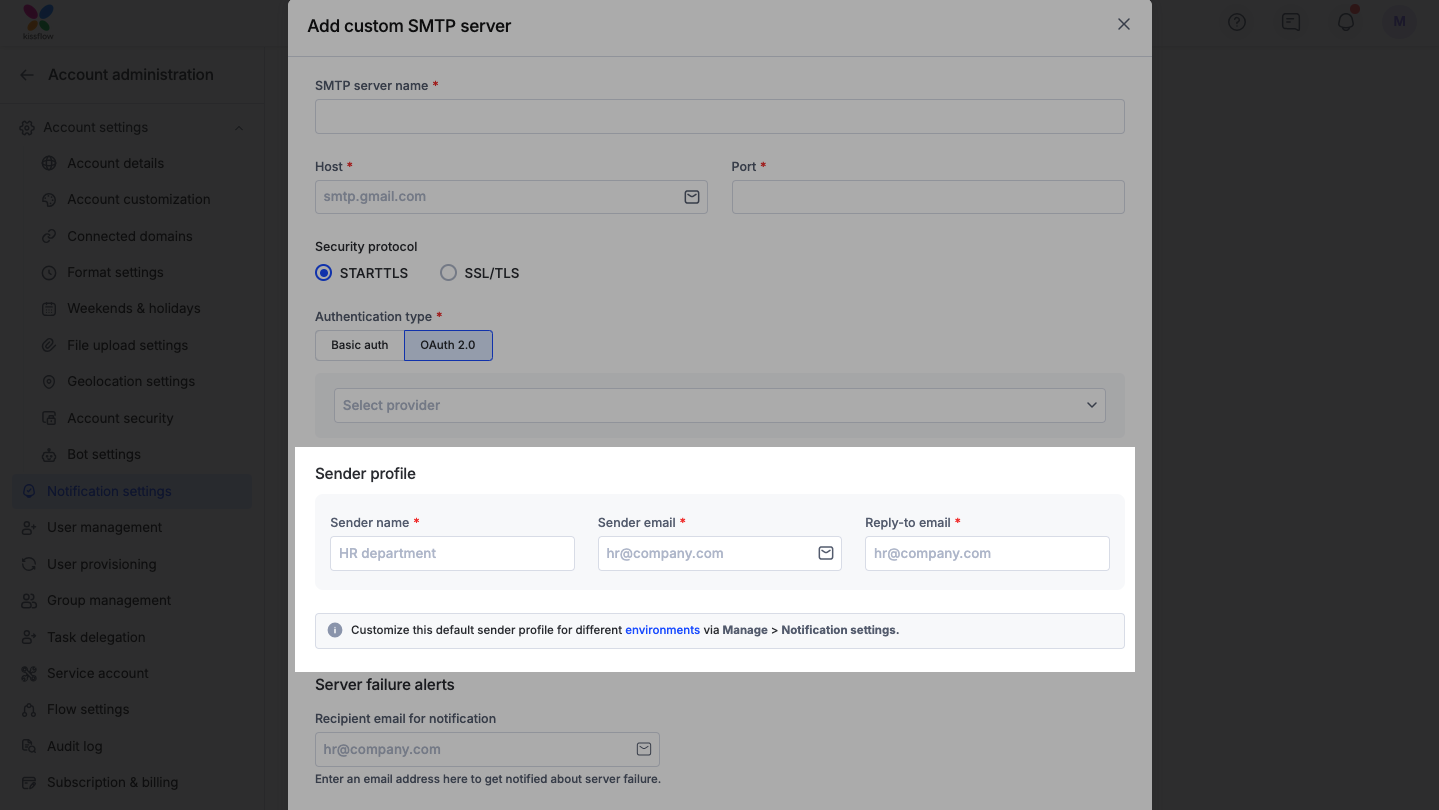
Customizing for environments: You can override the default profile for specific environments.
Click the environments hyperlink in the banner to view your list of environments.
Click Manage on the specific environment you wish to customize (for example, Development).
Navigate to Notification settings.
Under SMTP server settings, you will see the option to configure the profile.
Click Create profile (visible if your server is successfully configured), enter the specific sender details for that environment, and save.

Server failure alerts: Enter a recipient email address to receive notifications if the custom SMTP server fails to send emails.
Click Save and test. If the connection is successful, the server will be saved.
- You can switch between the Default server and your Custom SMTP server at any time from this page by clicking the More options icon (
) and selecting Switch to this server
Skipping email verification
The Skip email verification option allows users to receive notification emails immediately without being forced to verify their email address first.
Requirement: This feature is only supported when using a custom SMTP server. You cannot enable this while using the default Kissflow server.
How to enable: Toggle the Skip email verification switch ON on your custom SMTP server card.
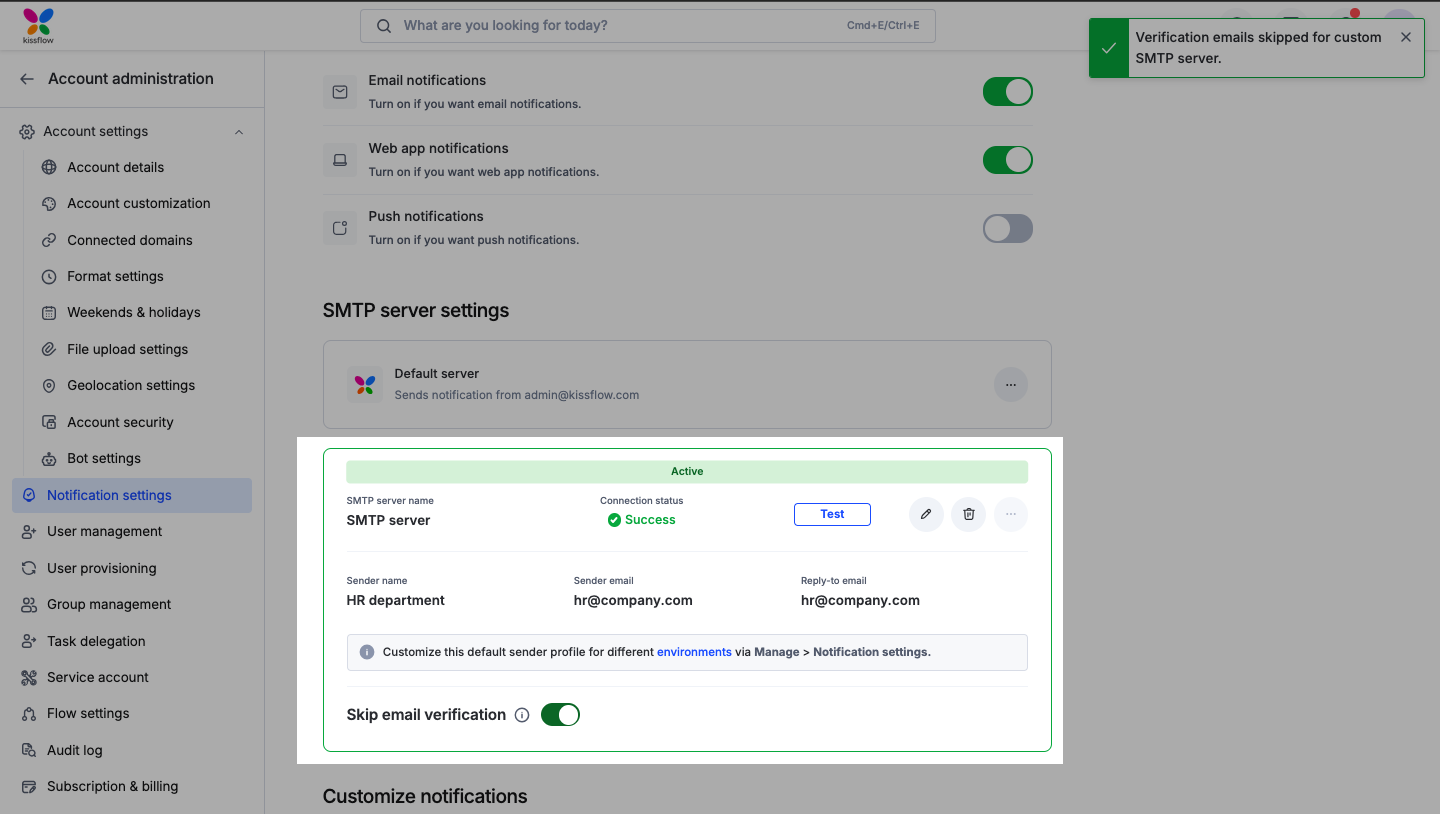
If you have not yet configured a custom server, switching this toggle when you navigate to the SMTP server settings, will automatically prompt you to add a custom SMTP server configuration.
Editing an active custom SMTP server
You cannot make changes to a custom SMTP server while it is currently processing live emails. To edit the configuration of an active server:
Click the Edit icon (

) on the active custom SMTP server card.
A confirmation popup will appear alerting you that the server must be disabled before editing.
Click Disable and edit to proceed.
Make the necessary changes to your server details or sender profile.
Click Save and test.
Once the test is successful and the changes are saved, switch to the custom SMTP server.
Edit or view the footer of emails sent from your account to include important contact information or legal disclaimers.
Note:
Your account will temporarily switch to the Default server to ensure email delivery continues while you make changes.
Deleting an active custom SMTP server
To permanently remove a custom SMTP server configuration that is currently in use:
Click the Delete icon (

) on the active custom SMTP server card.
A popup will appear stating that the server must be disabled before it can be deleted.
Click Disable and delete to confirm.
The custom server configuration will be removed, and the Default server will remain active.
Note:
Your account will automatically revert to the Default server upon deletion.
Editing an inactive custom SMTP server
If a custom server is not currently in use (inactive), you can update its configuration directly.
Click the Edit icon (
) on the inactive custom SMTP server card.
Update the server details, authentication credentials, or sender profile as needed in the popup window.
Click Save and test to verify the new settings and update the configuration.
Deleting an inactive custom SMTP server
To remove an inactive custom server configuration:
Click the Delete icon (
) on the inactive custom SMTP server card.
A confirmation popup will appear warning that the configuration will be permanently removed. Click Delete to confirm.
Customizing account notifications
In the Customize notifications section, Super Admins can manage the settings related to email notifications and customize the content of email sent from the account to all users.
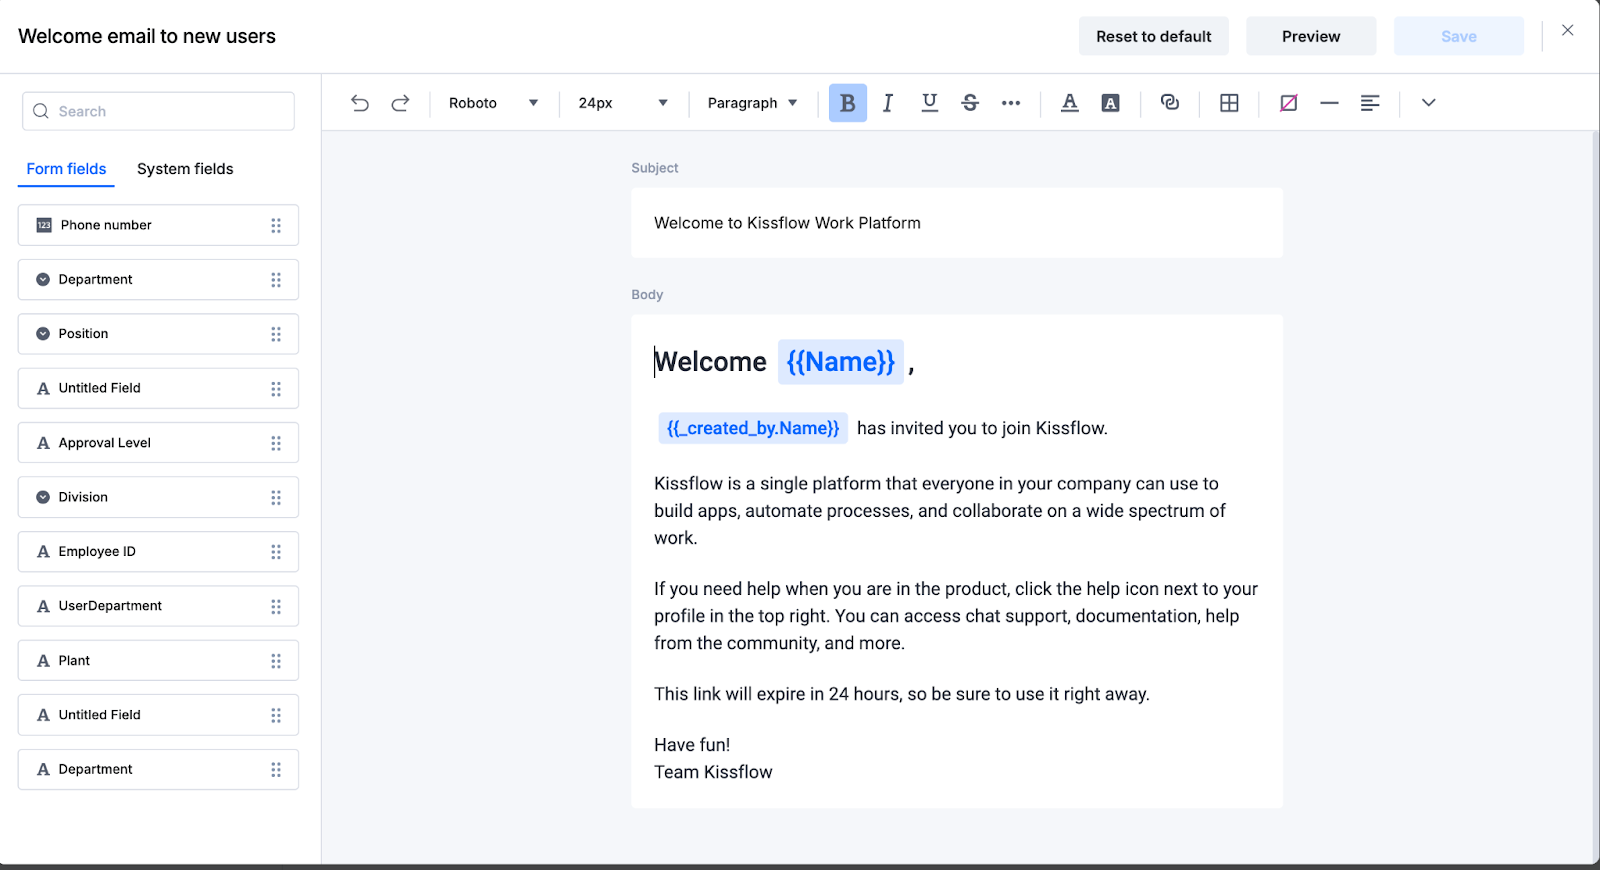
Under the General tab, click Edit to customize the content and formatting of welcome emails sent from the account to new users.
Editing emails
Kissflow provides users with the flexibility to customize the welcome email and the resend verification email that is sent to new users. You can personalize the content using an in-built editor that allows you to add, remove, or modify text as per your preference. Use the provided custom fields and default system-generated fields to dynamically insert user-specific information like name, email, phone number, etc. Experiment with different text styles, colors, and formatting options.
Note:
Signature fields are not supported in email notifications (Default and customized emails).
Once you have made the desired changes, click Preview to ensure everything looks correct and click Save to update the welcome email template.
Regularly review and update the welcome email template to reflect any changes or updates to your organization's processes. Click Reset to default to the initial default welcome email content.
Header and footer
Manage the appearance of email headers and footers to maintain brand consistency and professionalism in your communications.
Header
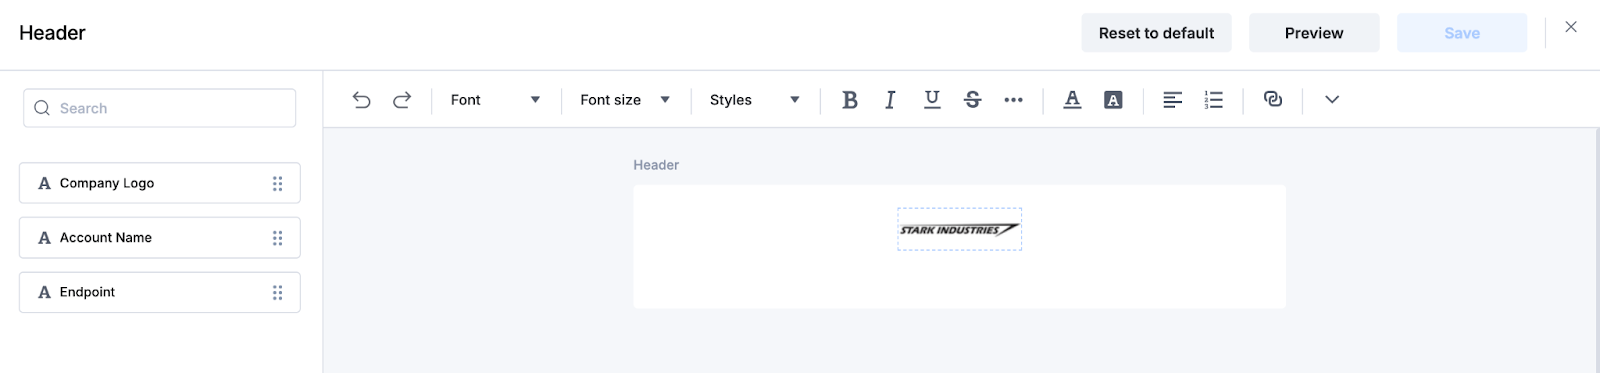
Edit or view the header of emails sent from your account to ensure a cohesive branding experience for recipients.
Footer
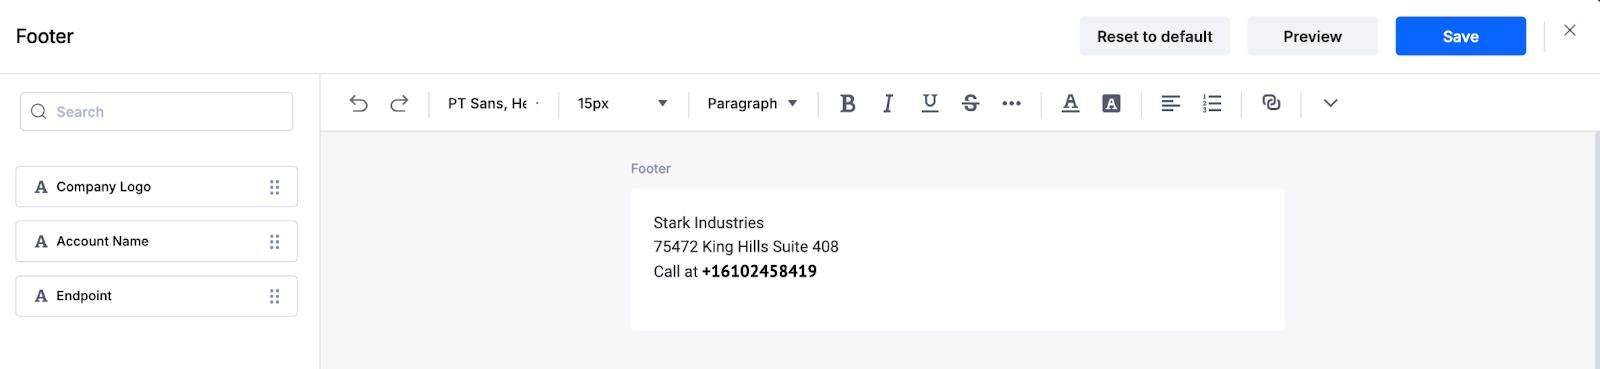
Edit or view the footer of emails sent from your account to include important contact information or legal disclaimers.