
Workflow automations
Workflow automations act on items assigned to you in standalone processes and processes inside apps. As an end user, you set rules once, and when a new item reaches a step where you are an assignee, the automation checks the item against your rules and either takes the action for you or suggests it so you can act in one click.
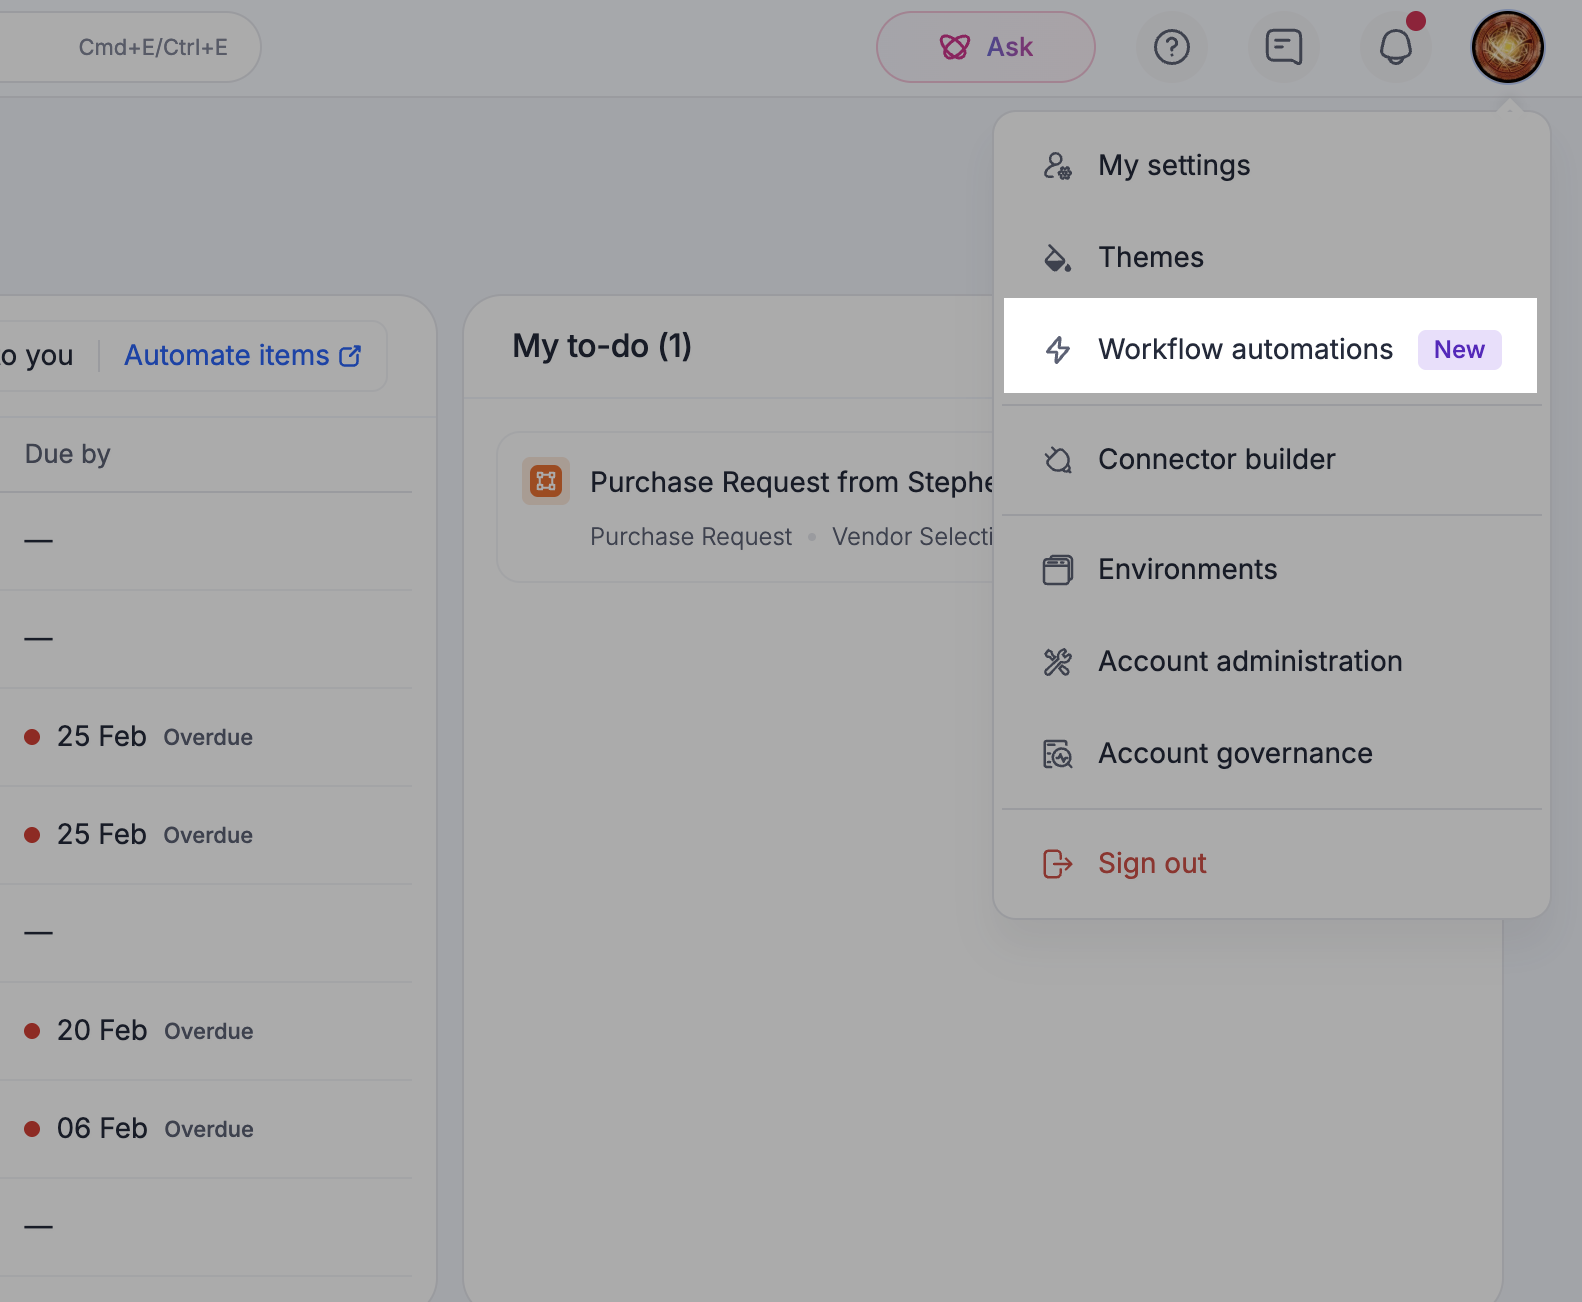
To get started, click your profile picture at the top right > Workflow automations.
How automations work
Every automation is tied to one workflow and one step where you are an assignee. The workflow can be a standalone process or a process inside an app where automations work the same way. An automation can have up to 10 rules, and each rule pairs a set of conditions with an action:
- Approve the item.
- Reject the item with a rejection note.
- Send back the item to the initiator or the previous step assignee, with a note.
Each action runs in one of two ways:
| Execution | What happens |
| Automatically | The action is performed without asking for confirmation. |
| As a suggestion | The action is displayed as a suggestion on the item, and you take it yourself. |
Rules are run from top to bottom, and the first matching rule is applied. If no rule matches, the item waits for your manual action as usual.
Note:
An automation only applies to new items assigned to you after it is enabled. Items already in your queue are not affected.
Creating an automation
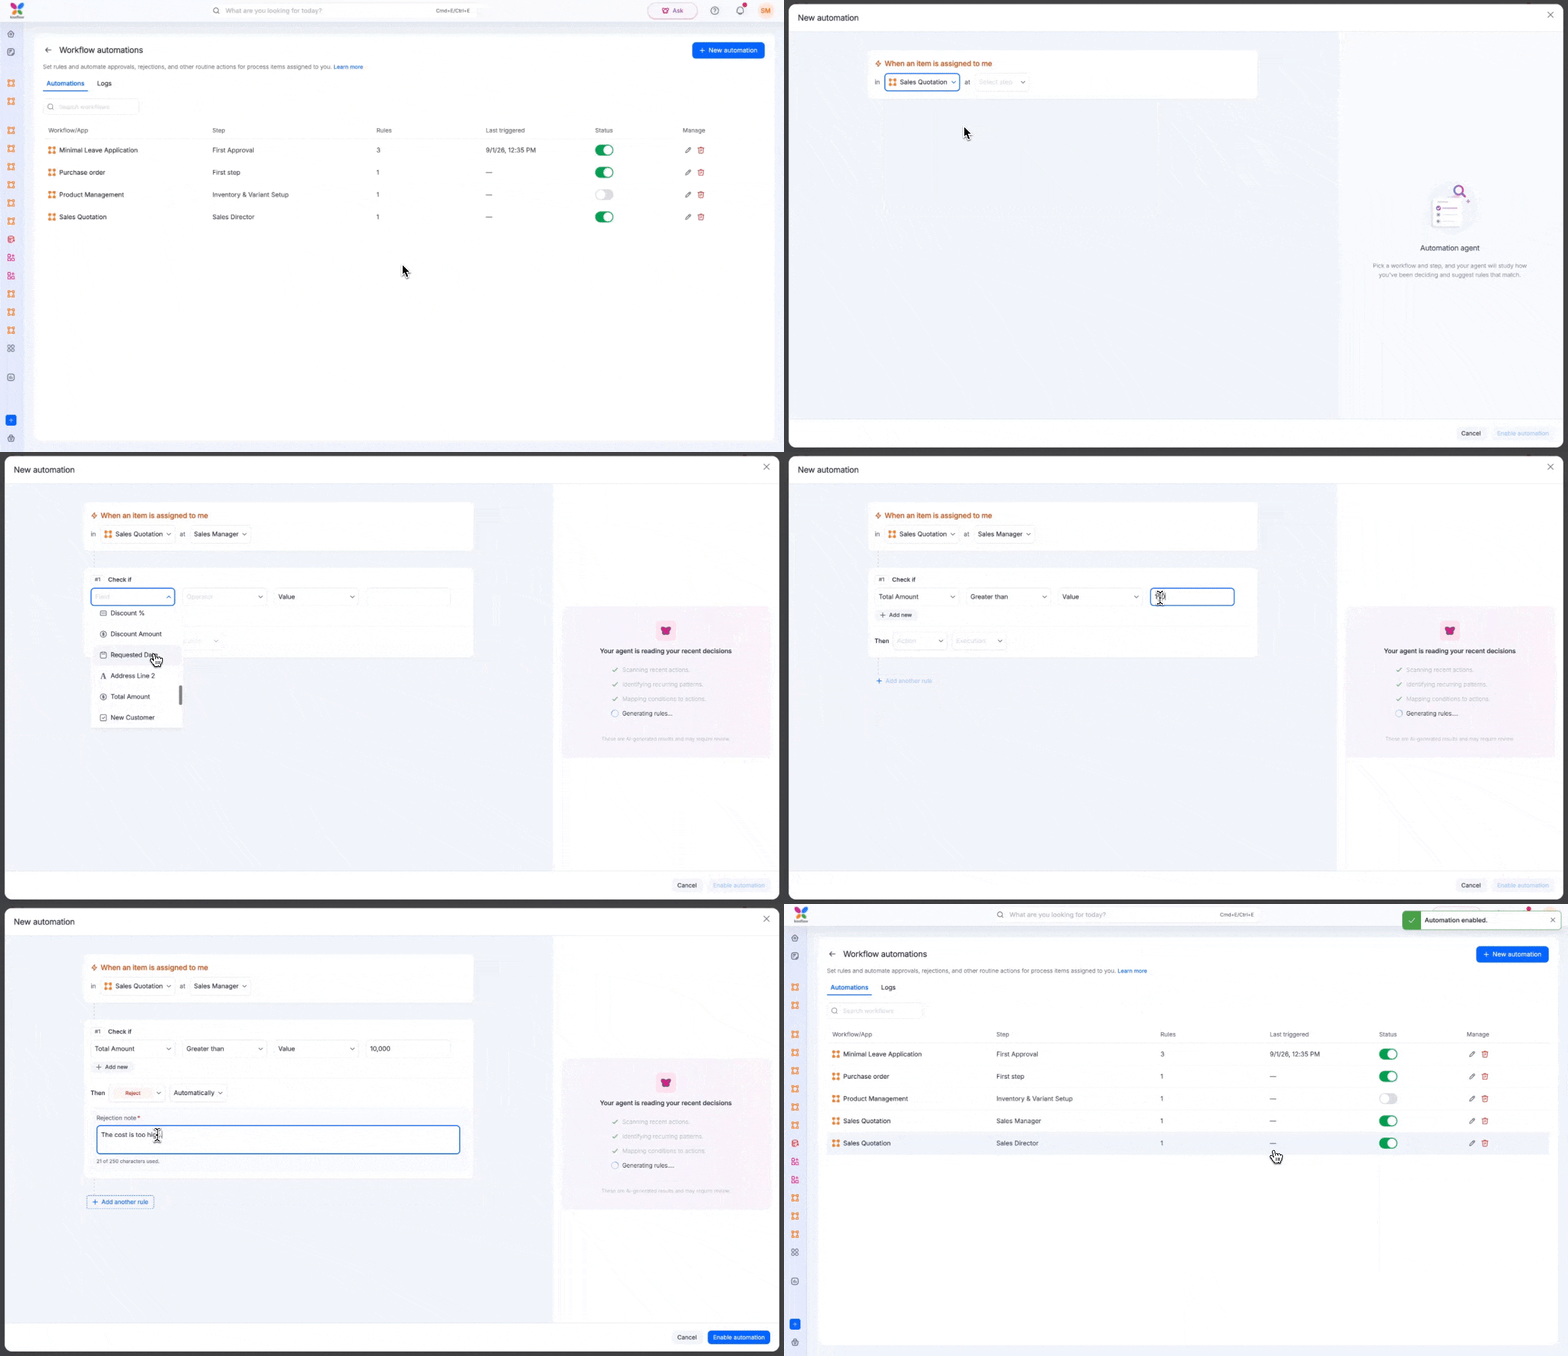
- Click your profile picture on the top navigation bar > Workflow automations.
- Click New automation.
- Select a workflow and a step where you are an assignee. For an app, select the app, its process, and the step. Steps that already have an automation are marked as already automated.
- Set up one or more rules with the conditions and actions of your choice.
- Click Enable automation.
Note:
Changing the workflow or step after you configure rules clears the configured rules and the suggestions panel.
Setting up rules
Each rule reads as a sentence: check if the conditions are true, then take the action.
- Under Check if, select a field, an operator, and a value. For example, Amount is less than 2000.
- Click Add new to add another condition. Click the connector chip between conditions to switch between and and or.
- Click Add new group to evaluate a separate set of conditions within the same rule. A rule can have up to 10 groups with up to 10 conditions each.
- Under Then, select the action and how it runs — Automatically or As a suggestion.
- Click Add another rule to handle a different scenario. You can add up to 10 rules, and only the first matching rule is applied. Use the Move up button (
 ) and Move down button (
  ) to reorder rules.
Note:
A rejection requires a rejection note, and a send back requires a recipient and a send back note. Notes can be up to 250 characters and are recorded on the item like a manual action.
Getting suggestions from your agent
Your agent studies your recent decisions at the selected step and suggests rules based on recurring patterns.
- When you create a new automation, the analysis starts as soon as you select a workflow and step.
- When you edit an existing automation, click Analyze this step in the panel on the right.
Each suggestion shows the conditions it found and how often you took that action on similar items. Click Add to turn a suggestion into a rule, then edit it like any other rule.
Note:
Suggestions are AI-generated results and may require review before you enable them.
Managing automations
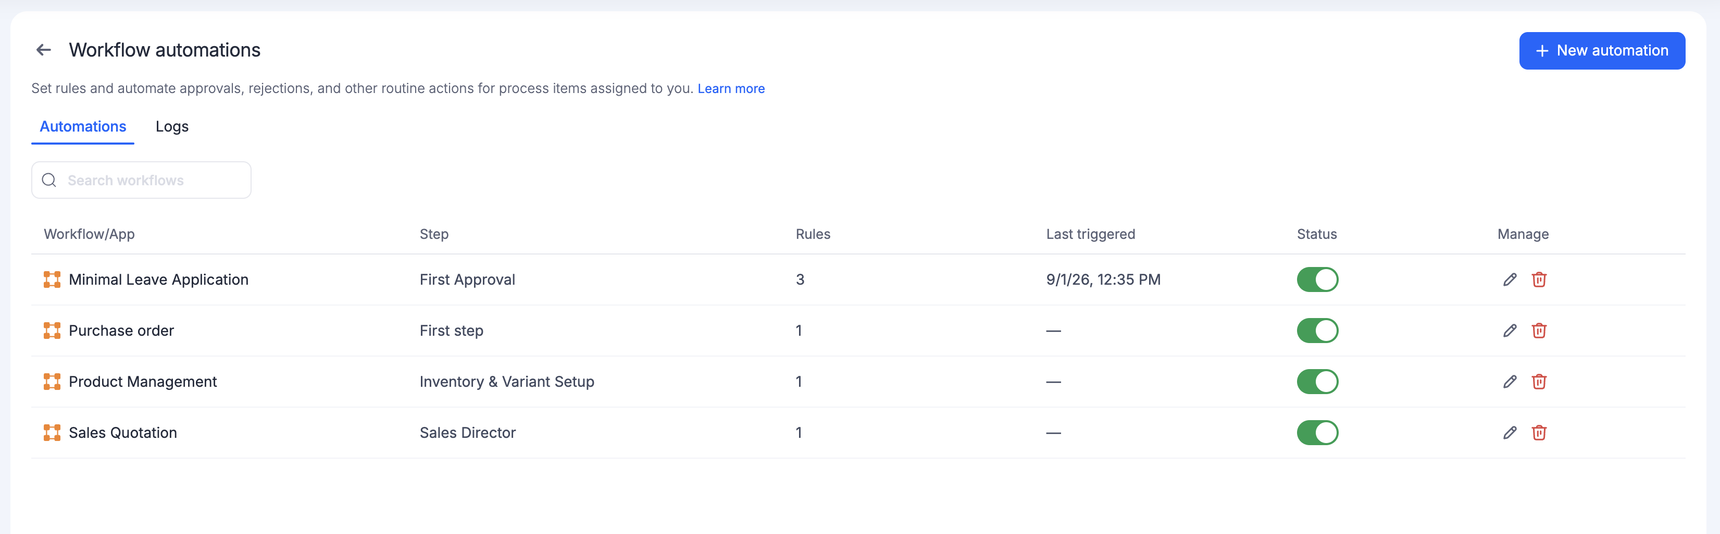
The Automations tab lists all your automations with their workflow or app, step, rule count, last triggered time, and status. Automations on an app's process are listed and logged under the app.
- To turn an automation on or off, use the toggle in the Status column. Disabling an automation means new items assigned to you in that workflow require manual action again.
- To edit an automation, click the Edit button (
 ) or click its row, make your changes, and click Save changes. Updated rules apply to new items assigned to you.
 - To delete an automation, click the Delete button (
 ).
).
Note:
Deleting an automation permanently removes it along with all its configured rules.
Viewing automation logs
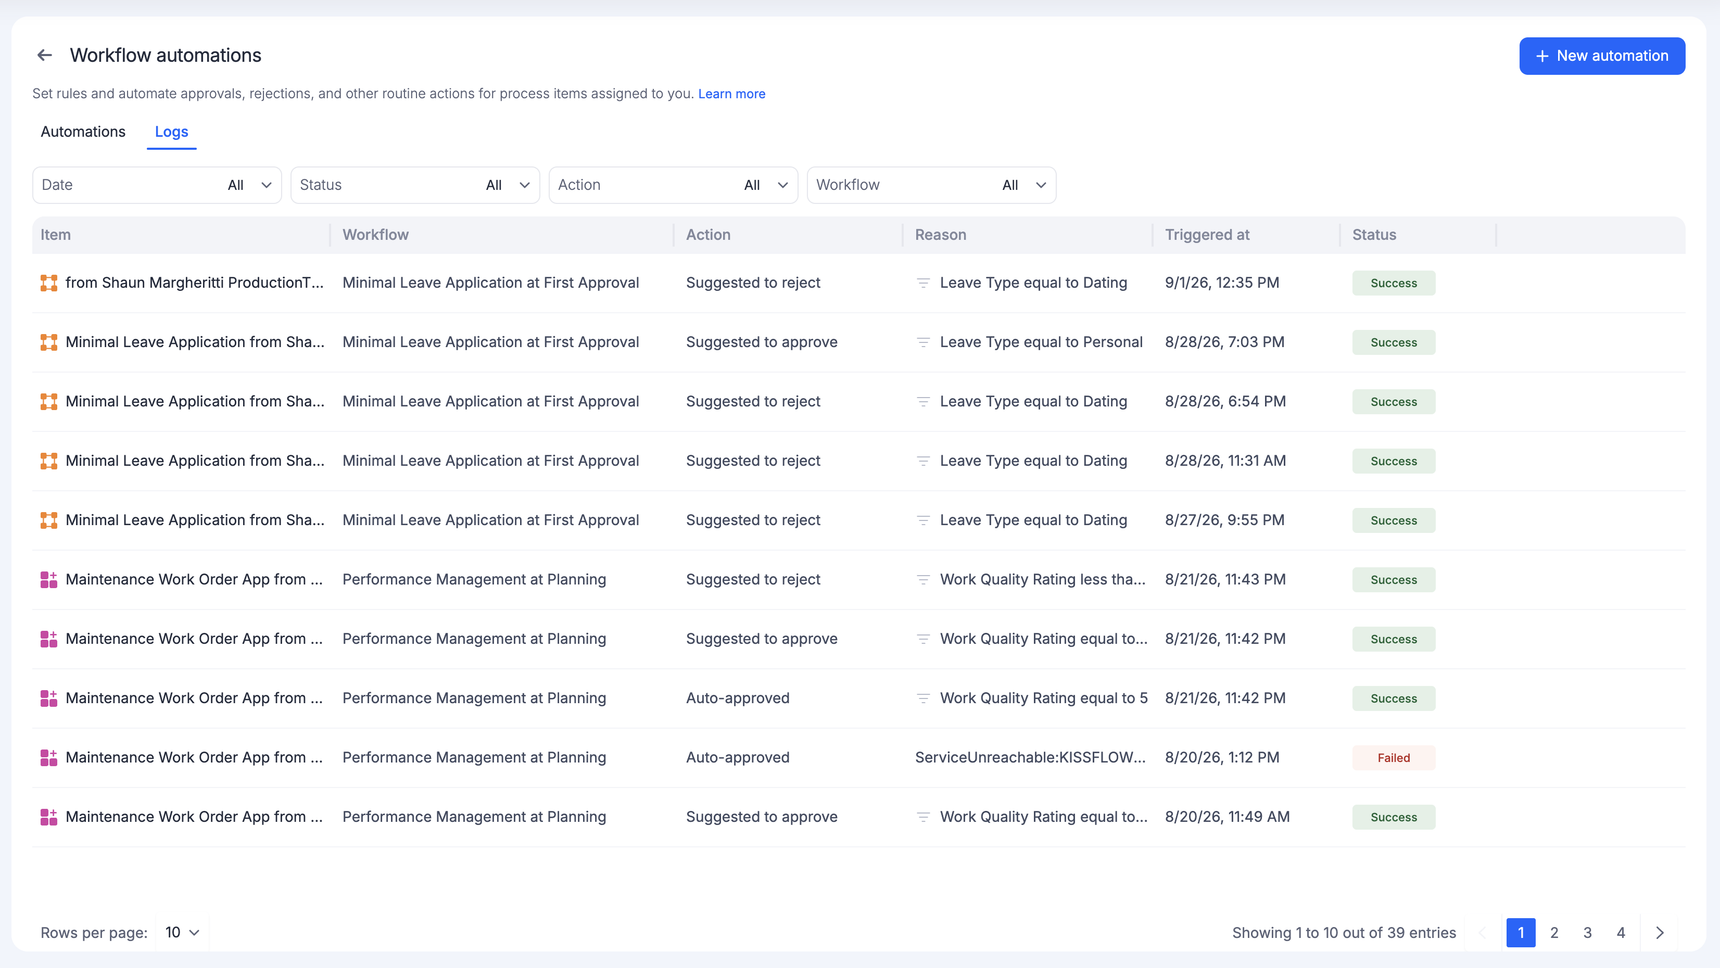
The Logs tab records every run of your automations.
Each entry shows the item, the workflow and step, the action taken (such as Auto-approved or Suggested to approve), the rule conditions that matched, when it was triggered, and whether the run succeeded or failed. For failed runs, the reason is displayed in place of the conditions.
- Filter the logs by date, status, action, or workflow.
- Click an entry to open the item.
Automated actions on your items
When an automation acts on an item, the action is visible everywhere the item appears:
- The item's Details tab shows a banner summarizing the steps where automation acted on your behalf.
- The item's Automation tab shows a timeline of each run — the rule that matched, the action taken or suggested, and any failures — with a link to manage your automations.
- Items acted on by automation carry an auto-action tag, such as Auto-approved, in item lists and on the item.
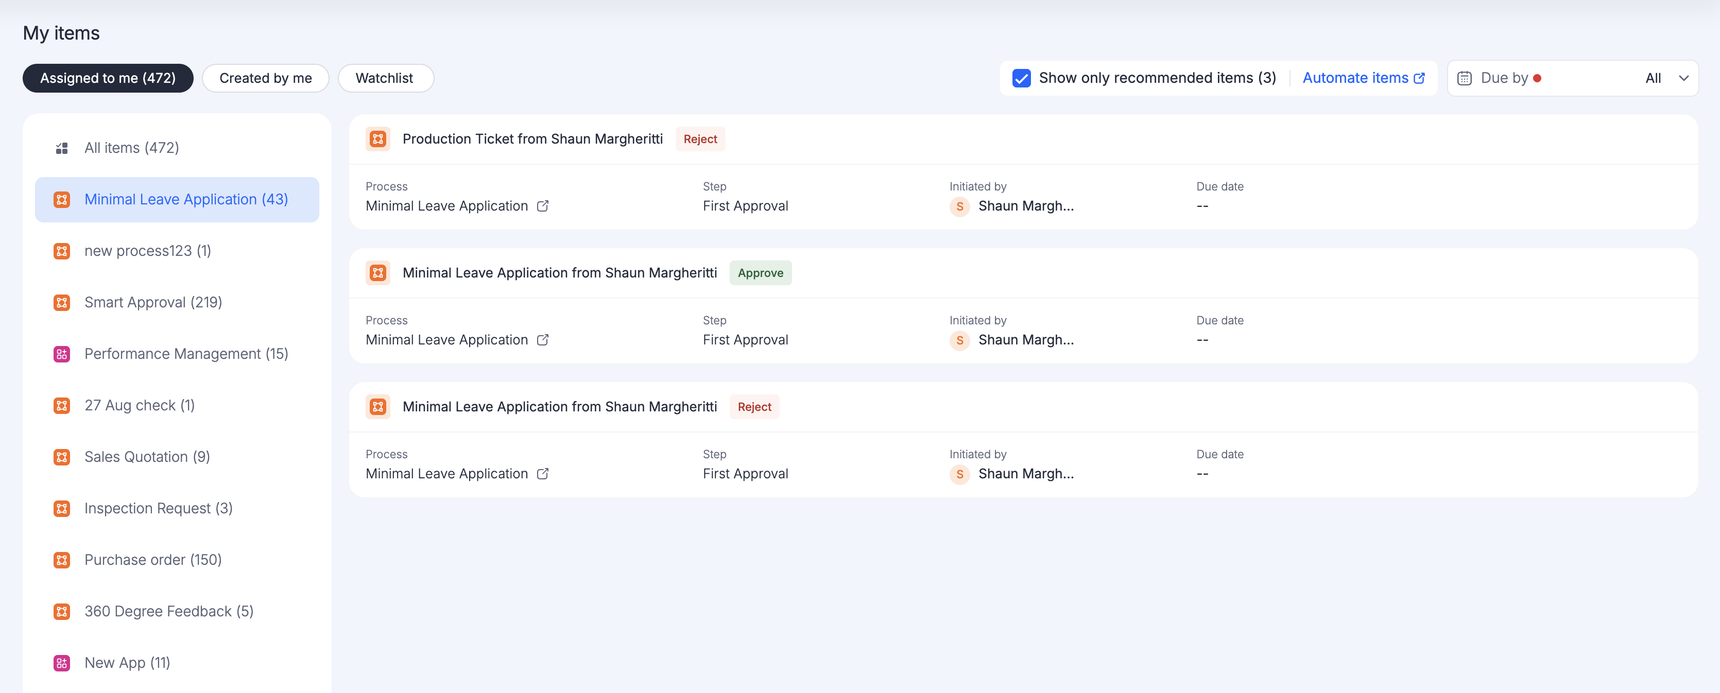
When an automation suggests an action, the item appears as a recommended item in your tasks. Select Show only recommended items to filter your task list down to them, review each item, and take the suggested action yourself.
Auto-action permissions
Process admins decide whether assignees can automate actions on a workflow through its security settings. When auto-actions are turned off for a workflow, your automations on it can only suggest actions.
Example use cases
- Approve routine requests instantly. For example, approve purchase requests where Amount is less than 2000 and Vendor equals Trusted Corp.
- Stay in control of edge cases. Suggest a rejection when Priority is Low so you decide with one click instead of reading every item.
- Route incomplete requests back. Send an item back to the initiator with a note when a required field, such as Justification, is empty.