
Creating actions
When using a Kissflow connector, actions are used to input or push new data into the connector. This is done through API calls that pass data from customized input fields created by the user. Action steps can either create new items or update existing ones using a create action. Additionally, search actions can be used to find existing items in the connector. If the search does not return a result, it can be paired with a create action to add a new item. After an action is completed, it returns output fields that detail what was created or found. This allows the data to be used in subsequent steps to build more detailed workflows.
Creating actions
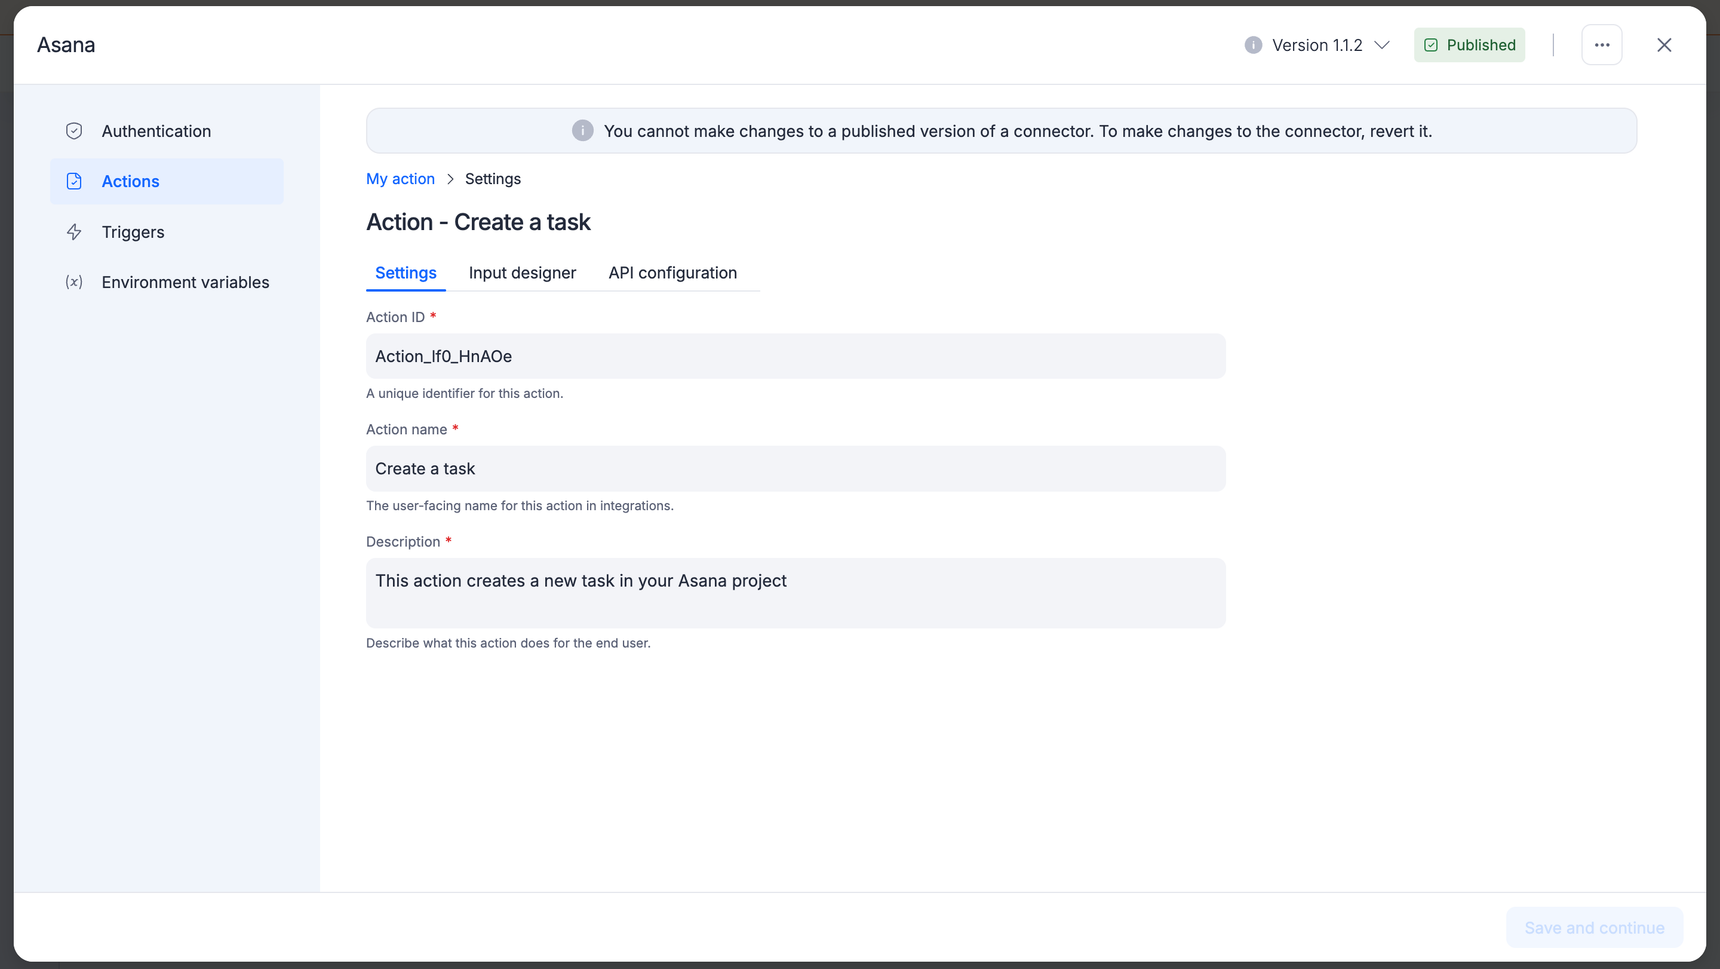
Click the New action button inside the Actions page to create a new action.
- Action ID: A unique identifier for this action.
- Name: This Action should be named using plain text, with a verb such as Add or Create followed by the name of the item it will create in your respective application. The name of this action will be displayed inside the Kissflow connector and on Kissflow integration marketing pages.
- Description: A sentence that describes how your Action helps users understand its benefits. It will be displayed inside the Kissflow connector and on Kissflow integration marketing pages.
Input designer in action
The Kissflow connector must collect relevant data to create or find items in your app through an input form. Use the Input designer to build this form for your respective action. Add at least one input field before moving to the final API Configuration tab.
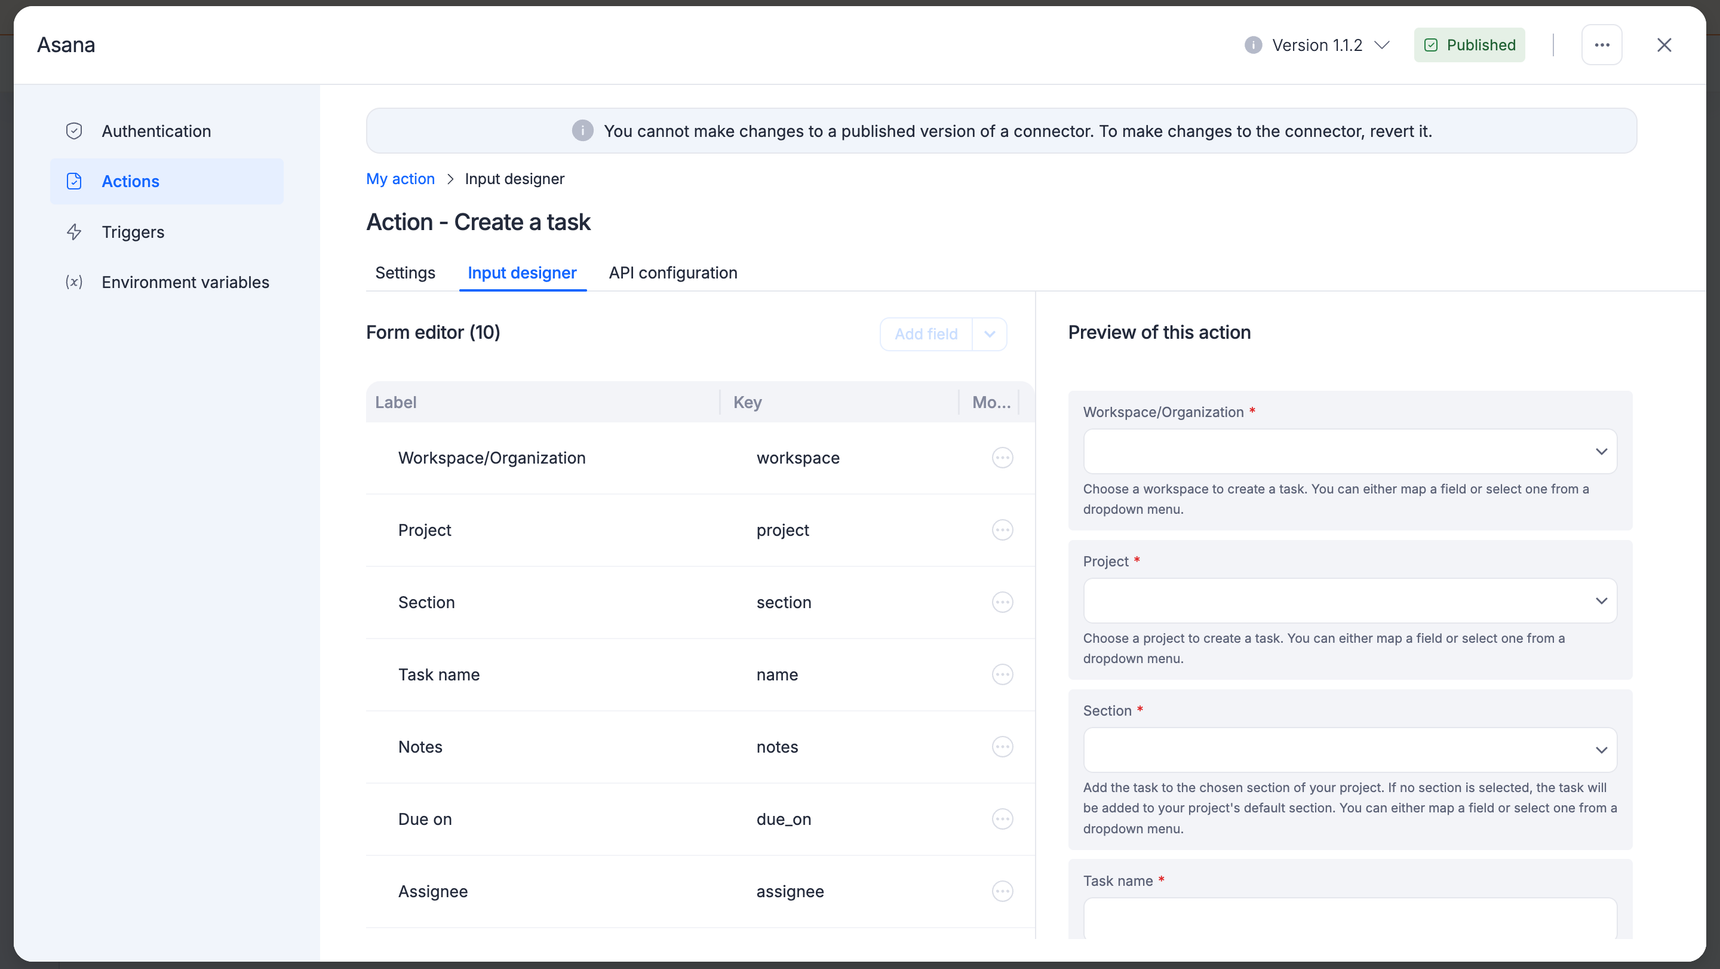
Before creating the input form for your action, it is important to identify all the necessary information the application requires to generate a new item. For instance, if you are building an action to create a new task in your Asana account, you must include fields for the organization, project, project section, task name, description, and due date. Your action may have mandatory and optional fields, such as for tags or additional particulars.
To make it easy for your app users to create or find items, you should include action fields for each piece of necessary data. It's best to add these fields in the same order as they appear in your app to facilitate a seamless integration.
API configuration
The final step in creating a connector action is instructing it on transmitting data to your API.
The Kissflow connector employs a POST call as its default method to create actions. It sends a single item to your API endpoint, and awaits a response. The response should contain an object with a single item that can be evaluated and parsed into separate fields for use in subsequent integration steps.
Kissflow connector defaults to using a GET call for search actions and sends input form data to the API endpoint.
If your API call requires input data in the core URL, you can reference any input field's key using the following syntax, replacing "key" with your actual field key: ${inputData.key}.
For most basic API calls, the default settings are sufficient. However, if you require additional configurations, you can click on Show options to add URL Params HTTP Headers, set your Action to omit empty parameters, or customize the request body. Alternatively, you can switch to code mode and write custom JavaScript code for your Action.
The default API settings form is the best option for most actions. If your action needs customized API calls, scripting to manipulate input field data, or other unique features, you can add custom JavaScript code for your API request.
To use custom code, click the Switch to code mode button. If you switch back to form mode, though, it will not transfer your code settings back to the form.
const options = {url: `https://app.asana.com/api/1.0/tags`,method: 'POST',headers: {'Accept': 'application/json','Authorization': `Bearer ${authData.access_token}`,'Content-Type': 'application/json' }, body: {}};var requestBody = {};requestBody.workspace = inputData.workspace;if (inputData.name) requestBody.name = inputData.name;if (inputData.notes) requestBody.notes = inputData.notes;if (inputData.followers) requestBody.followers = inputData.followers;if (inputData.color) requestBody.color = inputData.color;options.body = { data: requestBody};return request(options).then(res => res.json()).then(res => { let result = res.data; return result;}).catch(err => { let error = err.response_body; if ([400, 500].includes(err.status_code)) {throw new KissflowException(error?.errors?.[0].message || error);} return err;})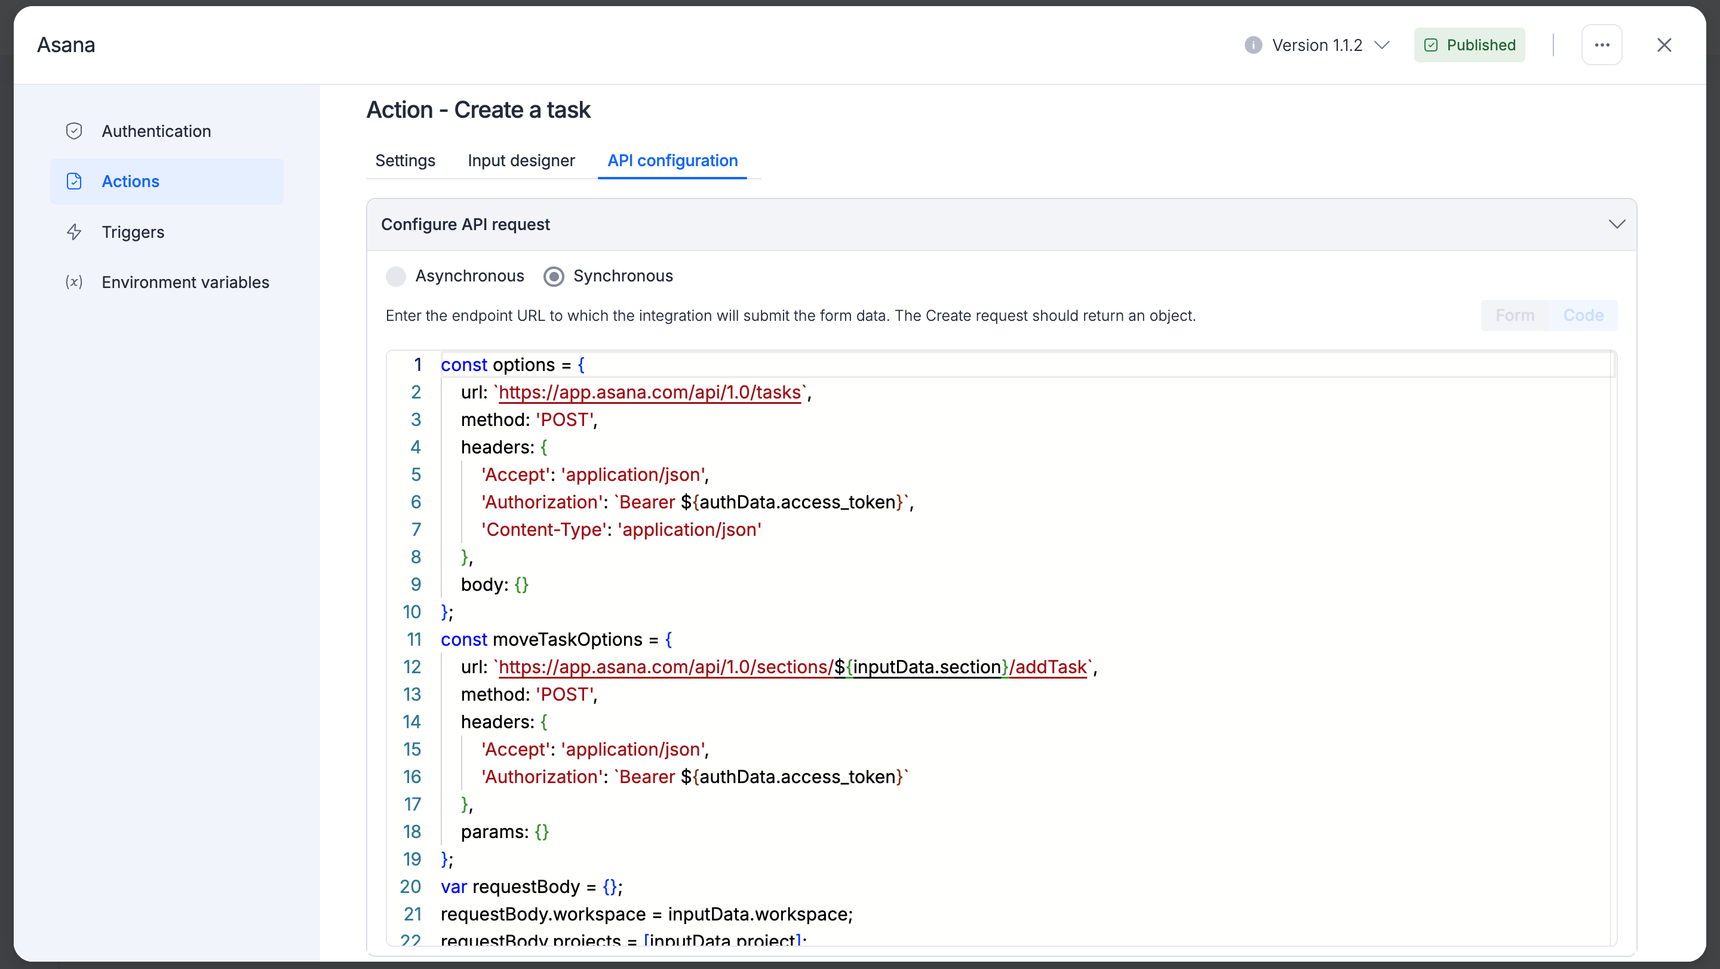
Test action
After adding your API call, testing it with appropriate data is important. If you haven't already authenticated with your application, do so now. Then, fill in each input field under the Configure test data section with data compatible with your app. To see how the Action functions in an integration, click Test authentication and view the results in the response tab.
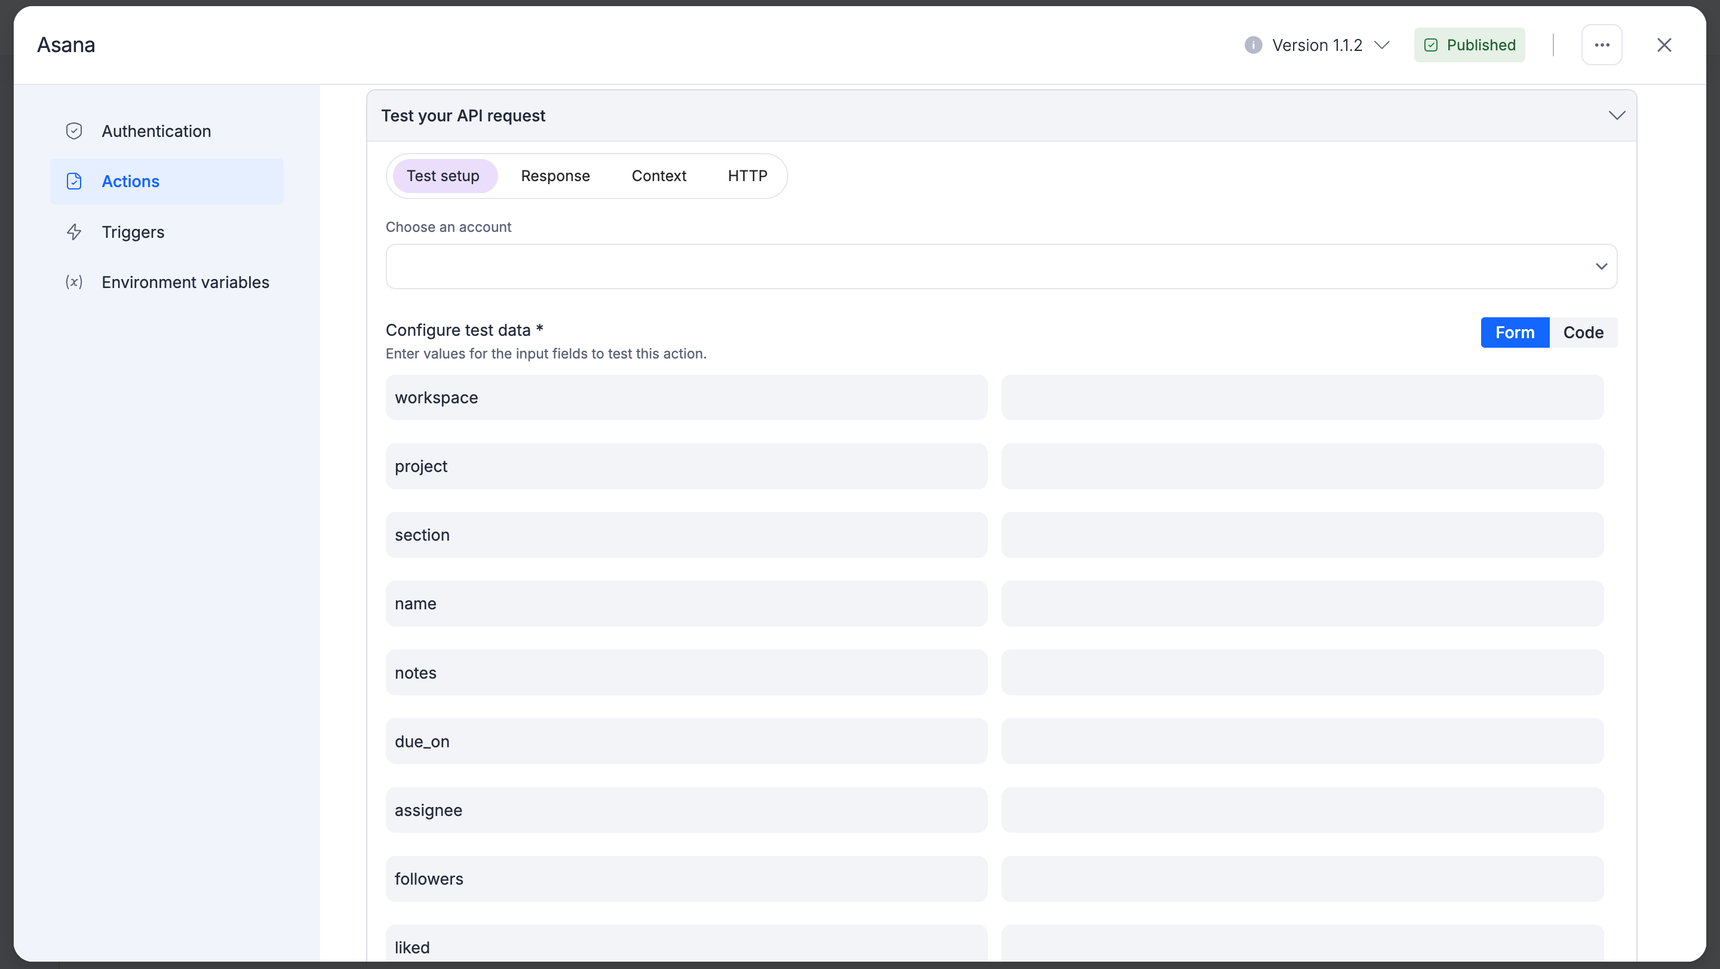
If an error occurs, make sure to verify:
Authentication: Have you tested the authentication process after connecting your app account to the connector? You can only test an integration once it's connected with an application.
Test data: Did you ensure that your test data includes the expected details, such as complete email addresses in email fields and actual dates in date fields?
Input field keys: Have you checked that your input field keys match your API's requirements in the Input Designer?
API call customization: If the options you need are not available, you may have to use custom coding for your API call.