
Creating a new connector
The Kissflow Connector builder is a development platform where you can create, configure, and submit new integration connectors to be listed in your connector library.
To build connectors, you must have a developer account. The development process is broken down into five high-level steps:
Basic details: Provide core information (name, description, URL, logo, and target audience).
Authentication: Configure how the connector securely connects to the target application.
Input designer: Define fields, triggers, and actions specific to your connector.
Advanced features: Configure environment variables and additional connection settings.
Review and publish: Submit the completed connector for review.
Accessing the connector builder
Only Super Admins have default access to the developer platform. If you cannot see these options, contact your account administrator.
Sign in to your Kissflow account.
Click your profile picture in the top-right corner.
Select Connector builder from the dropdown menu.
Click + New connector to open the creation page.
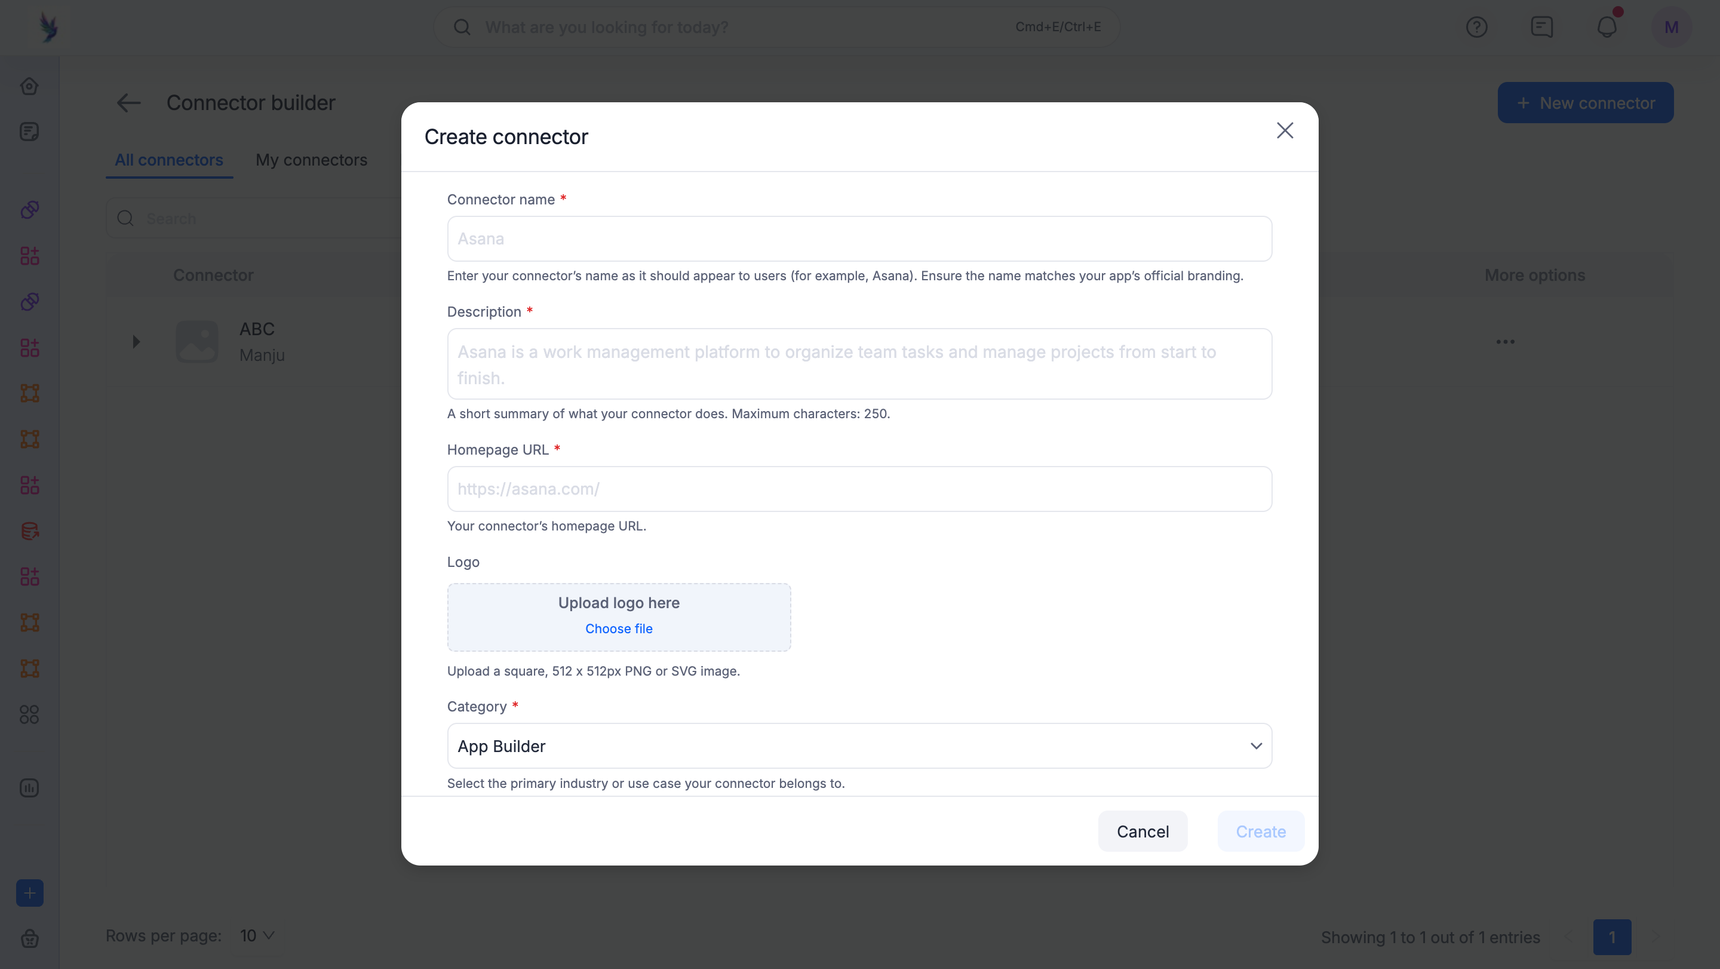
Configuring Basic Details
Fill out the initial metadata to classify and brand your connector within your connector library.
Core branding
Name: Enter the official brand name of the application. Match the exact capitalization and styling used on its official website (For example, DocuSign, not Docusign).
Description: Provide a brief summary of the connector's primary use case in 60 characters or less. Example: Kissflow Board is a case management tool to organize projects.
Homepage URL: Provide the homepage URL of the target application for reference.
Logo: Upload a square, 256x256px (or larger) transparent image in PNG, JPG, or JPEG format. Do not include the app's text name in the logo; use official branding assets.
Category: Choose the primary category that best fits the application's core utility. If multiple apply, select the one that aligns closest with your primary use case.
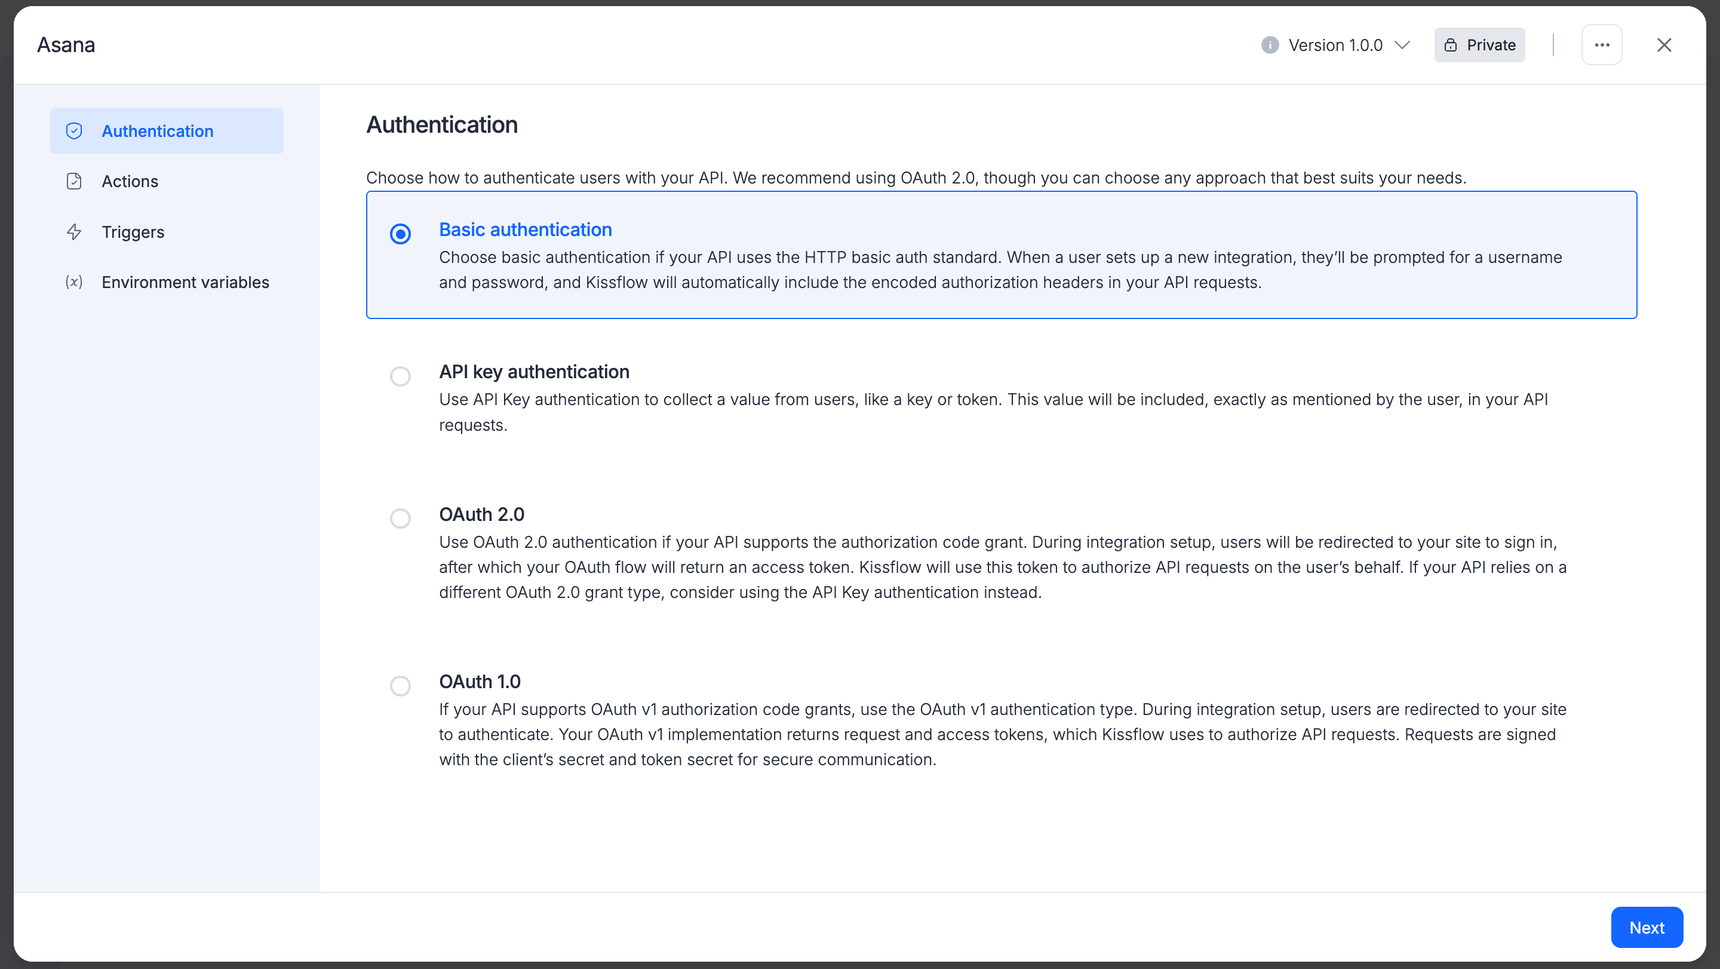
Configuring authentication
Authentication grants your connector secure access to an individual user's account in the target app, enabling it to monitor data changes (triggers) or execute data tasks (actions).
Kissflow supports three authentication methods, though OAuth v2 is highly preferred.
| Authentication type | Description | Best for |
| Basic authentication | Uses a straightforward Username and Password. Passes credentials with every API call. This method stores raw user credentials. Use it only as a last resort if the target application does not support API keys or OAuth v2. |
Legacy systems where no other authentication method is available. |
| API key | Uses a static string (and optional domain) provided by the target app. | Apps with simple token-based access control. |
| OAuth v2 | Employs an authorization_code flow (similar to GitHub or Facebook). Swaps a code for temporary access/refresh tokens. | Recommended standard for modern, secure integrations. |
Setting Up OAuth v2 (the preferred authentication method)
Because OAuth v2 is the standard for modern integrations, here is a step-by-step breakdown of how to configure it within Kissflow using Asana as an example.
1. Register your app in the target console
Before configuring Kissflow, visit the target application's developer console (for example, Asana Developer Console) and select Create new app. You must provide:
App name: The name users see when prompted to grant permissions.
Redirect URL (Callback URL): Copy this URL from the Kissflow configuration screen and paste it into the target app's developer settings. This is where users are sent after a successful or failed login.
Once registered, the target application will issue you a Client ID and Client secret.
2. Construct the authorization URL request
Set up the initial authorization endpoint where users will log in. You can configure this using Form mode or Code mode.
For Asana, the base endpoint is: https://app.asana.com/-/oauth_authorize
Add the required query parameters or HTTP headers. To dynamically insert values, use the Input Data tab (for items like the Redirect URI) or the Field tab (env) to inject stored environment variables.
Standard OAuth v2 Query Parameters
client_id(Required): The unique ID generated by the target app.redirect_uri(Required): The callback URI matching your app settings.response_type: Set tocode.state: An opaque value used to prevent CSRF attacks; returned verbatim in the response.scope: A space-delimited string specifying access permissions.
3. Configure the access token exchange
When the application successfully returns an authorization code, Kissflow must exchange it for an access token by making a POST request to the application's token endpoint (for example, https://app.asana.com/-/oauth_token).
Parameters should be passed as a standard form-encoded POST body. The endpoint typically returns a JSON response like this:
{
 "access_token": "f6ds7fdsa69ags7ag9sd5a",
 "expires_in": 3600,
 "token_type": "bearer",
 "refresh_token": "hjkl325hjkl4325hj4kl32fjds",
 "data": {
   "id": 4673218951,
   "gid": "4673218951",
   "name": "Greg Sanchez",
   "email": "gsanchez@example.com"
 }
}Important: Kissflow does not automatically inject the access token into subsequent API action steps. You must reference it manually using
${authData.access_token}in Code mode, or select it from the access token options in the input tab when using Form mode.
4. Set up the token refresh request
If the target API supports automated token refreshes, configure the refresh request body. This allows Kissflow to run workflows silently in the background using the refresh_token, preventing integration interruptions when the short-lived access_token expires.
Testing and labeling the connection
Test request
Before moving to triggers and actions, you must validate your authentication setup.
Provide a simple, unconfigured endpoint (such as a /user or /me profile endpoint) that requires no additional inputs to run.
Because Kissflow does not pass the access token by default, click Show options to explicitly add your authorization header, or click Switch to code mode for custom response parsing.
Connection label
Create a dynamic naming convention that helps end-users distinguish between multiple connected accounts (for example, separating a personal account from a work account).
By default, Kissflow names connections using the [App Name] + [Version]. You can customize this by mapping fields from your test response (such as ${authData.data.email} or ${authData.data.name}) to make the connection label more recog