
Input designer
To build a Kissflow connector:
- Tell your connector how to connect to your API.
- Create forms that users can use to input data which is sent to your API.
The input designer for the second instance where you need forms that users can interact with. Both triggers and actions can have an input form but they are frequently used in actions as you need a way for users to send data to your app to find, update, or create something new. To get started with, you can create two different types of fields:
Configure field
There are 11 different field types that you can choose from to allow users to enter plain text. You can also use this field to map variables from previous triggers or action into a particular field. When you add a new field into your input designer, there are certain details that need to be filled.
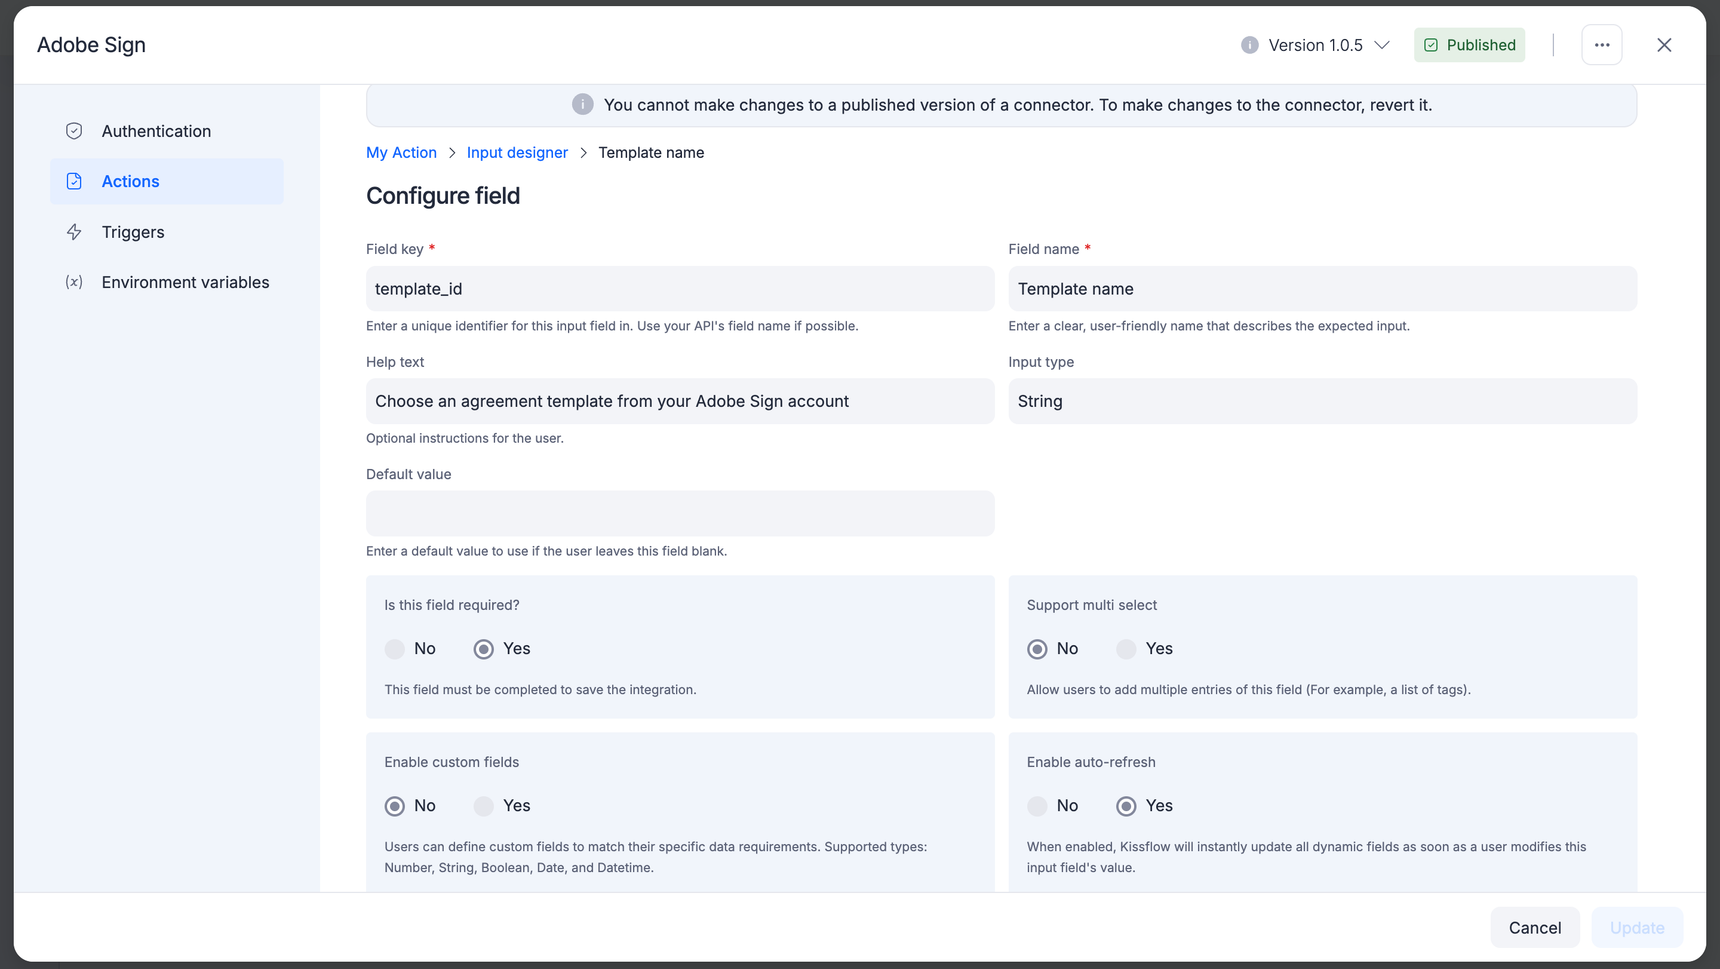
- Field key: Acts as a unique identifier for the field. Ideally has the same key as your API, such as first_name.
- Field name: A user friendly name for the field, such as First Name. It will be visible to the user.
- Help text: A short description of the field. It is optional.
- Input type: You can choose from one of the 11 available field types. String field will be the default one.
- Default value: An optional field if entered will be considered the default value for that particular field.
- Is this field required? Clicking Yes, will make this a mandatory field that the user must interact with.
- Support multi select Checking yes would allow users to enter multiple values in this field. For example, the Gmail connector allows users to add multiple tags to an email.
- Enable custom fields You can check yes if you want to add multiple fields within this field.
- Enable auto-refresh? If the dropdown values has to be dynamically fetched from an API call, and the api call requires another input passed along with it, then click yes.
- Dropdown: The dropdown field can be used when the user needs to choose multiple values from a dropdown. No dropdown, static dropdown, and dynamic dropdown are the three options available.
- No dropdown: Simple input box without a dropdown.
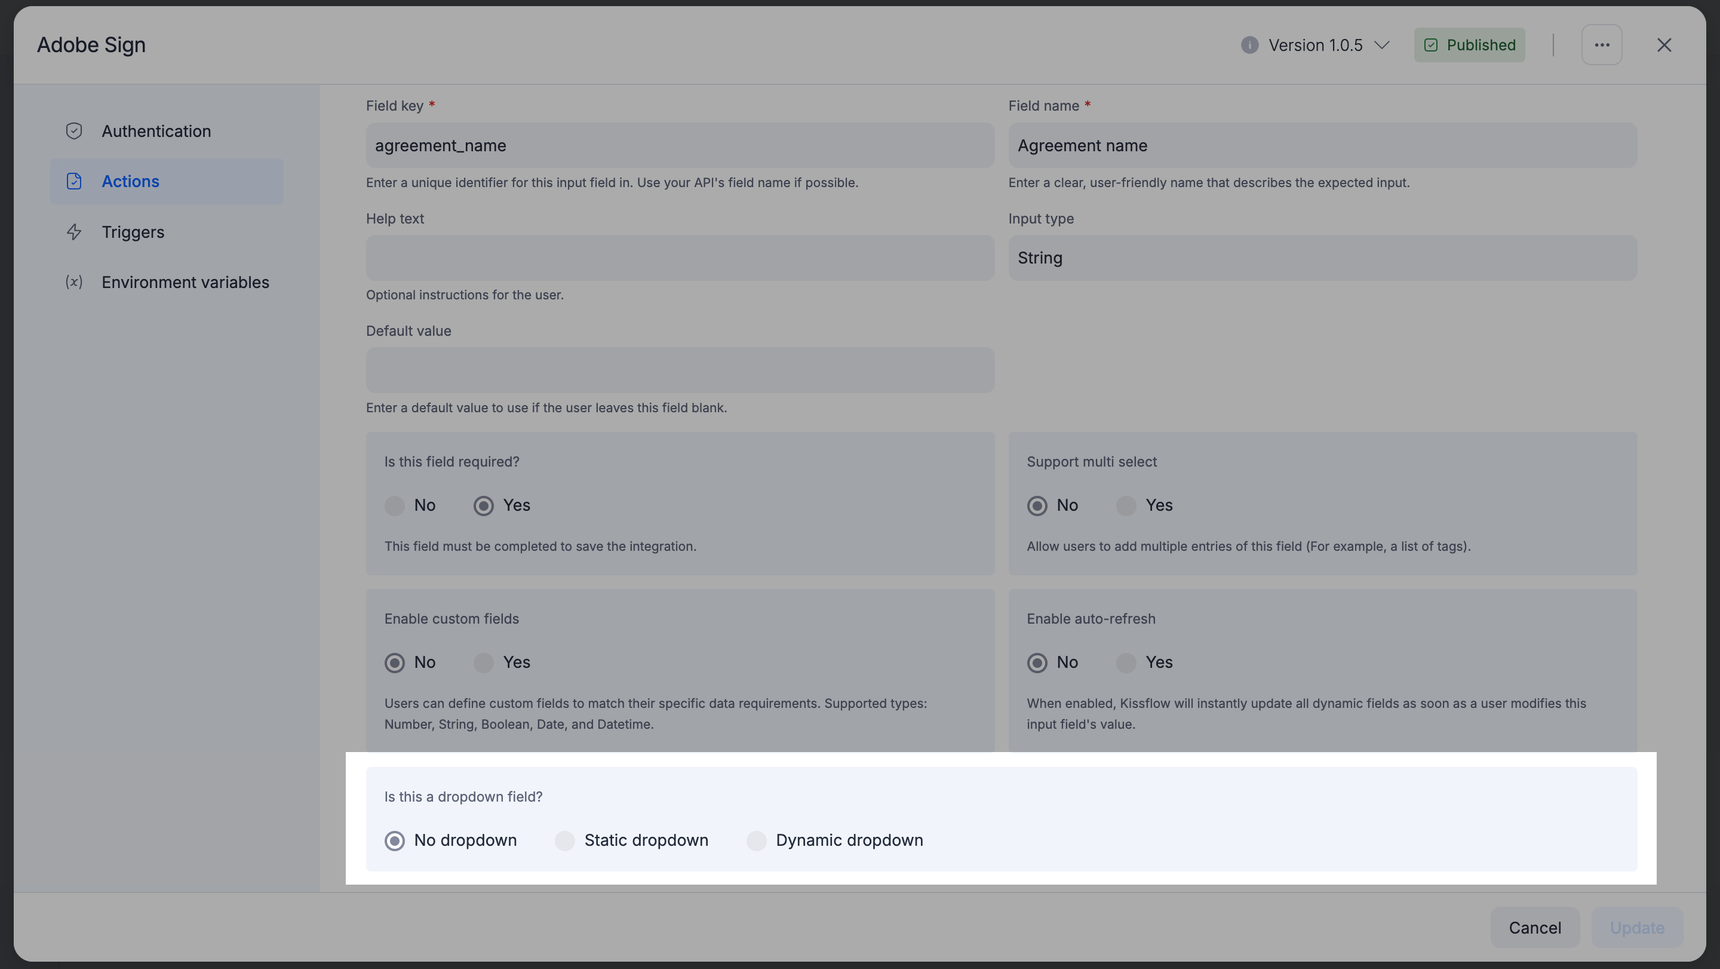
- Static dropdown: If you want to show different values for the field you can use the static dropdown option and make a key value pair that includes the value to send to your app. Add the sample value to be shown to the users along with a user-friendly label.
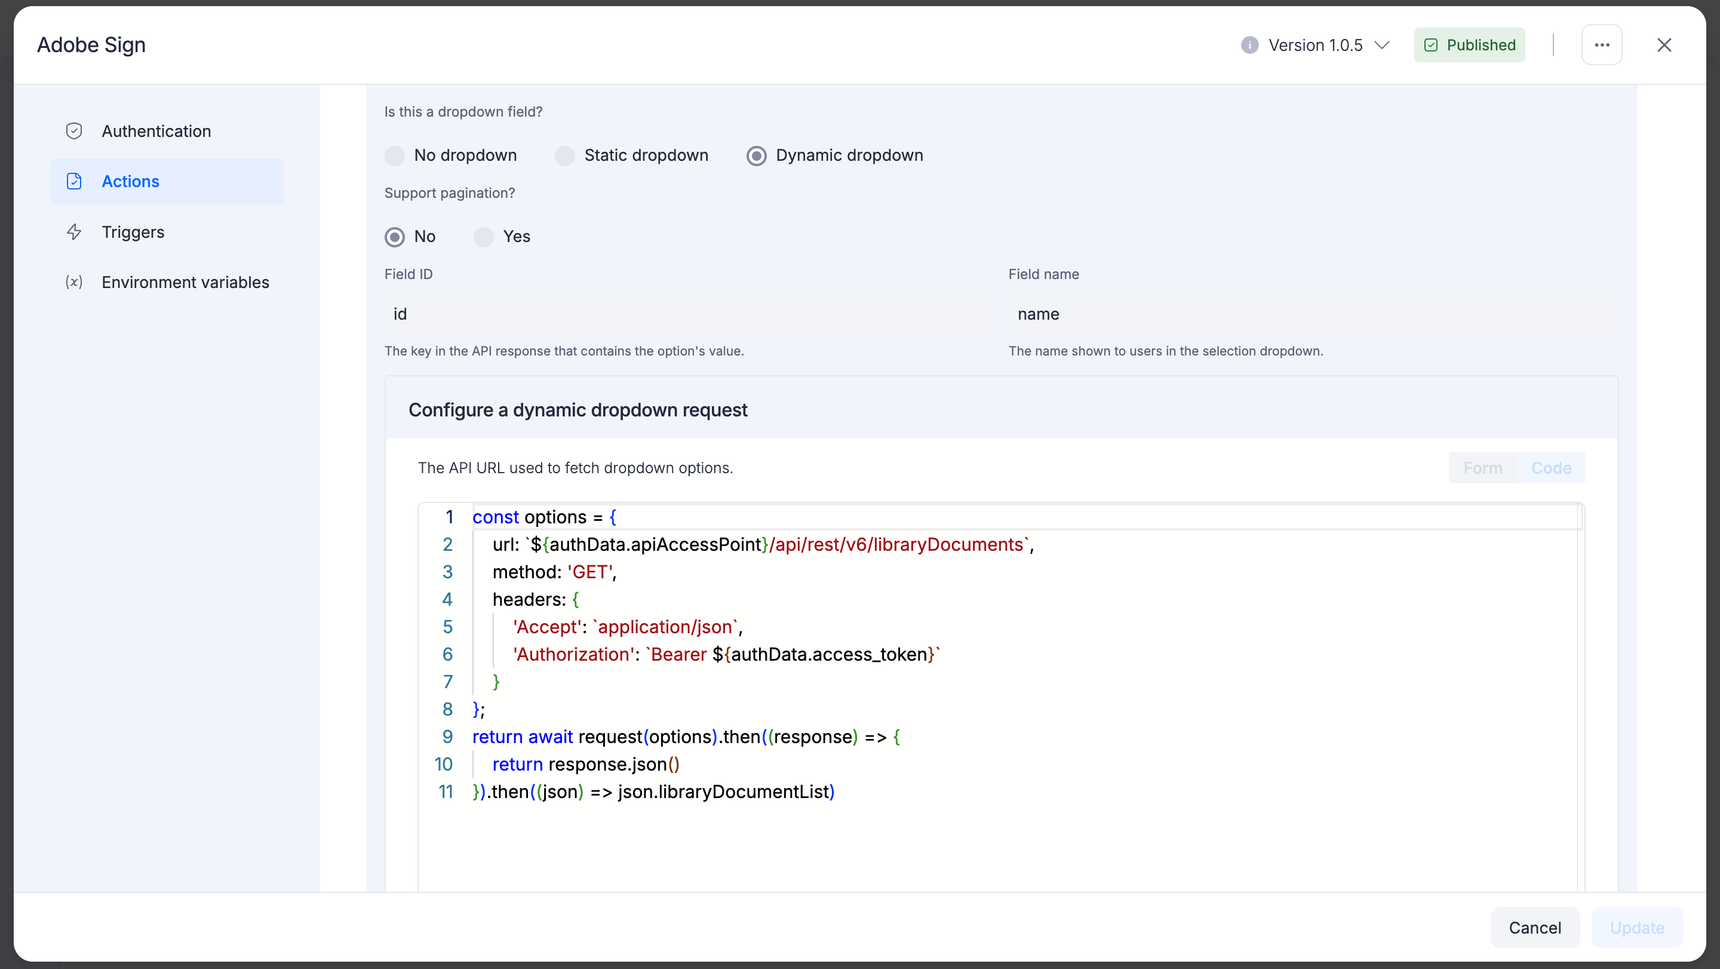
To do that, add them inside curly brackets, with a sample value, and label separated by a comma. The item that is listed first will be displayed first. The whole set should be wrapped in square brackets. Using inputdata.keyname the FieldId can be accessed by replacing the keyname with the specified input field key. For example:[{ "FieldId": "documentname", "FieldName": "document_name"}] - Dynamic dropdown: If users need to select data from their account in your app, such as a project, folder, team member, or other user-specific detail, then you can use a dynamic dropdown. For dynamic dropdowns, Kissflow first fetches data from your API and then displays it in a menu.
Configuring a dynamic dropdown request
Form mode
Select the method as a GET request and choose form mode.
If the GET request requires sending the access token along with it, expand the
Show options text and provide the key as Authorization and value as Bearer <space> and click to view the authdata, context data and input data.
Once you click the access_token in the dialogue box the value will be appended to the input box. To remove the value enter backspace or delete.
Support pagination? Whether a user can use links such as "next", "previous", or page numbers to navigate between pages that display one page of results at a time.
Field ID: Select the field with the data your API needs for this action in the Field Id.
Field name: select the field with a human-friendly name for the data in the Field name.
Dynamic field
You can add the dynamic field if you want to make API calls to your app and then show the returned data in a dropdown menu so users can select the item needed. This type of field is used in instances where you need to choose data from folders, projects, and assignees from your connector. Configuring this field can only be done in code mode. The list of fields from input will be dynamically generated once the relevant code is added to the Dynamic field.
