Editing an external data object
Here’s a detailed list of all the edit options available in external data objects.
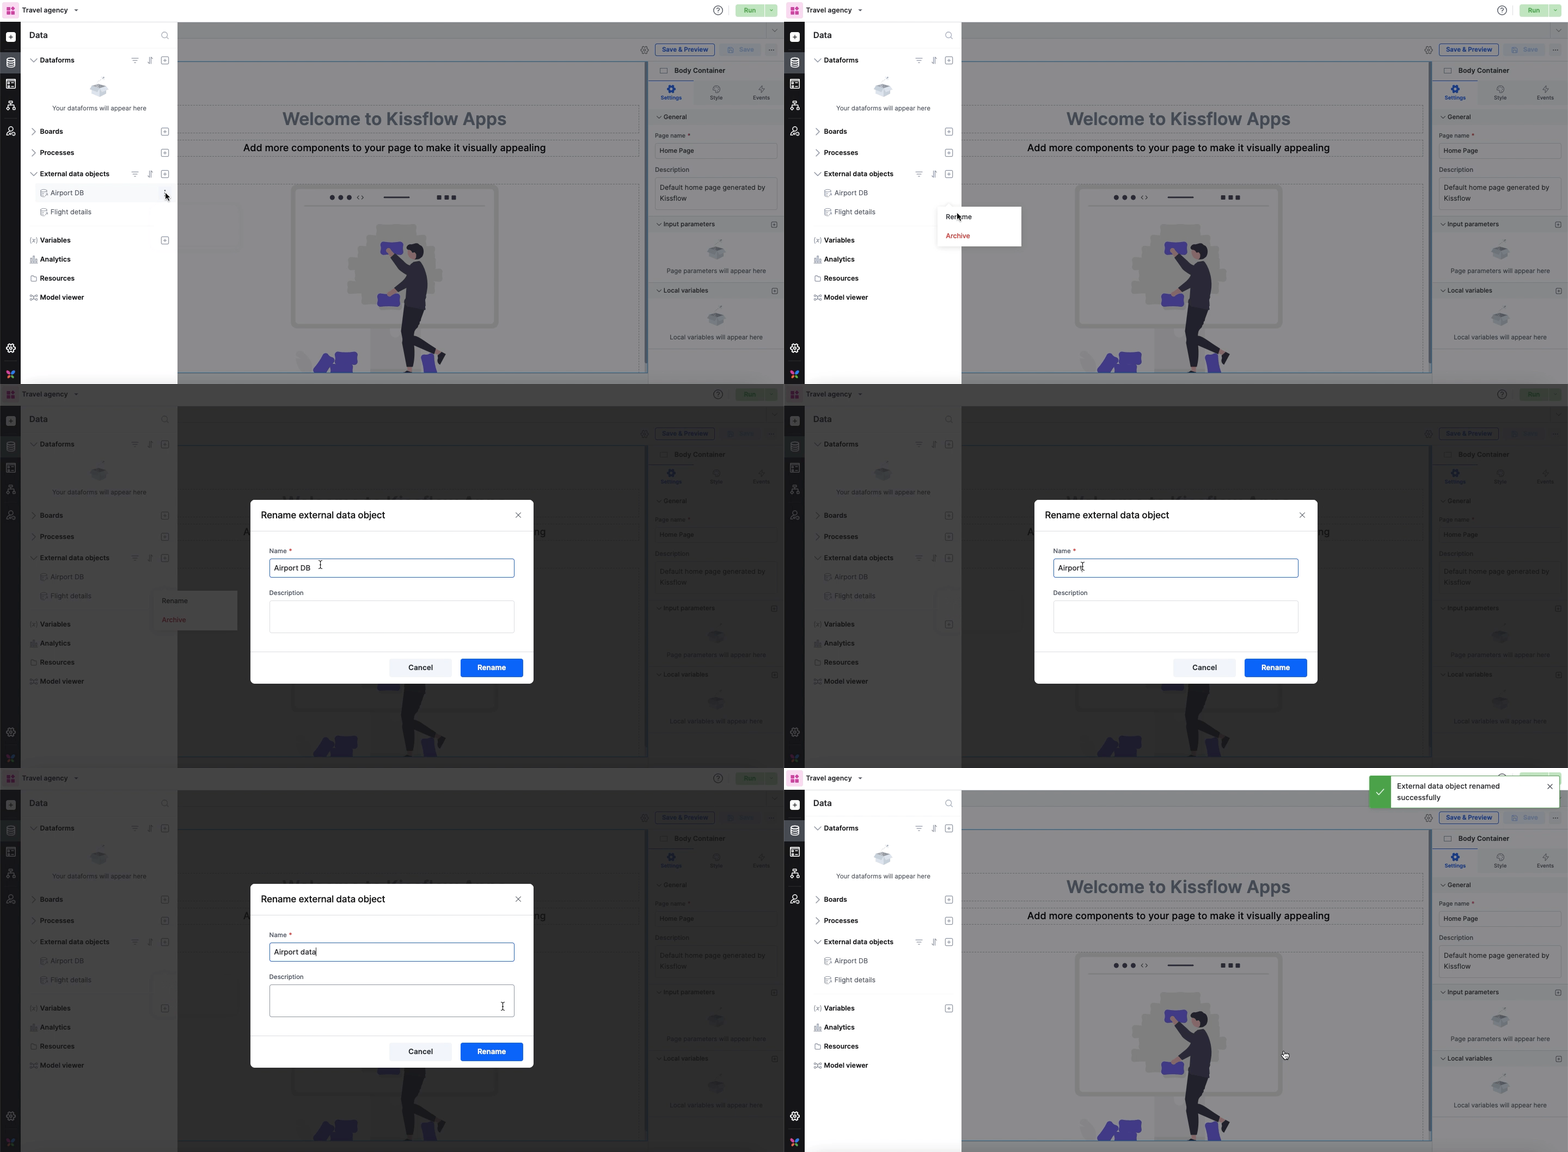
Rename an external data object
To modify the name of an external data object,
Go to the left nav and select the Data icon.
Click External data objects and locate the object that you intend to rename.
Click More options
 next to the respective external data object.
Enter the new name and confirm the changes in the popup.

Alternatively, you can open the External data object directly. Click More options next to Edit, and proceed to rename it from there.
Archive an external data object
To archive an external data object,
Go to the left nav and select the Data icon.
Click External data objects and locate the object that you intend to archive.
Click More options next to the respective external data object.
Archive the external data object.

If your external data object is used in other flows, such as lookup and integration, you cannot archive it unless you manually remove the dependencies.
Note:
Alternatively, you can open the External data object directly. Click More options next to Edit, and archive it.
Unarchive an external data object
To restore a previously archived external data object, navigate to filters, select Archived, and Unarchive the external data object from More options.

Delete an external data object
To delete an external data object, the first step is to archive it.
Navigate to More options in the archived external data object, and click Delete to remove the external data object permanently.

Share an external data object
You can grant Manage access to other members in your app to use the external data object.
Note:
Access is mandatory for users to create integrations with external data objects inside apps. However, assigning this role is not necessary for consuming data via lookup fields.
Open the external data object from the left navigation pane’s Data icon.
Click the Share icon (
) at the top right corner of the page.
Navigate to +Assign roles in the popup and add user names.
Select Manage permission and confirm your changes.

Modify external object configuration
To modify the configurations in an external data object, navigate to the specific object from your application's left navigation bar.
Data > External objects > particular table

Note:
While editing an external object, you cannot change or modify the connection or table. If that’s required, create a new external object from scratch.
Here, you'll find an overview of its general details and the selected columns.
Click the Edit button at the top right corner of the screen to access the configuration page. Here, you have the flexibility to:
Add new columns in the Select columns step.

Remove existing columns from the Configure columns step by clicking on the Delete icon (
) next to the Mandatory option.
A dependency error will occur if you’re deleting a field already in use in lookup or integration. To proceed with the deletion, you’ll have to go back to the particular dependency and remove the field.Edit field names, field types, set or remove field mandates, and modify validation rules in the Configure columns step.
Please note that the Field ID, once set, cannot be edited later.
After making the necessary changes, simply click Save to apply your edits.
