
Remote lookup field overview
The Remote lookup field allows you to fetch data from external systems and display it within your form. By configuring URLs, request types, and headers, you can create fields that interact with third-party APIs to retrieve real-time data.
Configuring the field
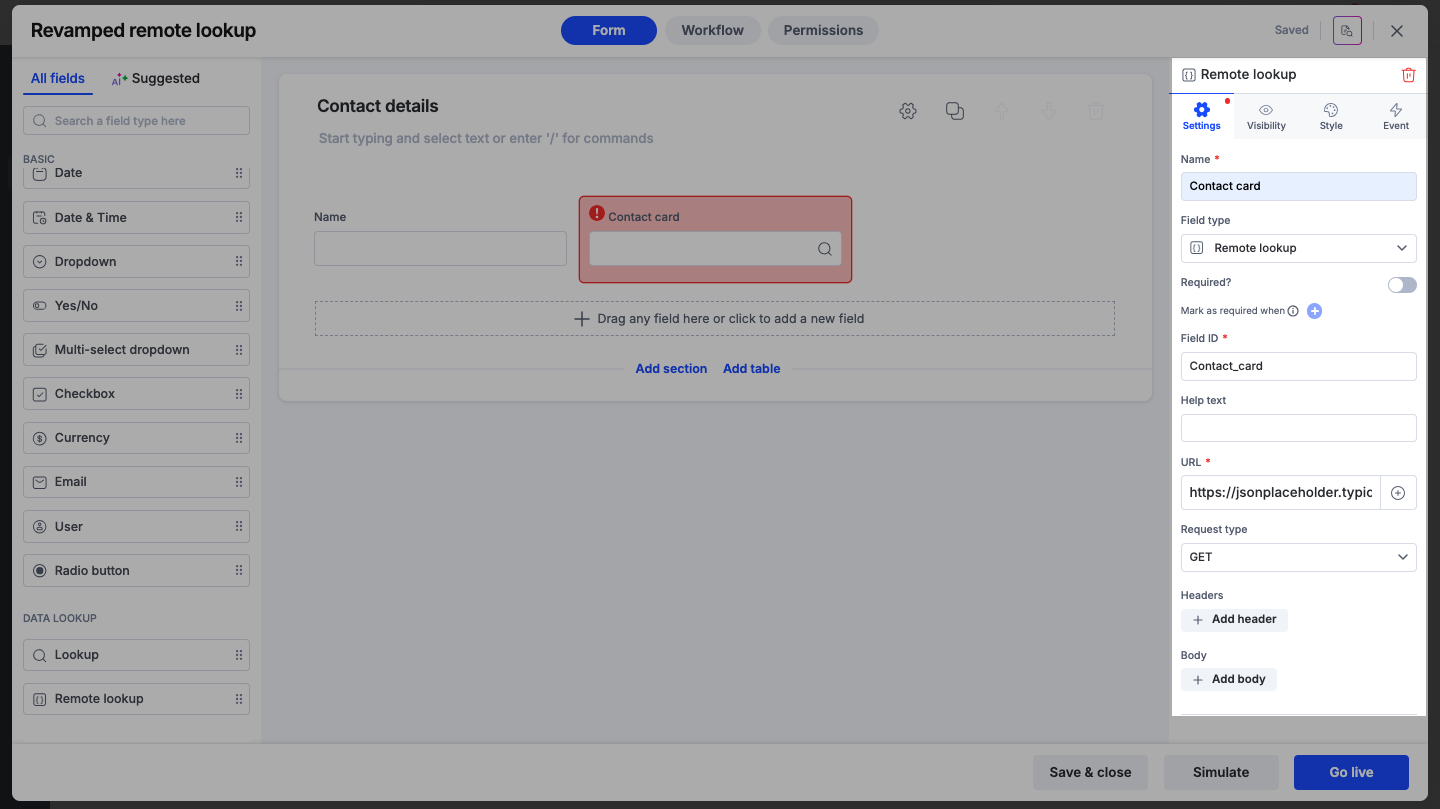
To set up a remote lookup field, drag the field onto your form and configure the properties.
Connection setup
Set up the endpoint details to establish a connection with the external service.
URL: Enter the endpoint URL to receive or send data.
Dynamic values: Click the + button inside the input field to insert values from other fields in your form dynamically (For example, passing a Process ID as a query parameter).
Request type: Select the HTTP method.
GET: To retrieve data from the specified URL.
POST: To send data to the specified URL.
Headers: Add any necessary request headers (key-value pairs) for authentication or content type definitions.
For example:
Name: X-Access-Key
Value: *********
Name: X-Access-Secret
Value: *********Body: For POST requests, define additional key-value pairs required by the external service.
Validate API
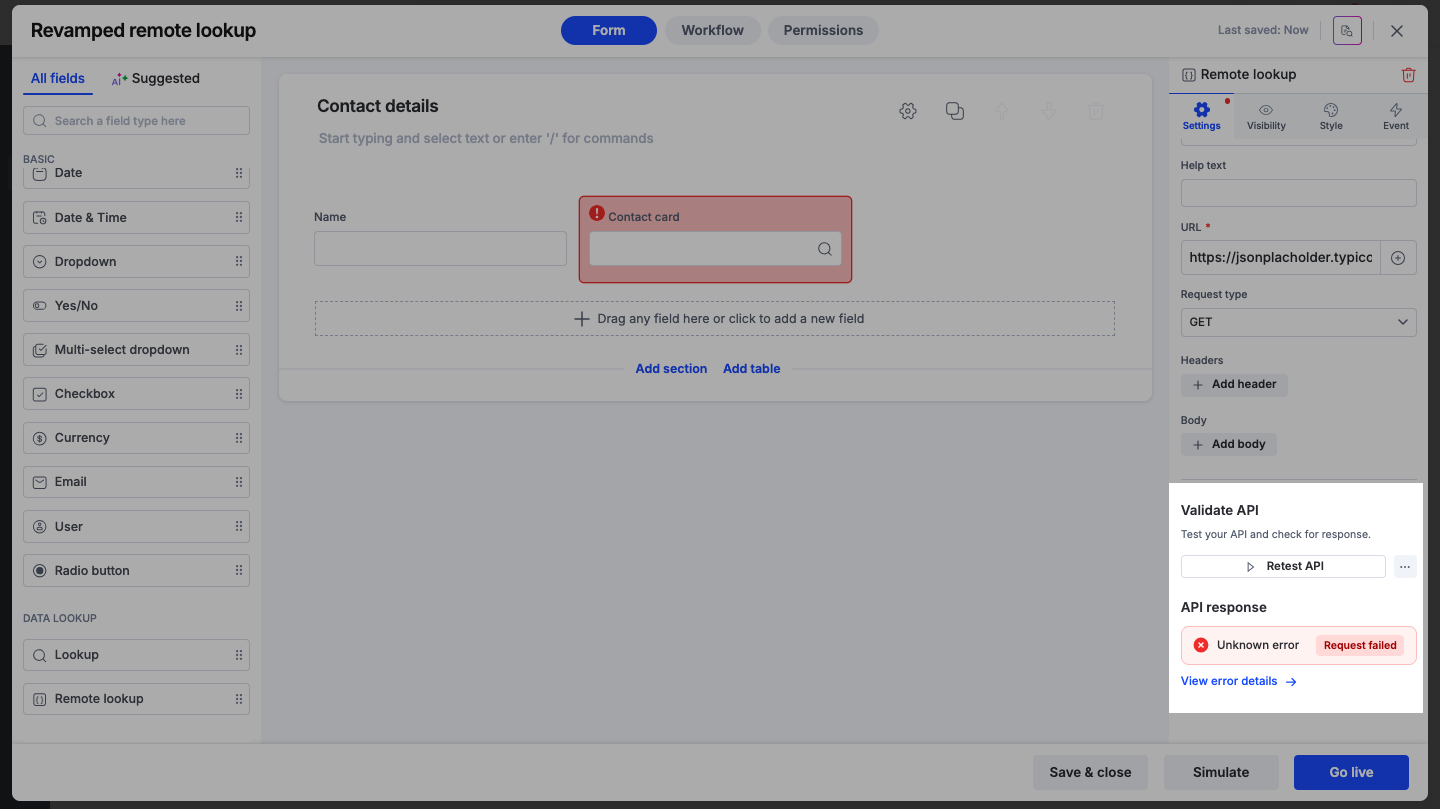
Once you have configured the URL and headers, you must validate the connection to ensure it works successfully. You can do this through an API test.
API testing
Click the Test API button to trigger a real request to your endpoint.
Success: If the connection works, you will see a Success status code (200). You can click View response to inspect the raw data returned by the external system.
Failure: If the connection fails, an error status will appear. Click View error details to troubleshoot the issue. Make the required changes and click Retest API.
Manual sample response
If you cannot perform a live test due to security restrictions, firewalls, or to avoid creating dummy entries in your external database, you can manually input the expected data as a sample. This sample response is used to set your JSON/XML path.
Click the More options icon next to the Test API button.
Select Provide sample response.
Choose the data format: JSON, XML, or Text.
Paste your sample response into the editor and click Save.
Managing configuration changes
If you modify the URL, headers, or body after a successful test, the status will change to Request modified.
Retest: You must click Test API again to validate that the new configuration works.
Compare: You can click View last test response to see the data received during the previous successful connection before your changes were made.
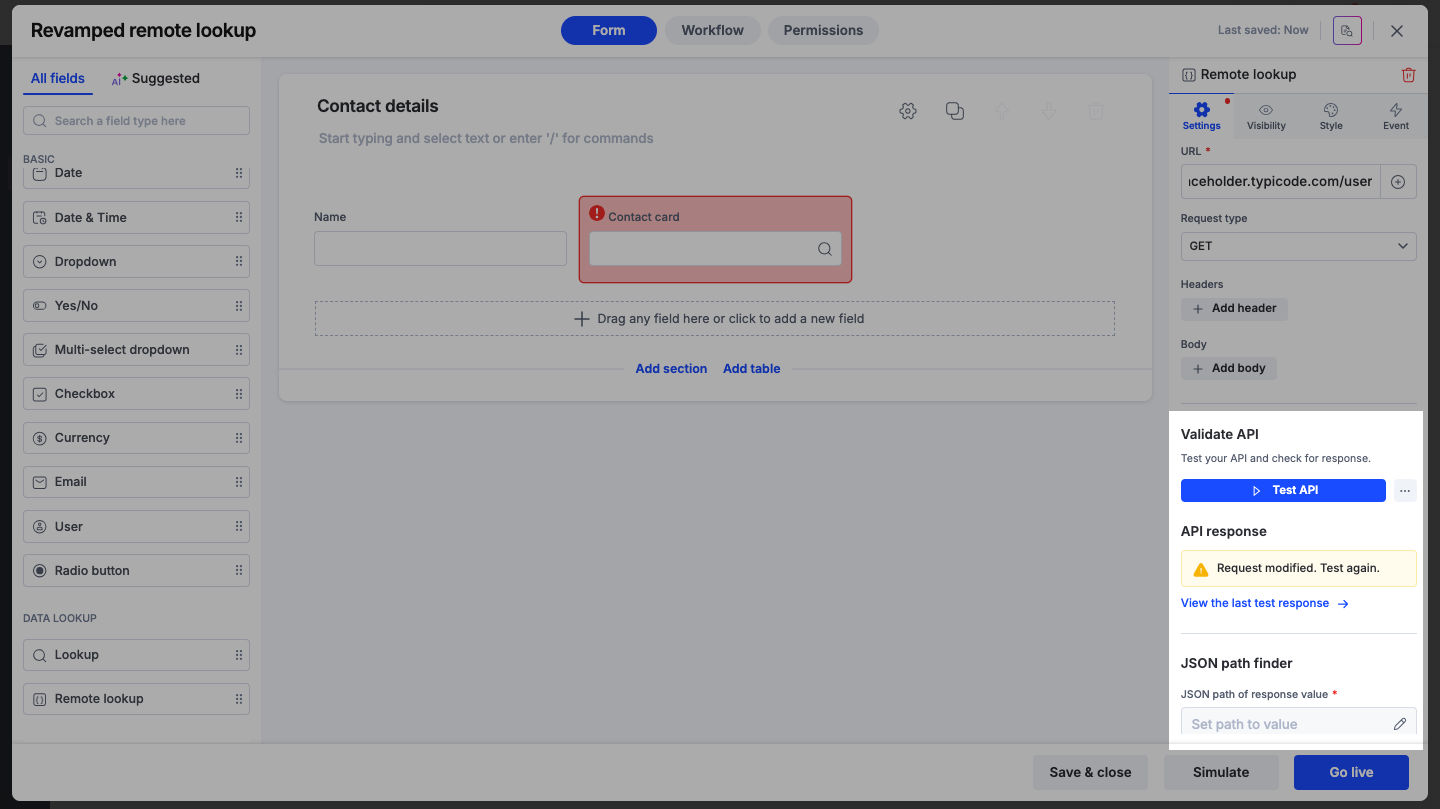
Note:
The test response is not stored permanently. If you click Save & close on the form, the cached response will be cleared. You must run the test again to view the response when you return to the settings.
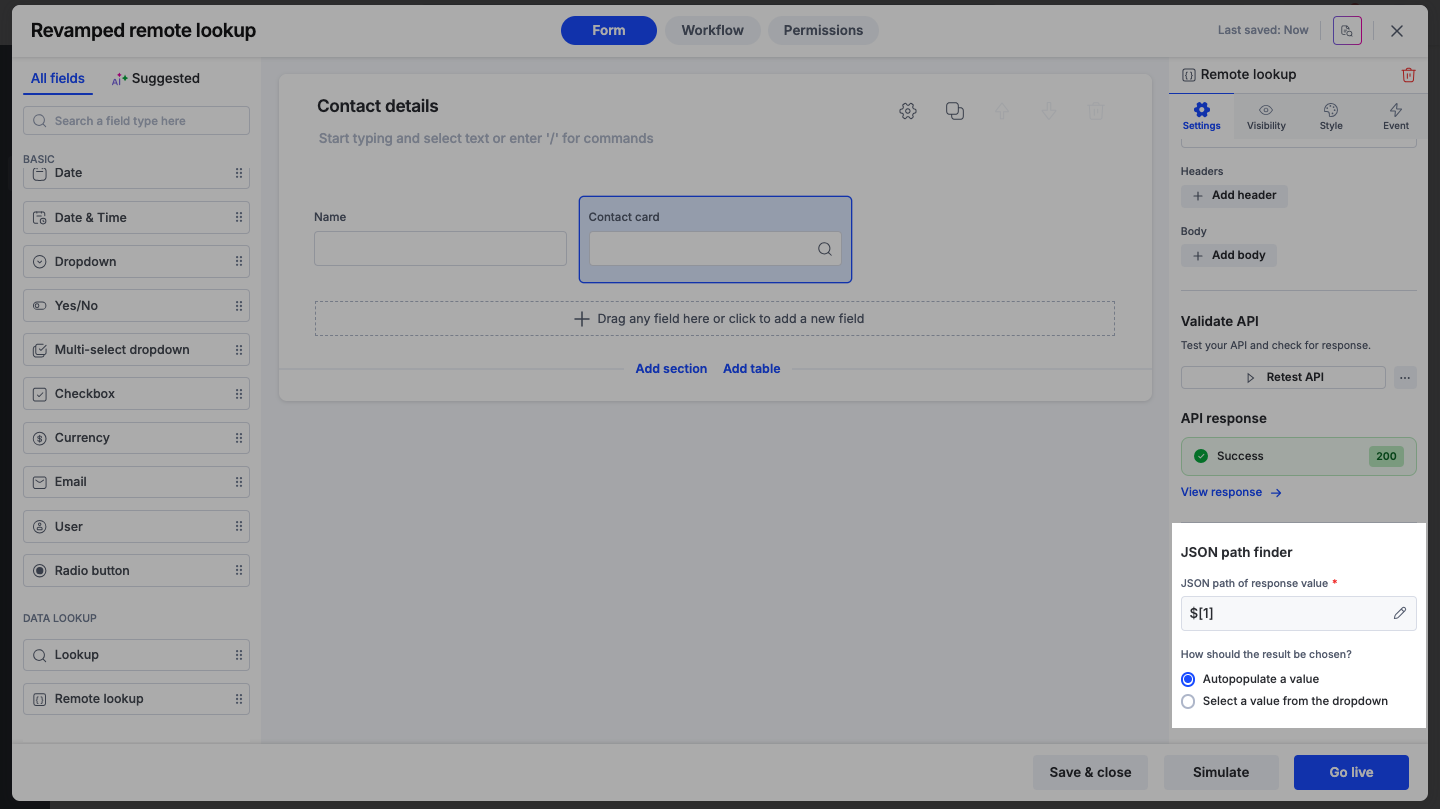
JSON path finder
Once the API connection is successfully validated, you need to specify exactly which data point to extract from the response. Click Set path to value to open the JSON Path Finder.
This tool provides three methods to help you locate the correct path within JSON or XML responses:
AI path finder
Simply type a natural language prompt into the search bar (for example, Give me city names or Get user emails). The system will interpret your request and automatically generate the correct JSON path (For example, $[*].address.city) for you.

Visual tree selection
Browse through the response tree displayed in the main window. Click on any specific node or value to automatically capture its path.
Manual entry
If you are familiar with JSON syntax, you can manually type the path into the input field while referencing the response tree below.
Previewing results
Once the path is set using any of the methods above, the JSON path result panel on the right side of the path finder will immediately display the specific values extracted from the response, allowing you to verify accuracy.
Using dynamic values in paths
You can make your JSON path dynamic by inserting values from other fields in your form.
Click the + button inside the JSON path input field.
Select the form field to insert it into the path.
Since the path now depends on variable input, the system requires a test value to verify the result. You will be prompted to enter a sample value for the dynamic field.
Click Simulate to see the JSON/XML path result with the test data.
Configuring the result format
Once the path is defined, choose how the result should be presented to the user:.
Autopopulate a value: Use this if the path returns a single specific value. The field will automatically fill with the fetched data.
Select a value from the dropdown: Use this if the path returns a list (array). The user will see a dropdown menu of options.
Note:
Text response: If the API response was identified as text earlier, these options are skipped, and the full response is used in the result.
Editing restrictions and dependencies
When editing an existing Remote Lookup field, the behavior changes based on whether other fields rely on it.
Editing a field with dependencies
If another field depends on this Remote Lookup field, you cannot make changes that could break that connection. You must clear the dependencies before editing the settings.
Test API blocked: You cannot run Test API. Clicking it will trigger a dependency alert asking you to remove the dependency first.
JSON Path locked: You cannot open the JSON Path Finder.
Configuration visible: All existing settings (URL, Headers, Path) remain visible but cannot be altered until the dependency is removed.
How to clear dependencies
To unlock the field for editing, you must identify and remove the conflicting dependencies. When you try to edit the settings, the dependency message pops up.
View connections: On the popup, click Show Dependencies. This will display a list showing exactly which fields are dependent and the nature of the dependency.
Clear dependencies: Remove the reference to the current Remote Lookup field on the dependent field.
Edit field: Once all dependencies are cleared, return to the Remote lookup field’s settings. The field will now be fully editable.
Editing a field without dependencies
If no dependencies exist, the field functions normally:
Test API: You can run the test. Upon success, the response preview loads, and the lower sections (JSON Path, Result Format) become editable.
JSON/XML path: This button remains disabled until you successfully run Test API or provide a sample response.
Using Remote lookup data in formulas
Data fetched by the Remote lookup field can be extracted and used in other parts of your form using formulas.
Syntax
For Number fields: Remotelookup_Fieldname.extractNumber(path, index)
For Text fields: Remotelookup_Fieldname.extractText(path, index)
Parameters
Path: The JSON path string pointing to the specific value in the response.
Index: The position of the item in the array.
Example
API Response:
JSON
{
"weather":
[{"main": "Clear", "temp": 25},
 {"main": "Rainy", "temp": 18}]
}
Formula
Weather_Lookup.extractText("$[*].main", 1).
Parameters
Path: "$[*].main" |
Retrieves the value of the main attribute from each object in the weather array. |
Index: 1 |
The index is the position within an array. |
Output
"Clear"