Backing up data to Amazon S3
Note: This service is available on request. Please contact our support team to enable it on your account.
Amazon S3 prerequisites
Before you start account backup configuration in Kissflow, you must grant the following Amazon Simple Storage Service (S3) bucket permissions in your IAM policy:
s3:PutObject - Allow users to add objects to a bucket.
s3:GetObject - Allow users to fetch objects from a bucket.
s3:ListBucket - Allow users to list all the objects in their bucket.
You must additionally create your AWS access key ID and secret access key. You can copy these credentials to your clipboard or download them as a CSV file for authentication inside Kissflow.
Configuring data backup
As a Super Admin, you can configure your backup preferences according to your organization's needs. Here’s how you can backup your Kissflow data to Amazon Simple Storage Service (S3):
Sign in to Kissflow.
Click your profile picture on the top right corner of your page, then click Account administration > Data backup.
Click Start configuration on the Data backup page to set up your data backup preferences.
Data backup configuration involves three separate steps.
Authentication of storage modes.
Data backup management.
Selection of data categories.
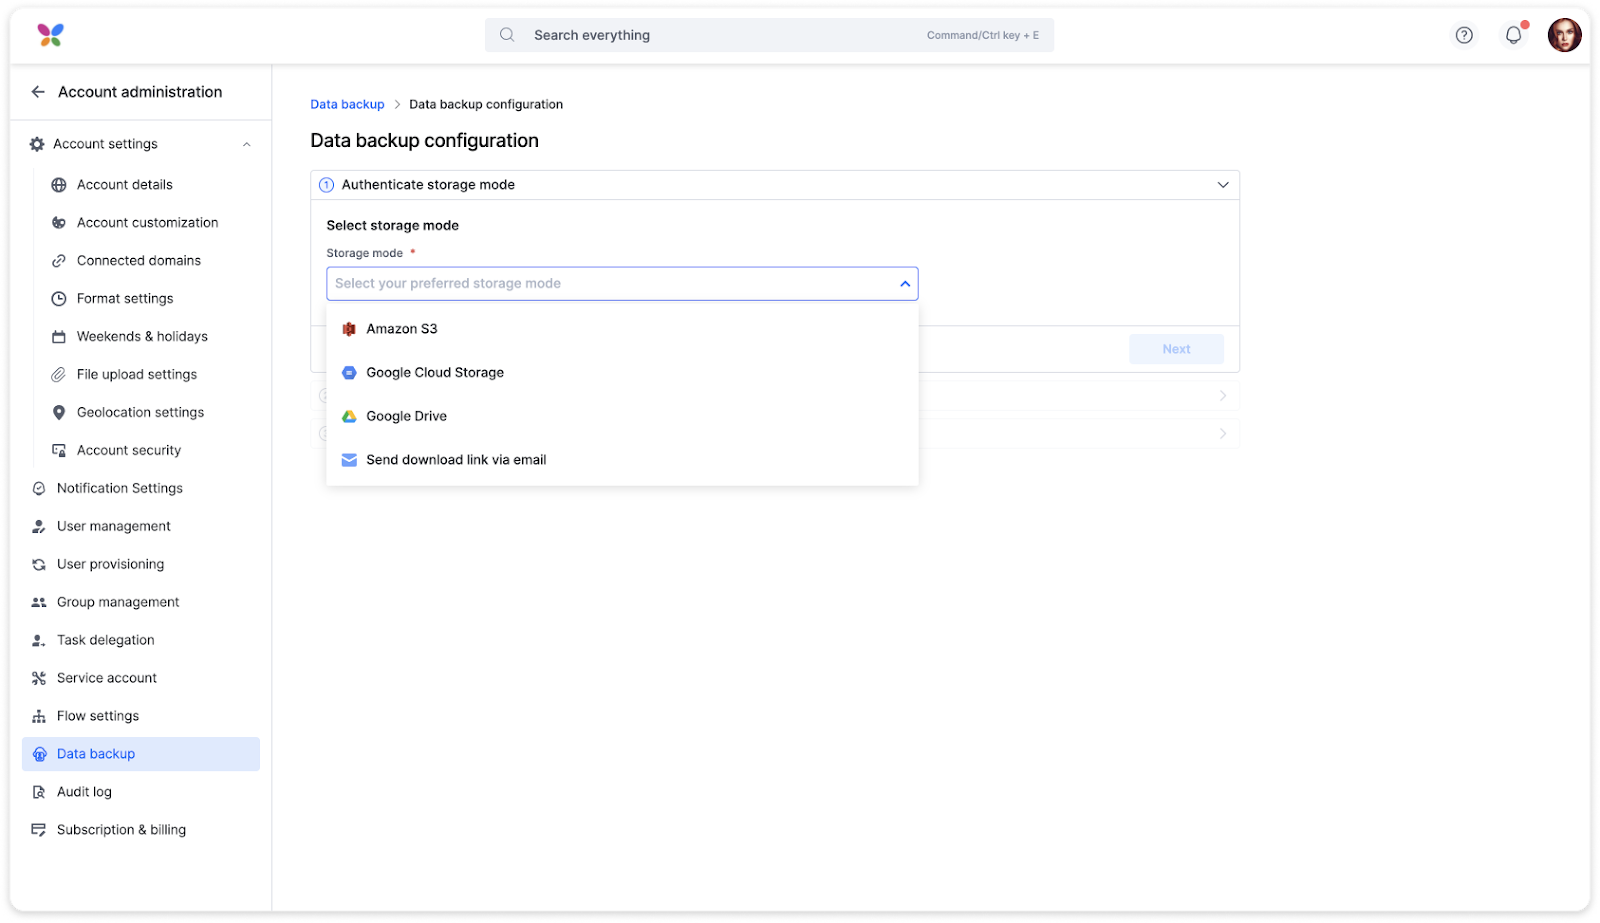
Authenticating Amazon S3 account
Follow the steps below to authenticate your Amazon S3 account:
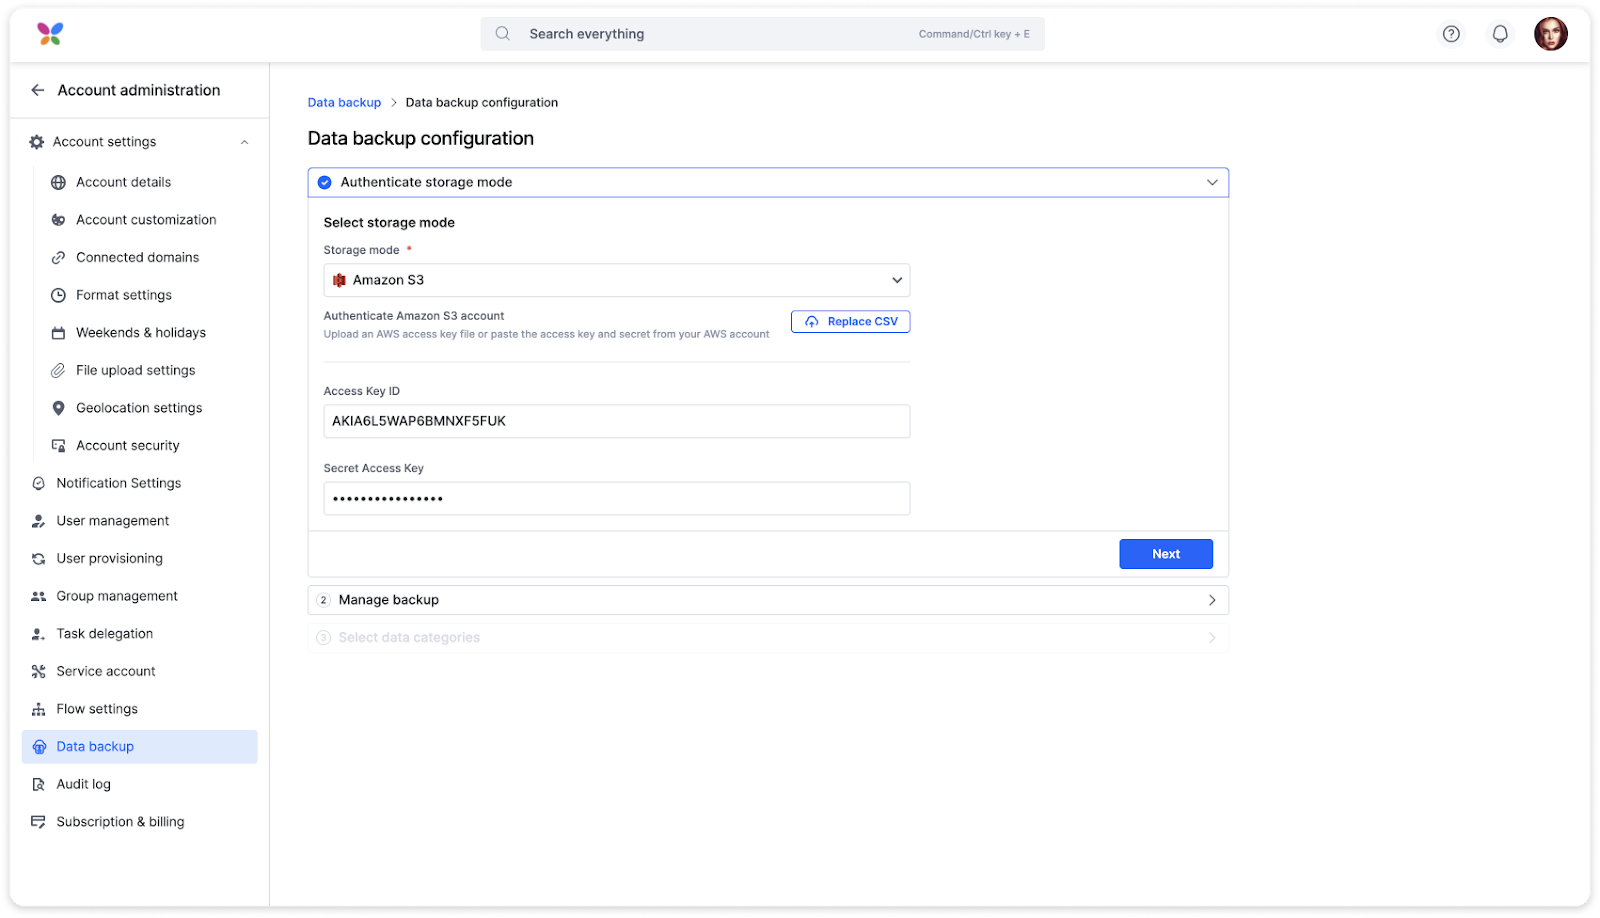
Select Amazon S3 as the storage mode from the drop-down.
Click the Upload CSV button to auto-populate your AWS access key ID and secret access key.
Note:
You can alternatively paste your copied credentials in the respective fields.
Click Next.
Note:
If you wish to change your AWS account credentials, click the Replace CSV button to upload a new CSV file containing a unique access key ID and secret access key.
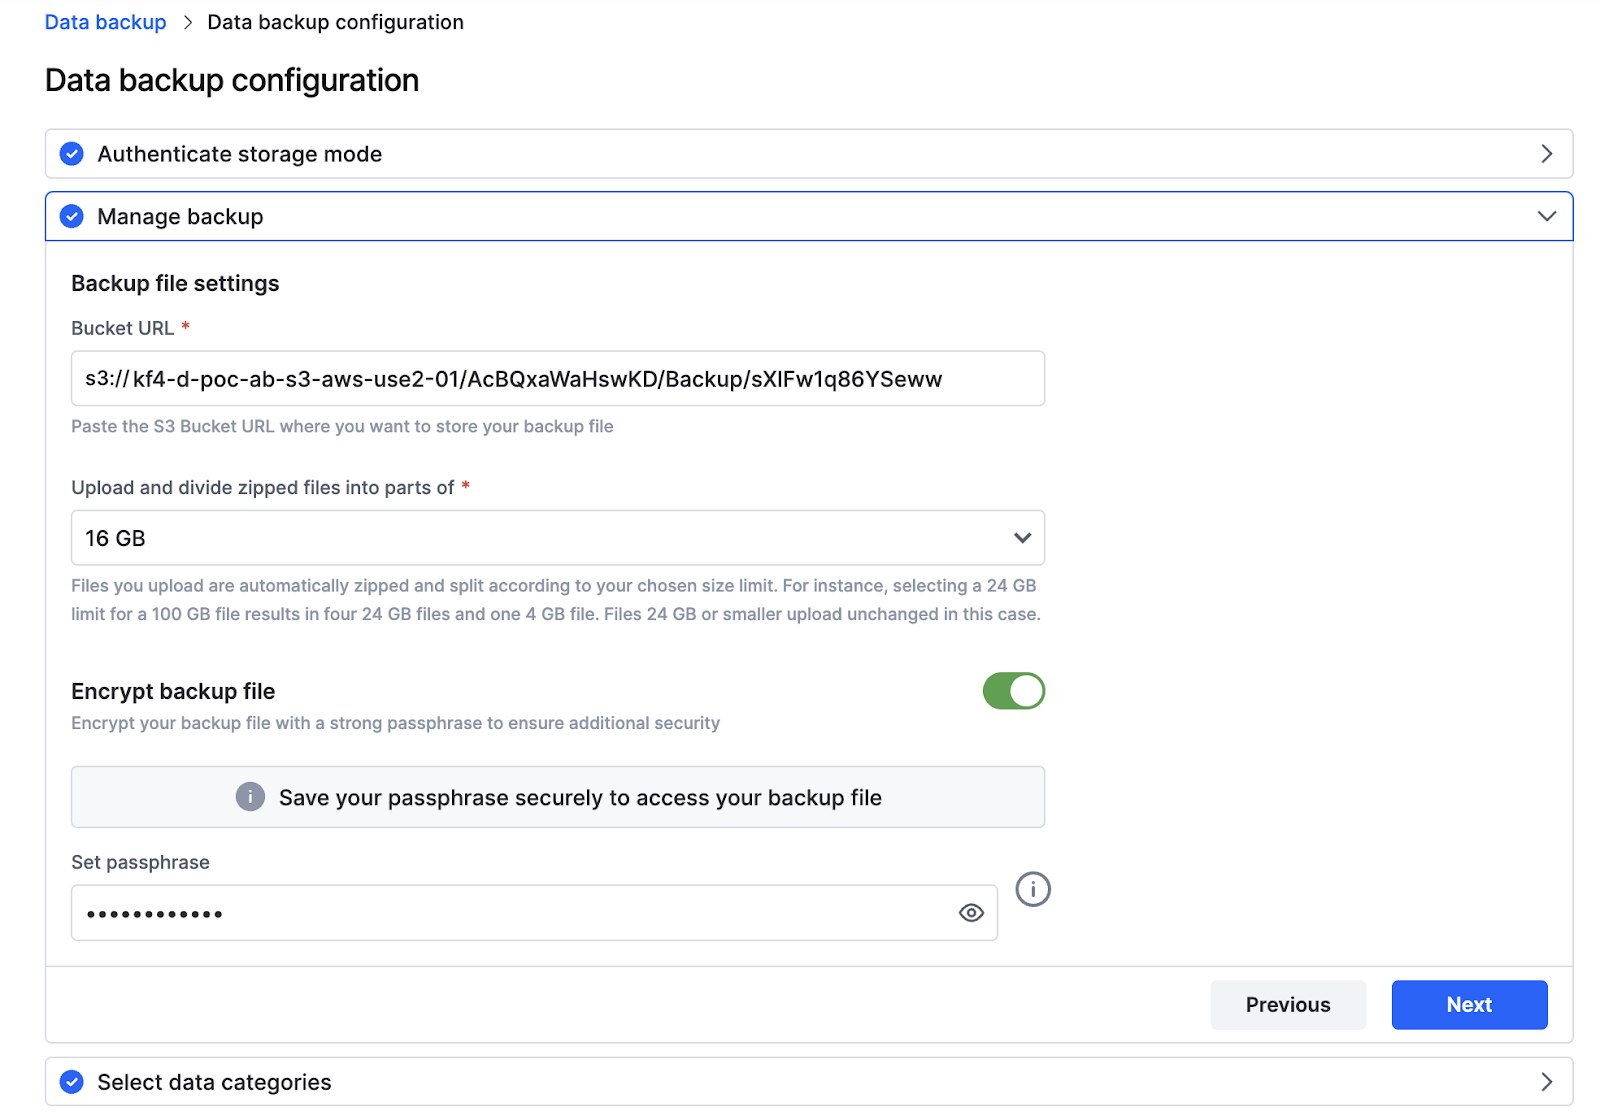
Managing backup
Follow the steps below to manage backup settings:
Select file location. Paste the S3 Bucket URI where you want your files to be stored.
Select ZIP file size. You can select any of the following ZIP file sizes: 4 GB, 8 GB, 16 GB, or 24 GB. Files you upload are automatically zipped and split according to your chosen size limit.
For instance, selecting a 24 GB limit for a 100 GB file results in four 24 GB files and one 4 GB file. Files 24 GB or smaller upload unchanged in this case.Encrypt backup file. Encrypting backed-up files is an optional feature. You can switch the toggle button to add a passphrase to encrypt your backed-up file. It offers additional security to the backed-up data.
Your passphrase must follow the conditions below:Contain at least eight characters.
Contain upper and lower case characters.
Contain at least one numeric character or symbol.
Note: After you’ve encrypted your file, save your passphrase to access your backed-up files later.
- Click Next.
Selecting data modules for backup
Kissflow allows for modular data selection for backup, catering to specific organizational requirements. You can choose to back up:
User and group data: Includes all account user and group data.
Transactional data: Encompasses all flow item details such as status, comments, and assignees.
Audit log data: Contains last year's audit logs at both flow and account levels.
Attachments: Covers all attachments within flows like processes, boards, datasets, and apps.
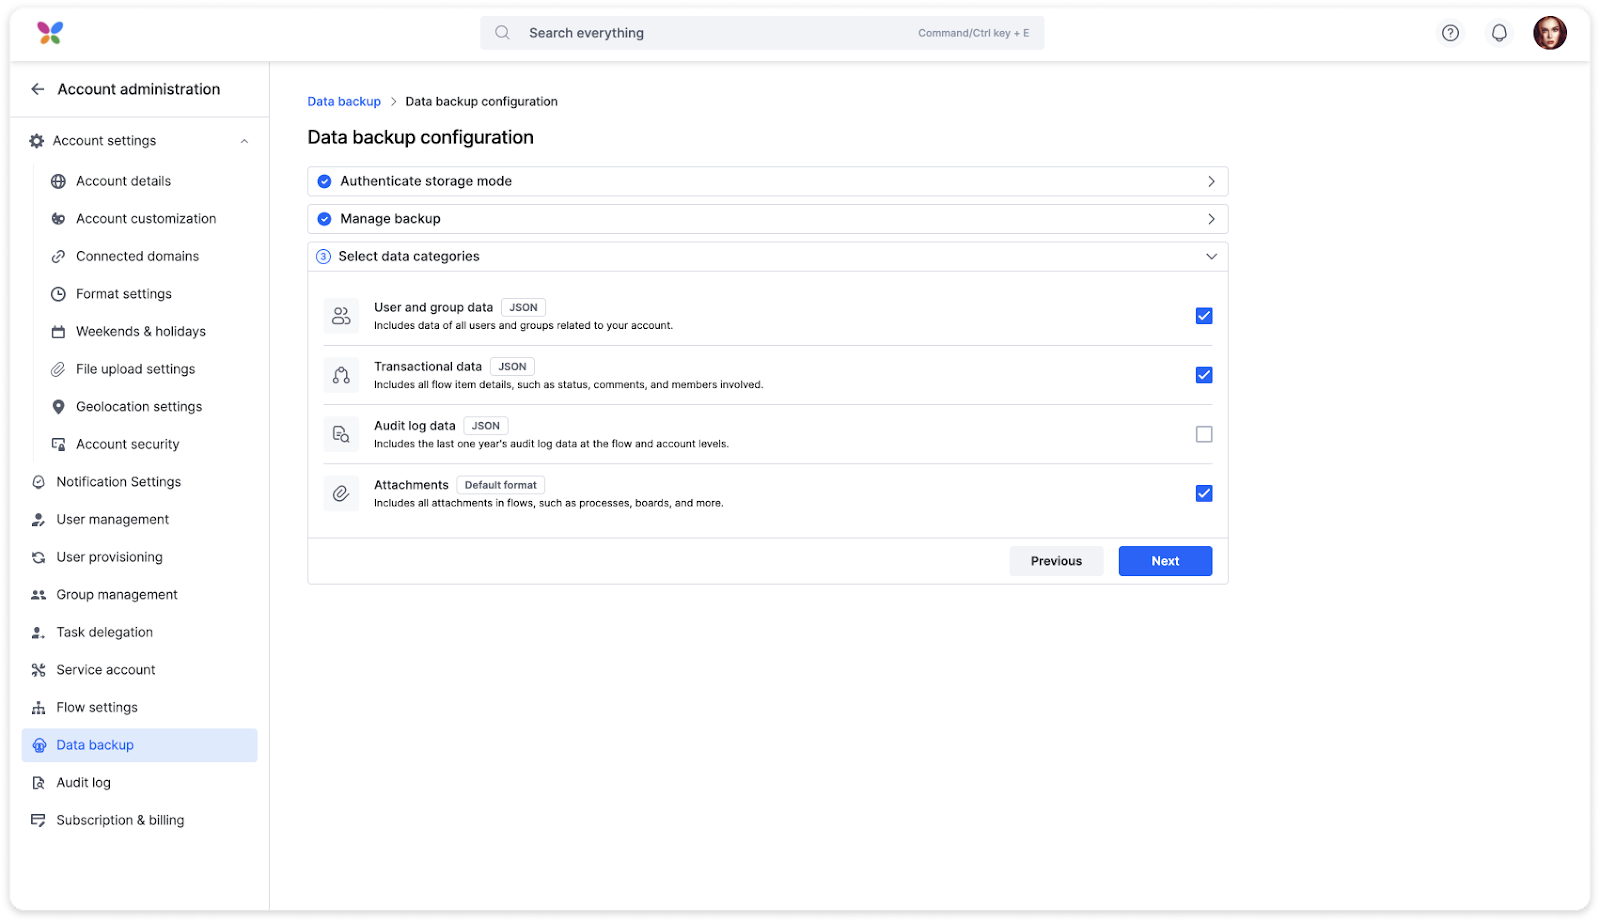
Select one or more data categories by clicking the checkboxes and clicking Next. A backup confirmation popup will appear.
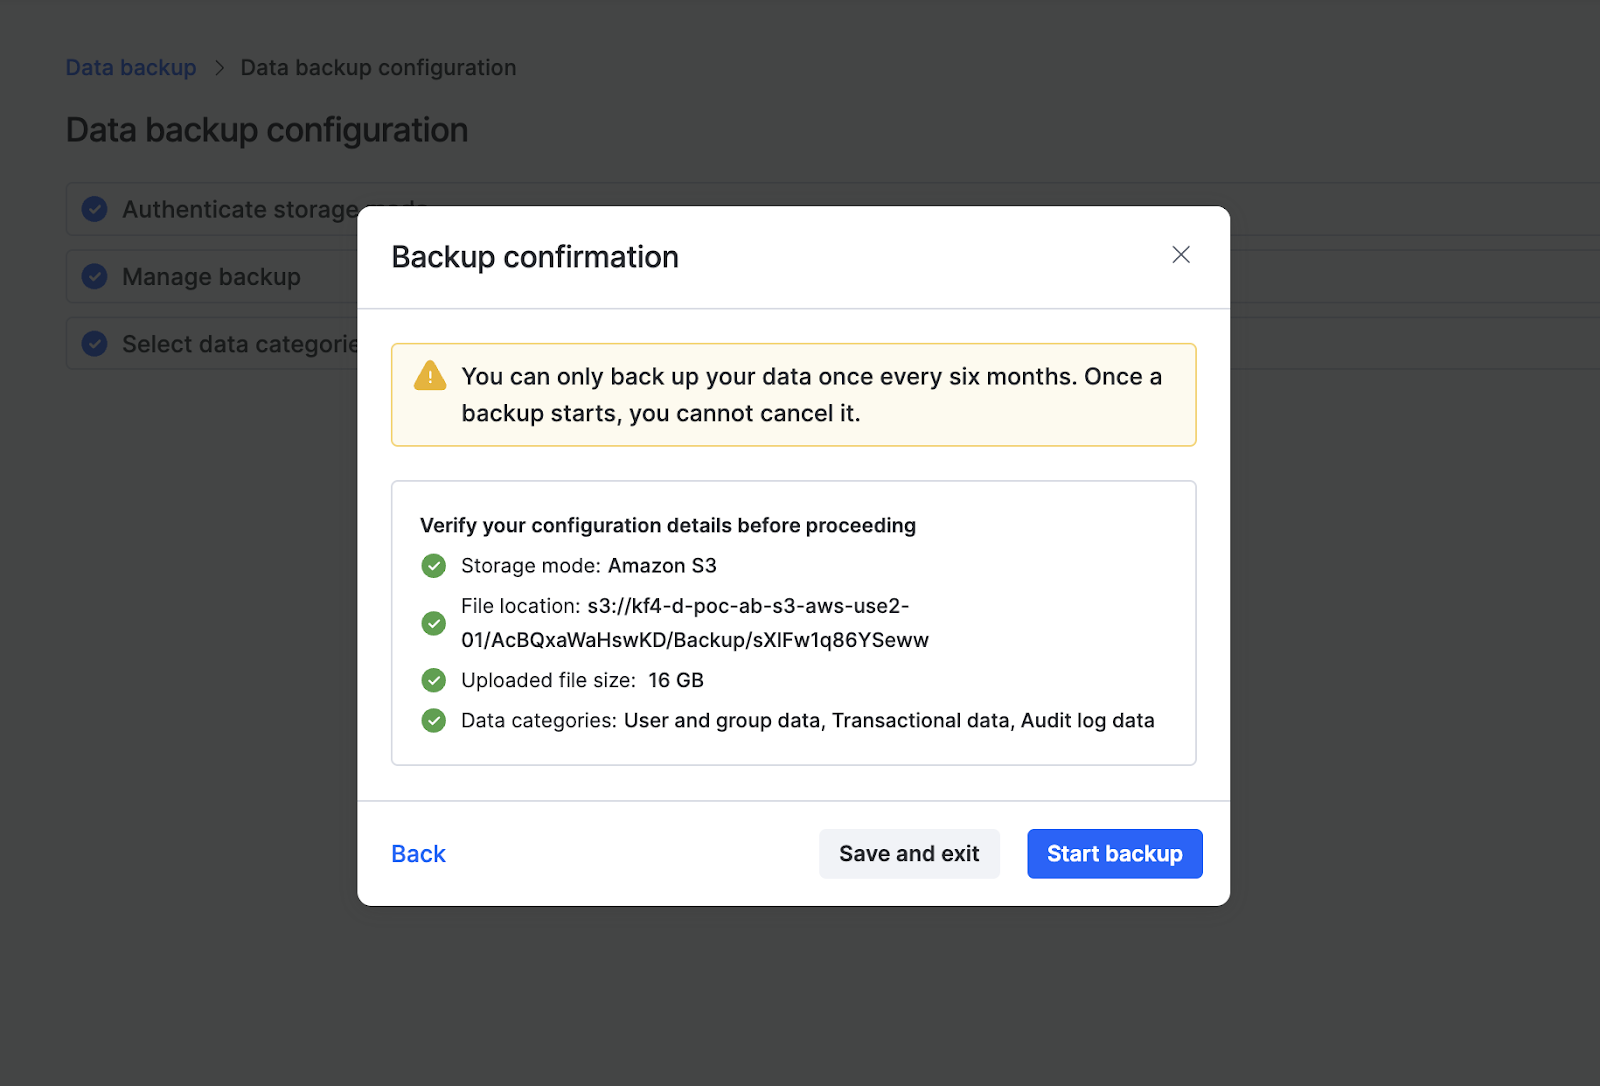
Verify the configuration details and click Start backup.
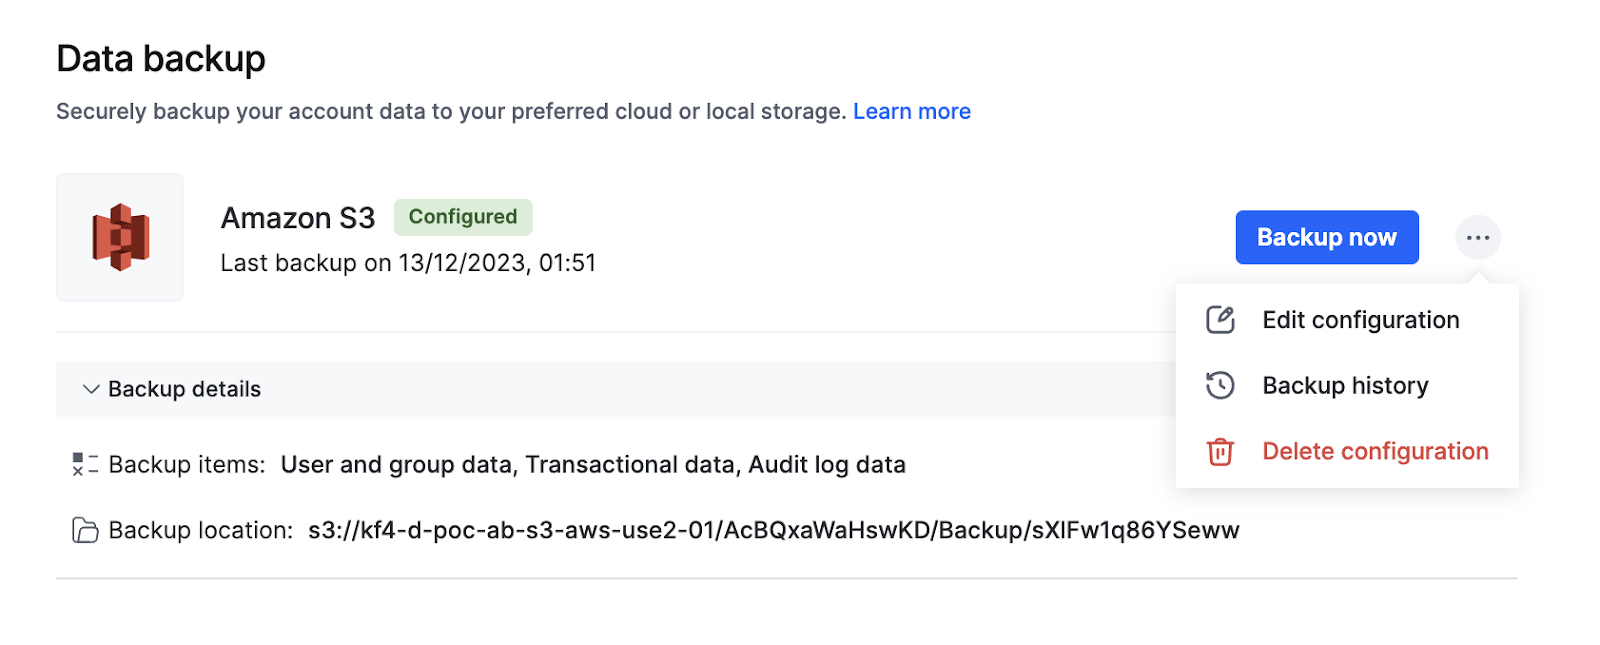
However, if you save the configuration and exit the window, you can restart the backup process. You can also edit the configuration, delete it, or view the backup history from this page.