
Board notifications
You can create and customize notifications to stay informed about important updates or ensure timely communication within your team.
You can also select the notification channels (email, web app, and push) through which you want to receive notifications by clicking the More options button () in the top right corner > Notification channels.

There are two types of notifications available within Kissflow Boards:
Item notifications - These notifications are related to any item within the board. You can create and customize item notifications to ensure that you stay updated on relevant activities and changes.
Board management notifications - These notifications provide board users and admins with any updates related to managing a board. They can only be toggled on or off.
Creating item notifications
To create an item notification inside boards,
Click the Manage button at the top right corner > Settings > Notification settings. You'll find a list of all available item notification events.
Click + New notification to start creating a new notification.
Configure details -
Select the notification event and conditions for triggering the notification.
Select recipients to whom the notification should be sent. Click Next.
Note:
If there’s a user field type in the form and a user has been selected, the user’s name will be shown in the recipient drop-down box.
Note:
Changing the notification event after configuring the conditions and recipient will reset those configurations.
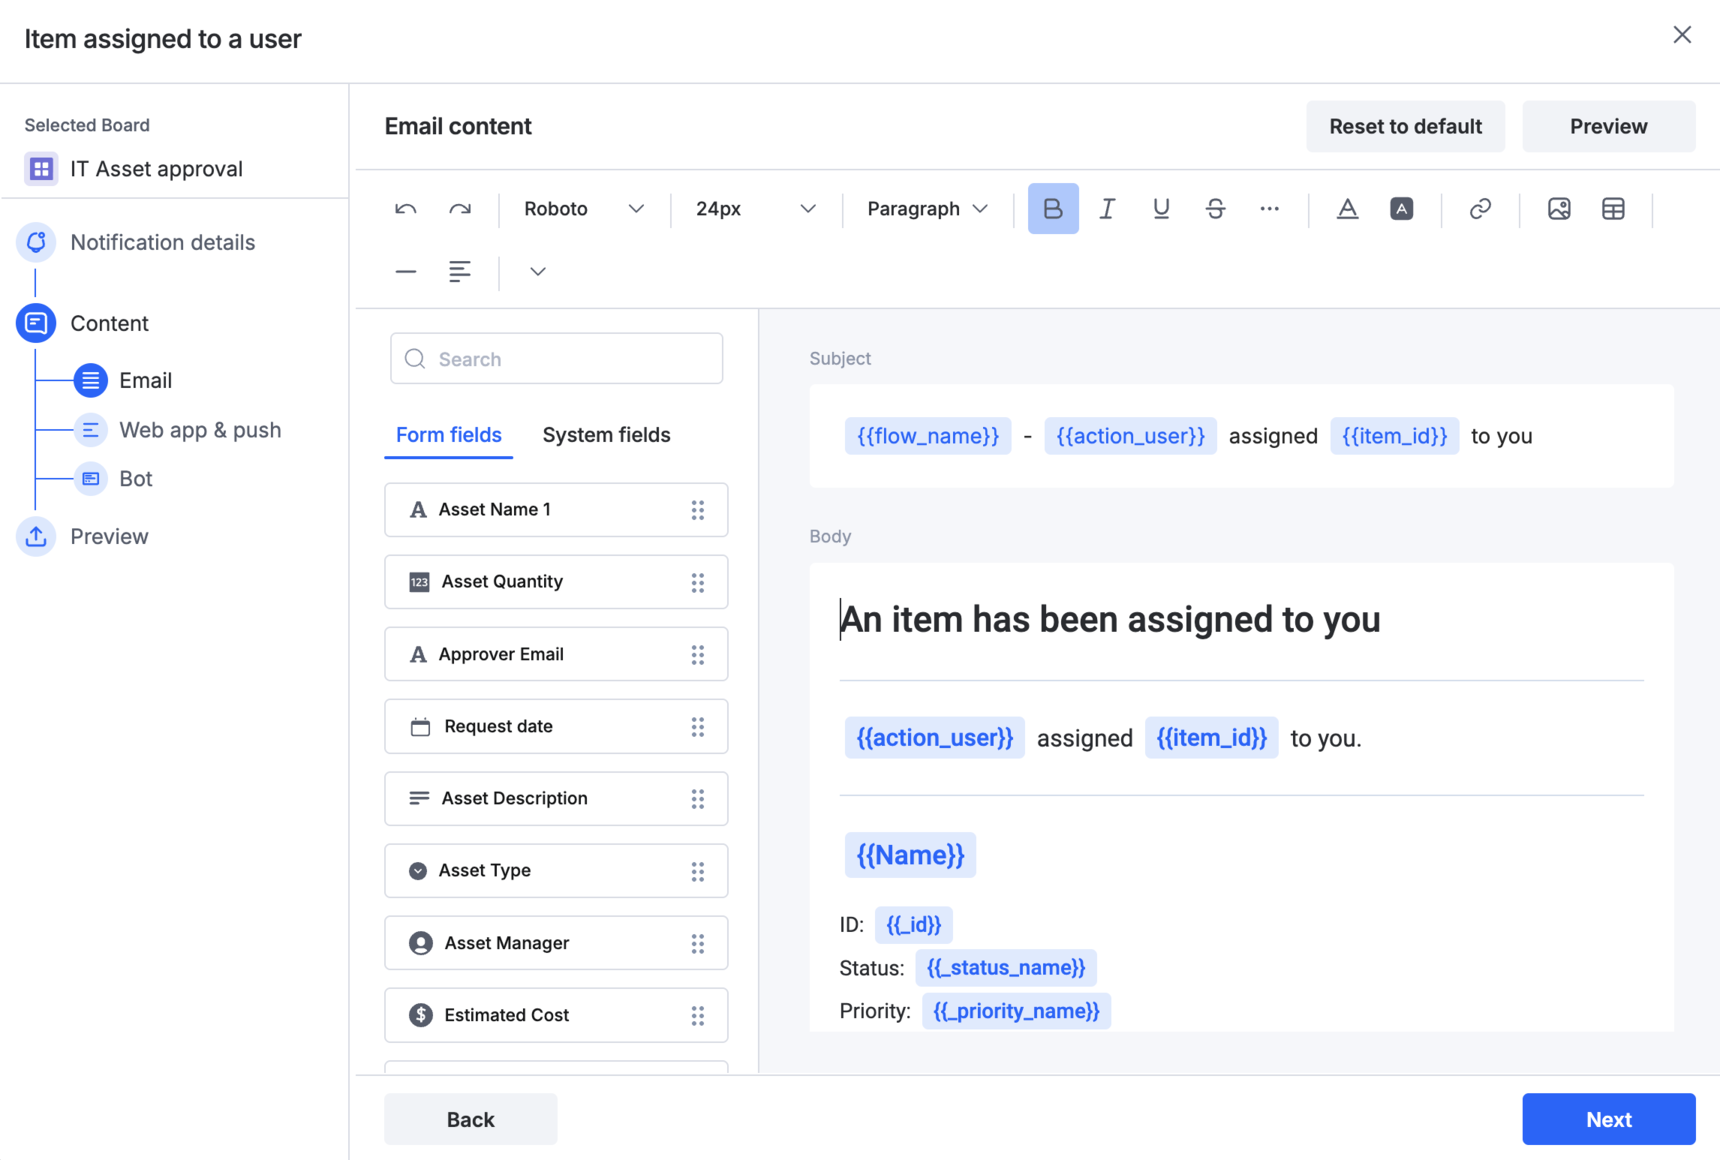
4. Customize and preview content -
- Email content is for email notification channels where you have a large space to convey information comprehensively and provide more details for recipients to understand the notification fully.
- Web app & push content provides a concise summary or snippet of the notification message, ideal for channels like web app and push notifications, where space is limited.
- Bot content is the message displayed in chat apps like Slack, Microsoft Teams, and Google Chat, so you can view key details without leaving your chat.
Click Next.
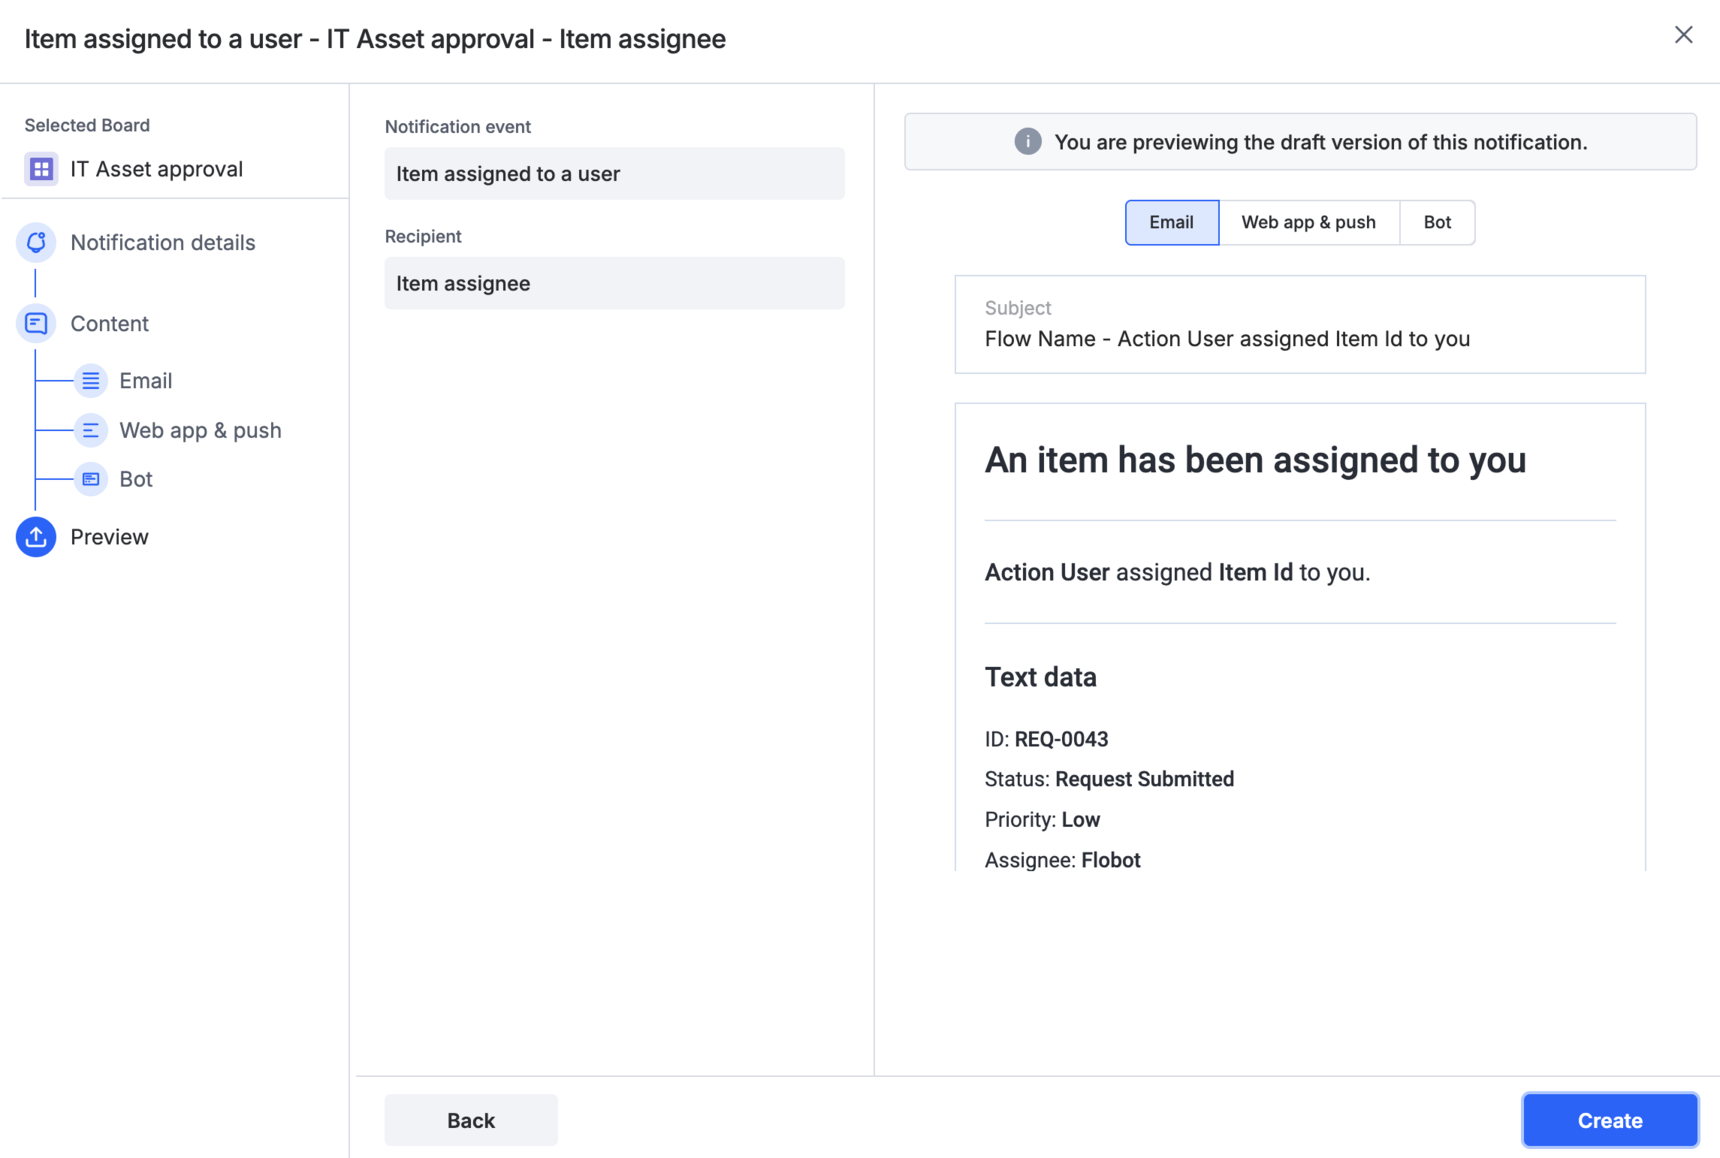
5. Preview - Have a preview of the notifications, and click Create. In the pop-up that appears next, you can choose to change the system-generated notification name and give a desired name.
Alternatively, if you want to set up custom email notifications for recipients outside Kissflow, you can use the send an email integration action.