
Field visibility
All the fields you create as part of your form are visible to the end user by default. However, the Visibility settings allow limiting the visibility of certain fields based on your business requirements.
Click a field and access the Visibility tab in the right side properties panel or hover over a field and click the spectacle icon to configure a field's visibility conditions.
The Default visibility state of a field is always set to Visible, however, you can toggle it to Hidden if you wish to.
Adding visibility rules
A visibility rule lets you show or hide a field based on a certain condition or a set of conditions involving other data in the form.
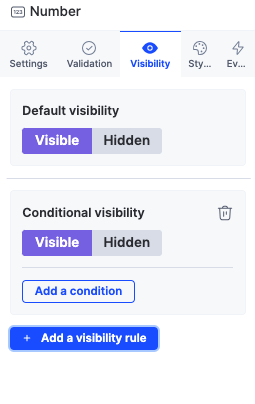
- Click Add a visibility rule in the field's properties panel to display or hide the field based on certain conditions.
- Click Add a condition to add as many filter conditions as you want. Select Match all if all the filter conditions are to be met. You can select Match any if you want at least one of the filter conditions to be met.

Visibility rules for sections
You can set visibility conditions for a section like how you do it for a field. Click the gear icon ( ) on the top of the section to access its settings.

Example
Let's assume that you are creating a Travel request form. As you know, a few trips might mandate a cash advance while others don't. In this case, it is recommended that we limit the visibility of the Cash Advance field based on whether the trip requires an advance amount or not.
- Create a Yes/No field by the name Do you need advance in cash?
- Create a Currency field by the name Cash Advance.
- Click the Cash Advance field to access its visibility settings in the right panel or hover over the spectacle icon to land on the visibility settings directly in the field properties panel.
- Toggle the default visibility of the Cash Advance field to Hidden.
- Click Add a condition.
- Display the field only when the value of the Do you need advance in cash? field is Yes.
Visibility rules for tables
When setting conditions for fields in a table, the fields you select determine the scope of visibility:
Section + table field: The condition evaluates each row individually and applies visibility per row when the condition is satisfied. For example, to show the Attach bill field only for travel expenses exceeding $1,000:
Select the Attach bill field in your table.
Add a condition: Reimbursement type (section field) is Travel AND Amount (table field) is greater than $1,000.
If a user selects Travel and enters an amount over $1,000, the Attach bill field becomes visible for that specific row. For all other rows, the field remains hidden.
Only section, or section + section field: The condition applies to the entire column across all rows.
For example, if you want to show the Hotel name column only when the user is claiming travel expenses:Select the Hotel name field in your table.
Add a condition: Reimbursement type (section field) is Travel.
If a user selects Food, the Hotel name column is hidden for every single row in the table. If they switch to Travel, the entire column appears across all rows.
Difference between field visibility and permissions
Field visibility shows and hides fields based on default settings or other data in the form. In the Permissions section of the process editor, you can make fields editable, read-only, or hidden. These settings are based on what step in the workflow the item is in, not on form data.
These two different settings can affect each other.
- If the field visibility is set to Visible, but the permissions setting is Hidden at a particular step, the field will be hidden at that step.
- If the field visibility is set to Hidden, but the permission setting is either Read-only or Editable, the field will be hidden at that step.