
 User guide
Application roles

Creating functional roles for accessing an application
Individuals or application-level user groups, be it in-app (within the same application) or external (portal apps), representing business units, departments, or divisions that will interact with the live application, are known as roles. Each role can be assigned access permissions to process, board, and dataform that apply to all its users.
Adding a role to an application
Inside your application's builder, click the Role option on the left navigation bar. You can create an in-app role or link a role from an external app.
Creating an in-app role
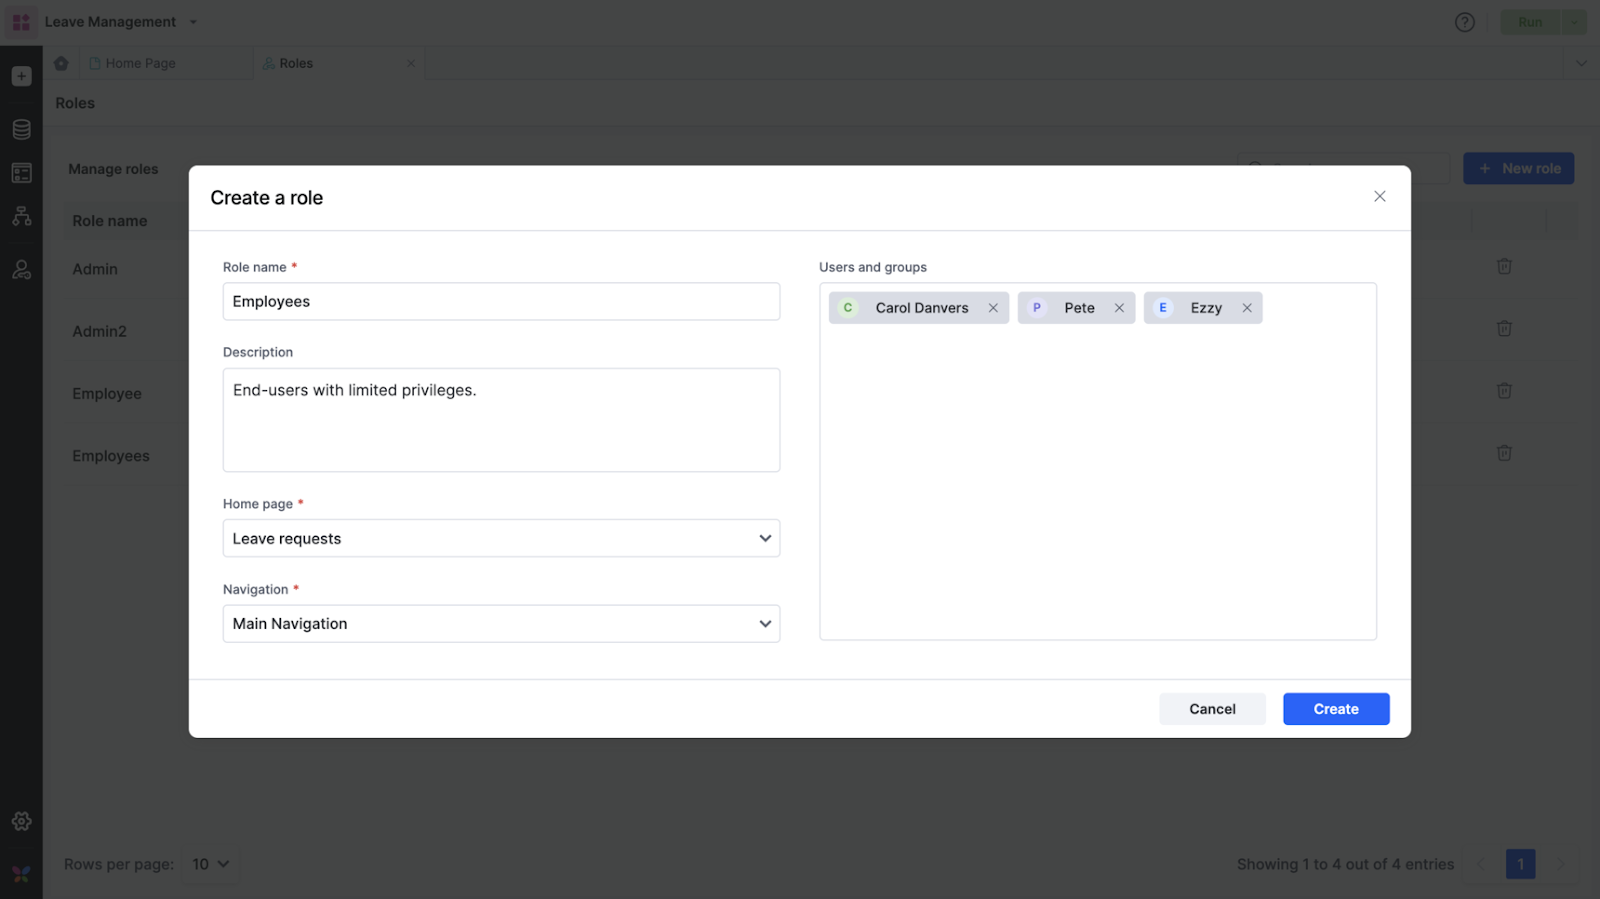
Click + New role.
Provide a role name and description. Set the home page and navigation bar for users with these roles to see when the application gets published.
The home page and navigation are always set as default. You can change this to a page or navigation you've created.
Add users and groups from your account administration that will be part of this functional role.
Save the role.
Linking a role from an external app
Click + Link new role.
Select the external app and the roles from the dropdown menus.
Link the roles.
Editing roles and permissions
In-app roles
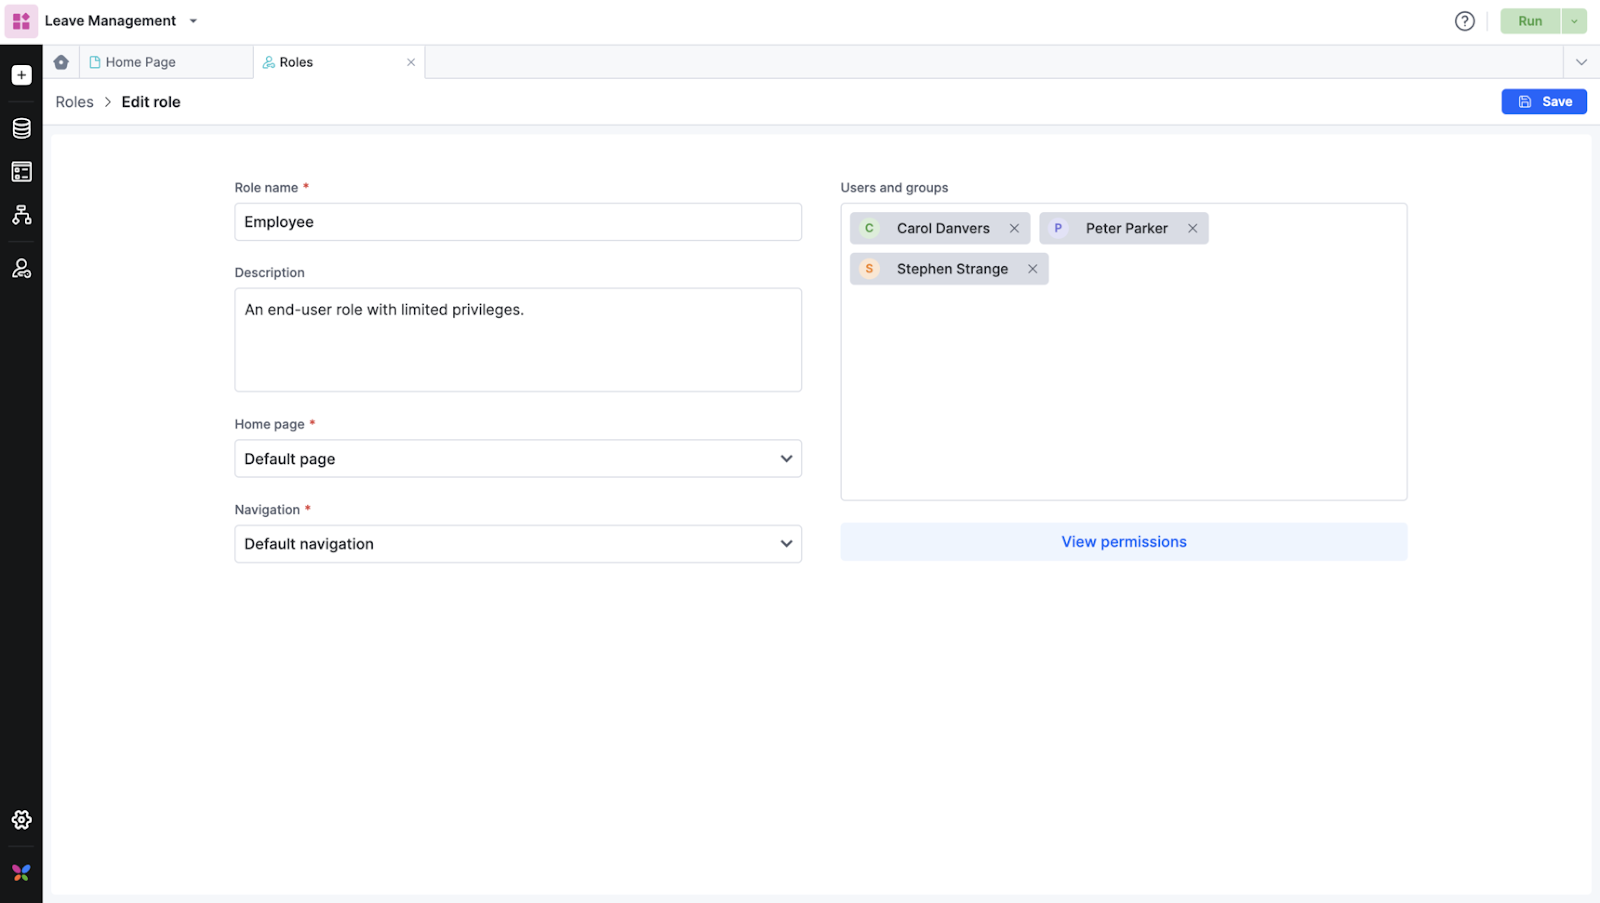
After creating a role, the same will be shown on the Roles page. Click a specific role that you wish to edit. You will be taken to the Edit role page next.
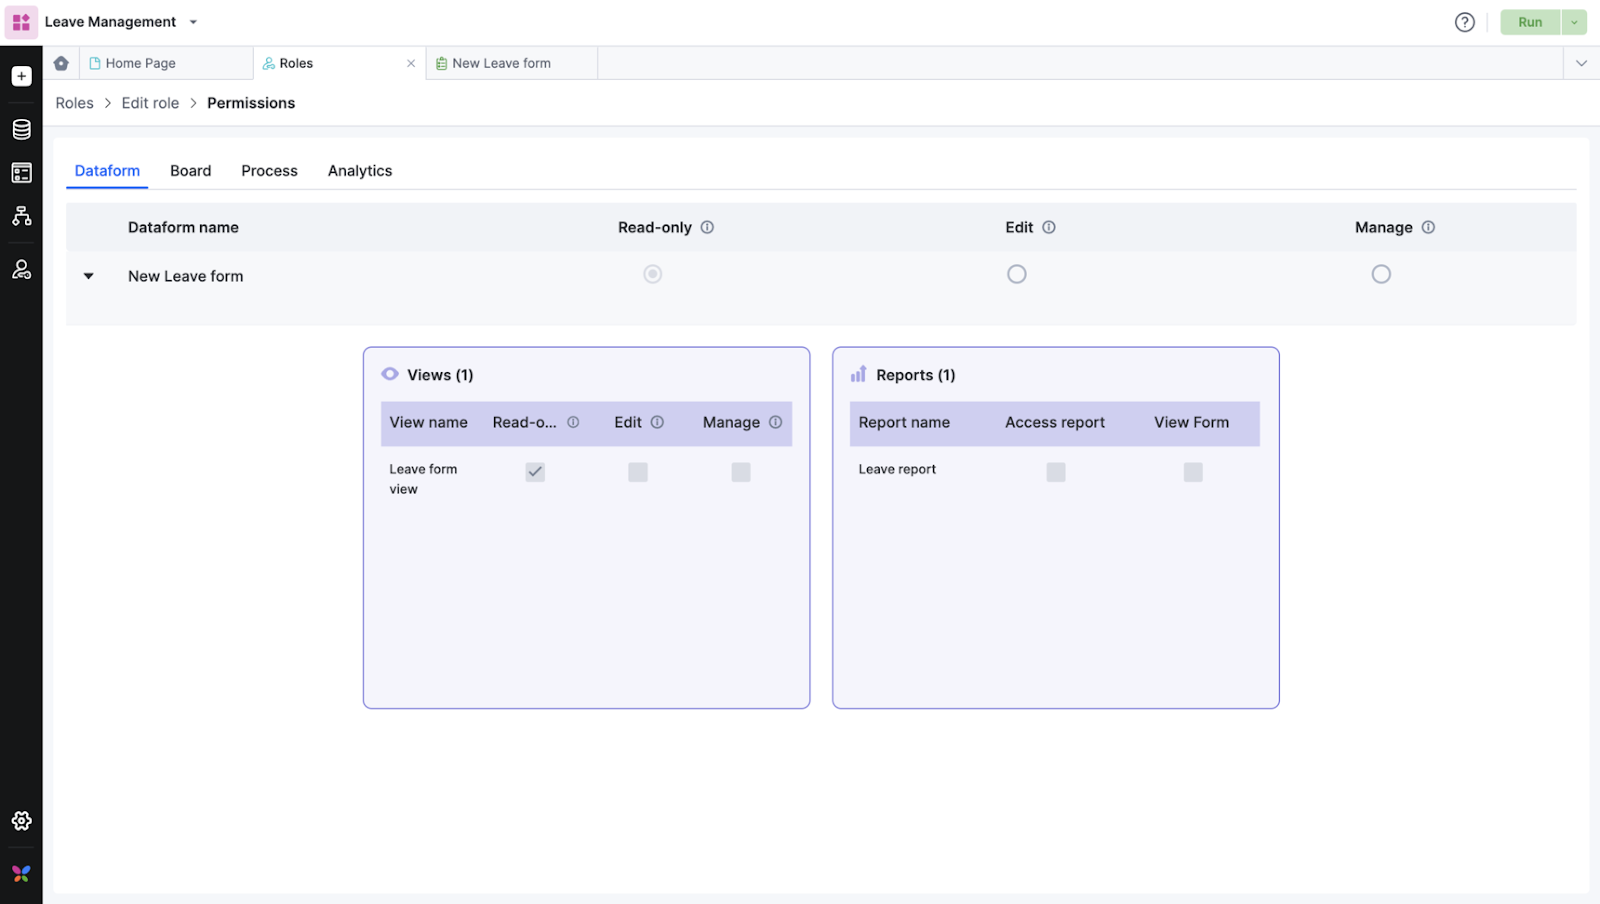
Click View permissions.
Here, you can turn your roles' permission levels on or off. Click the checkboxes to manage permissions for working with processes, boards, datasets, and lists. Inside your permissions page, click any of your processes or boards to view a list of all the reports associated with that flow. Similarly, you can see the dataset views related to a dataset when you click it.
Click the back button > Save to set the new permissions for this role.
External app roles
You cannot modify an external app’s role directly from the source app. Instead, you must edit the roles on the external app's in-app page.
To view permissions, hover your cursor over the role name and click View permission. The permissions granted for all data shared across various data modules in the app will be listed here.
Deleting roles
You can use the search bar to find a specific role if you have several roles in your application.
For in-app roles, you can click the Delete button (), while for external apps, you can use the Delink button (
).