
Image, Attachment, Smart attachment, and Signature fields
Use Attachment, Smart attachment, Image, and Signature fields to collect files and signatures in a form. Choose the field that matches what you need:
- Attachment: Collect supporting files, such as invoices, spreadsheets, and documents.
- Smart attachment: Extract information from uploaded documents to help fill in a process form.
- Image: Upload and display one image in a field.
- Signature: Collect a drawn signature or one saved in the user's profile.
Attachment field
Use an Attachment field to add supporting files to a form.
In the live form, click Attach files and choose files from your device or an available cloud storage provider. Grant access to the provider if prompted.
File size and attachment count
- Size per file: Each attachment can be up to 100 MB by default. A form creator can set a lower maximum size.
- Number of attachments: There is no default maximum number of attachments stored in an ordinary Attachment field. A form creator can set a maximum for that field.
- Files selected at a time: The file picker normally allows up to 10 files per selection. A configured maximum attachment count can change the allowed selection; follow the limit shown in the field.
Example: With the default size limit, two 60 MB files can be added to the same Attachment field, provided its attachment-count and file-type rules allow them. Each file is below 100 MB, even though their combined size is 120 MB.
The 100 MB limit applies to each file. It is not a combined 100 MB allowance for all attachments in the field.
Click a file icon to preview a supported file without downloading it. Preview is available for PDF, XLS, XLSX, and ODS files.
To remove a file, hover over it and click Remove ( ).
).
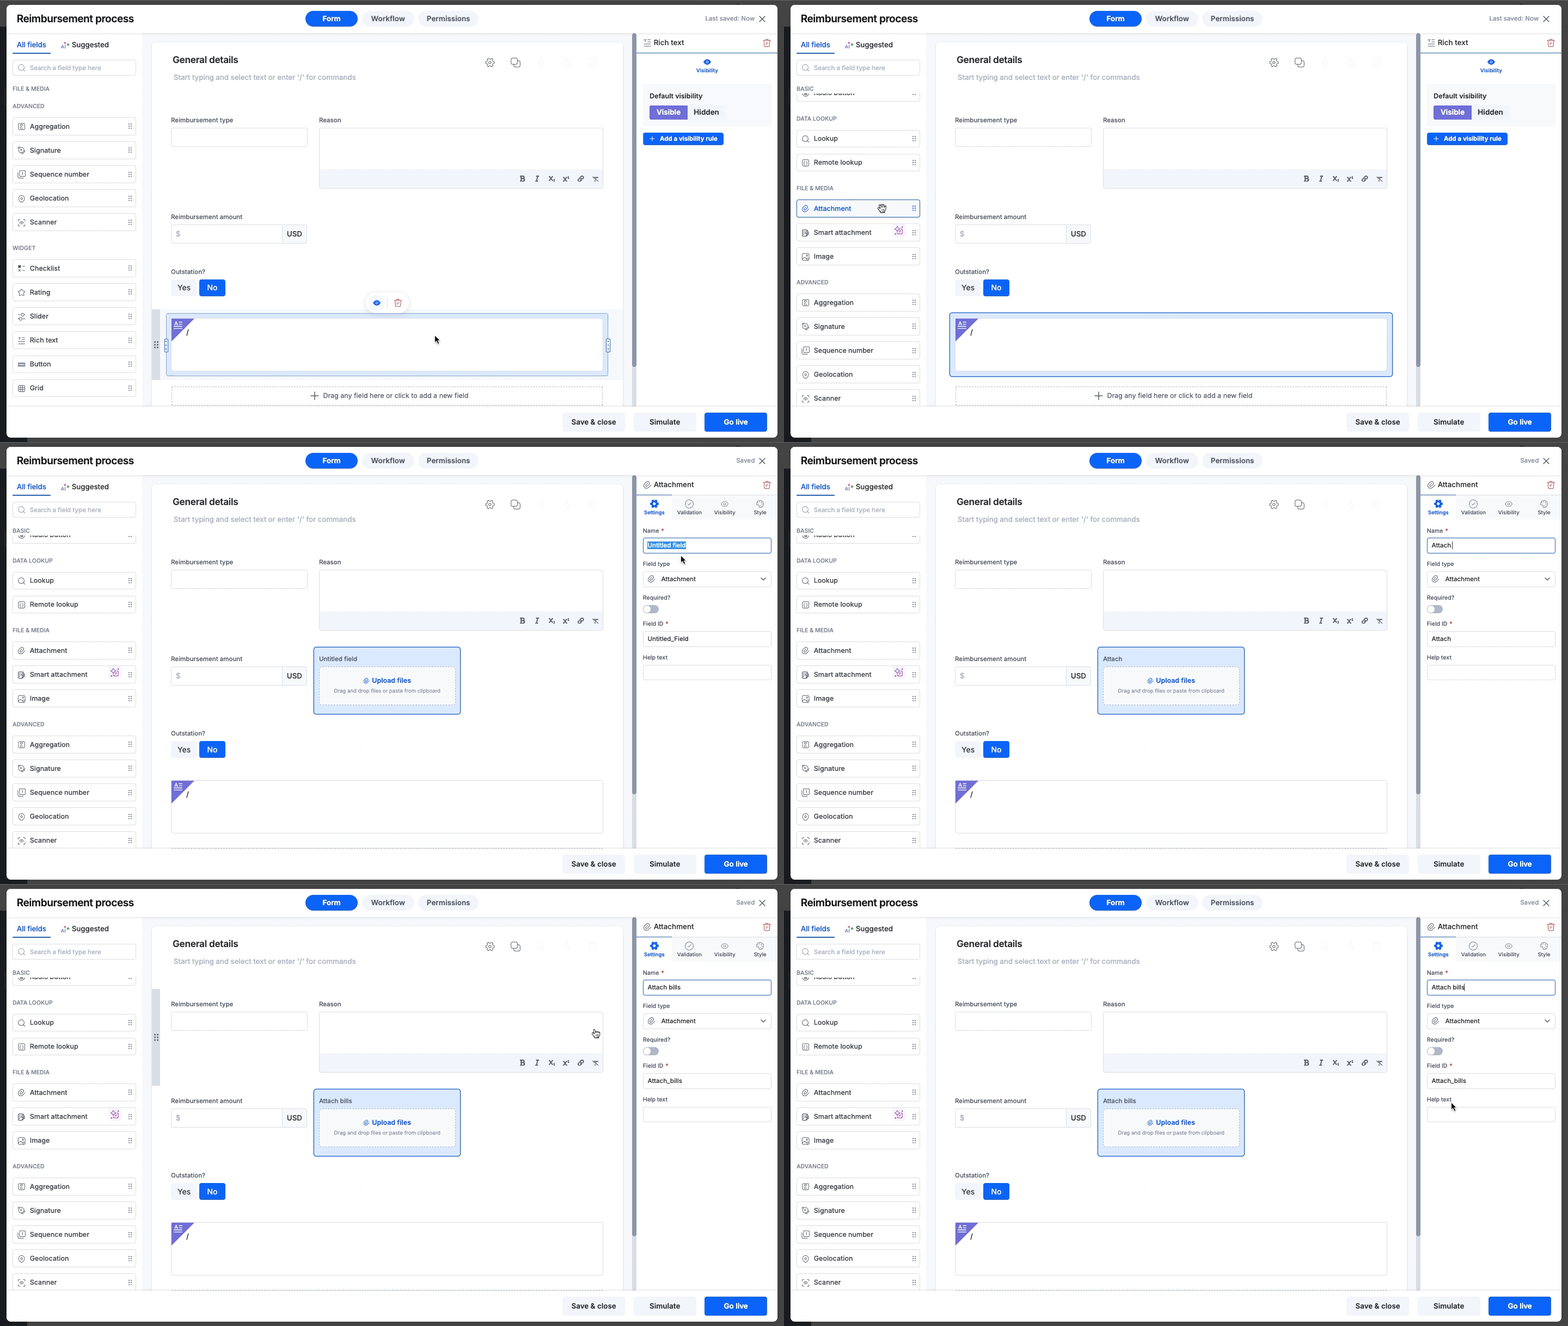
Validations
Form creators can configure the following rules for an Attachment field:
- Attachment file type: Restrict the allowed formats. Options include JPG, JPEG, PNG, BMP, GIF, DOC, DOCX, PDF, PPT, PPTX, XLS, XLSX, CSV, TXT, EML, and ZIP.
- Max attachment size: Set the maximum size of each individual file, up to 100 MB. For example, a 20 MB limit requires every file to be 20 MB or smaller.
- Maximum number of attachments: Set how many files the field can contain.
- Minimum number of attachments: Set how many files users must attach.
These rules apply independently. A file must meet the size and format requirements, and the field must meet any attachment-count requirements.
Smart attachment field
A Smart attachment field uses intelligent document processing (IDP) to extract information from uploaded documents and suggest values for a process form.
Adding a smart attachment field
Under Field properties, enter a Name and select Smart attachment as the Field type.
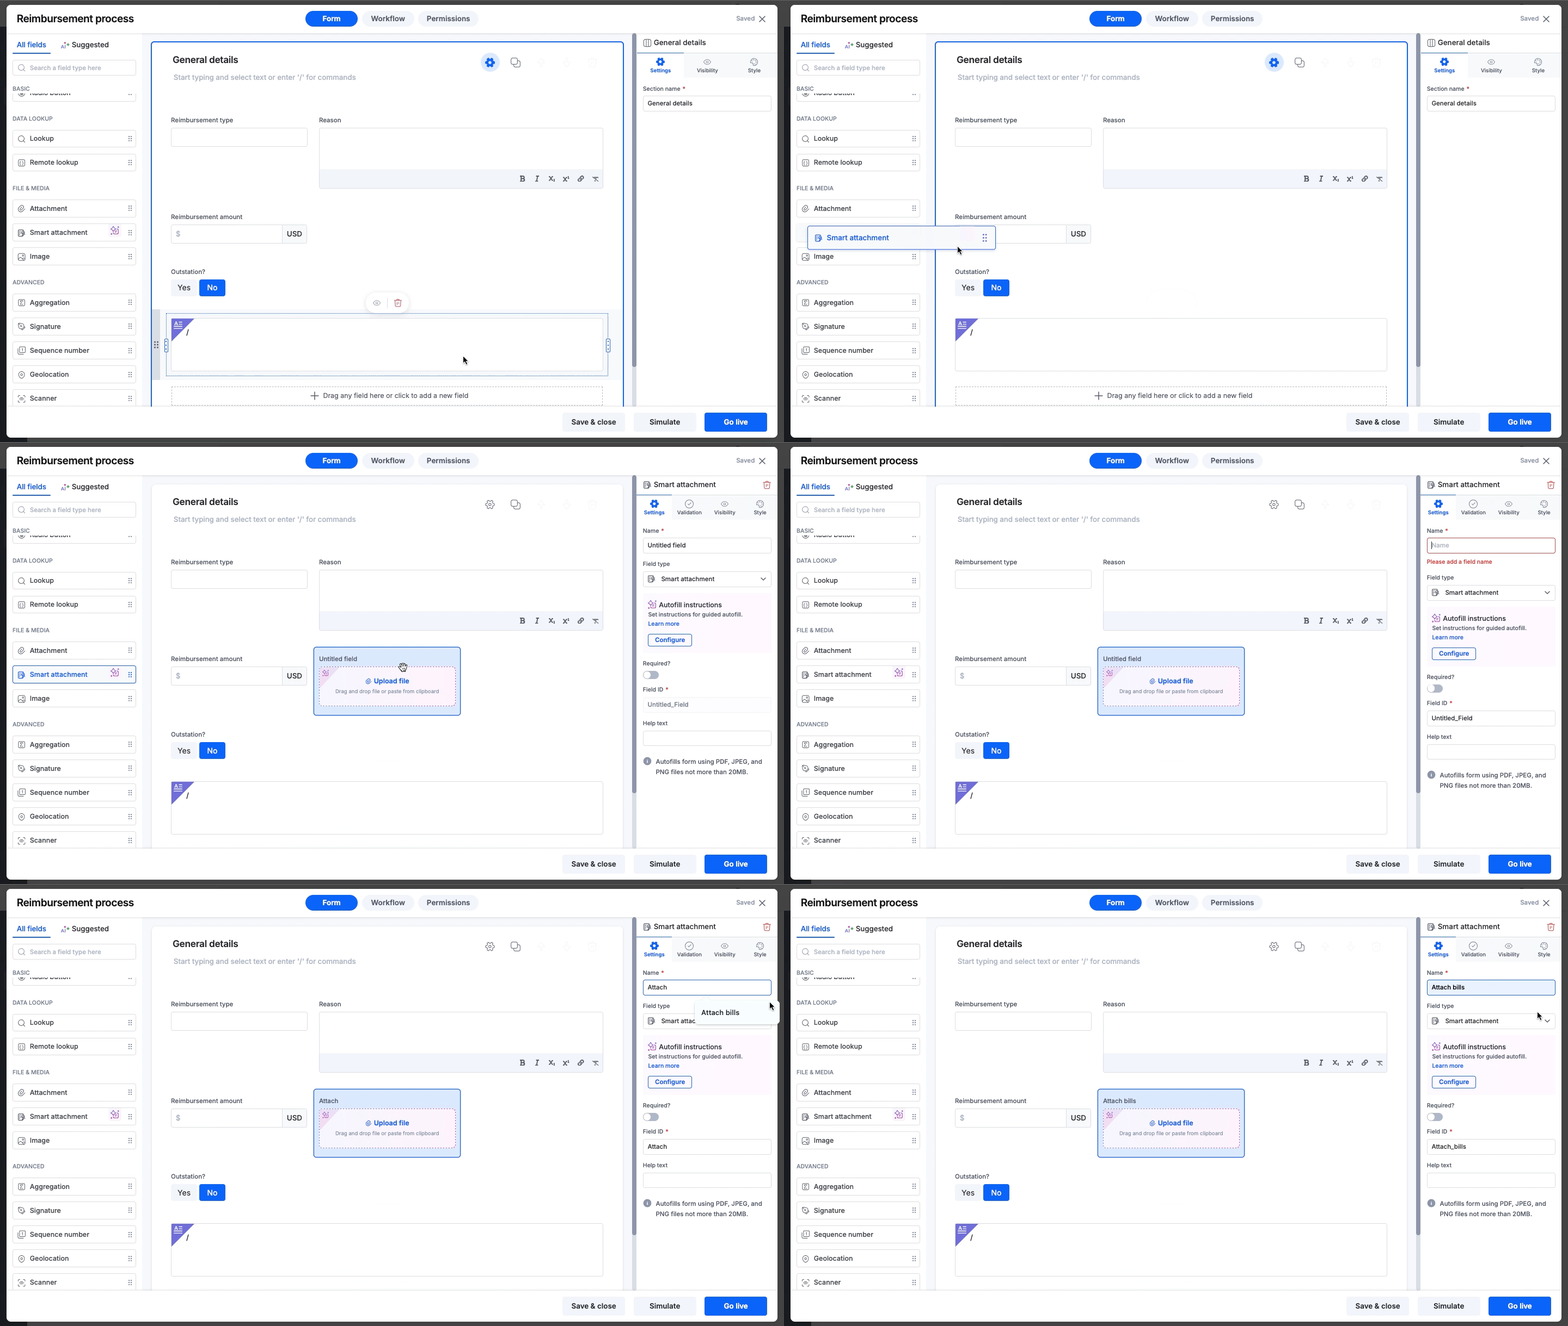
Supported files and limits:
- Upload PDF, JPG/JPEG, or PNG files, up to 20 MB per file.
- PDF documents can contain up to 20 pages.
- Smart attachment is available in process forms.
- Add documents one at a time. A Smart attachment field can retain multiple uploaded documents.
Smart attachments have their own processing limits. The ordinary Attachment field's 100 MB limit does not apply here.
Using a smart attachment field
Click Upload file and choose a document from your device or an available cloud storage provider. When autofill is enabled, the uploaded document is processed to fill empty fields and child table records.
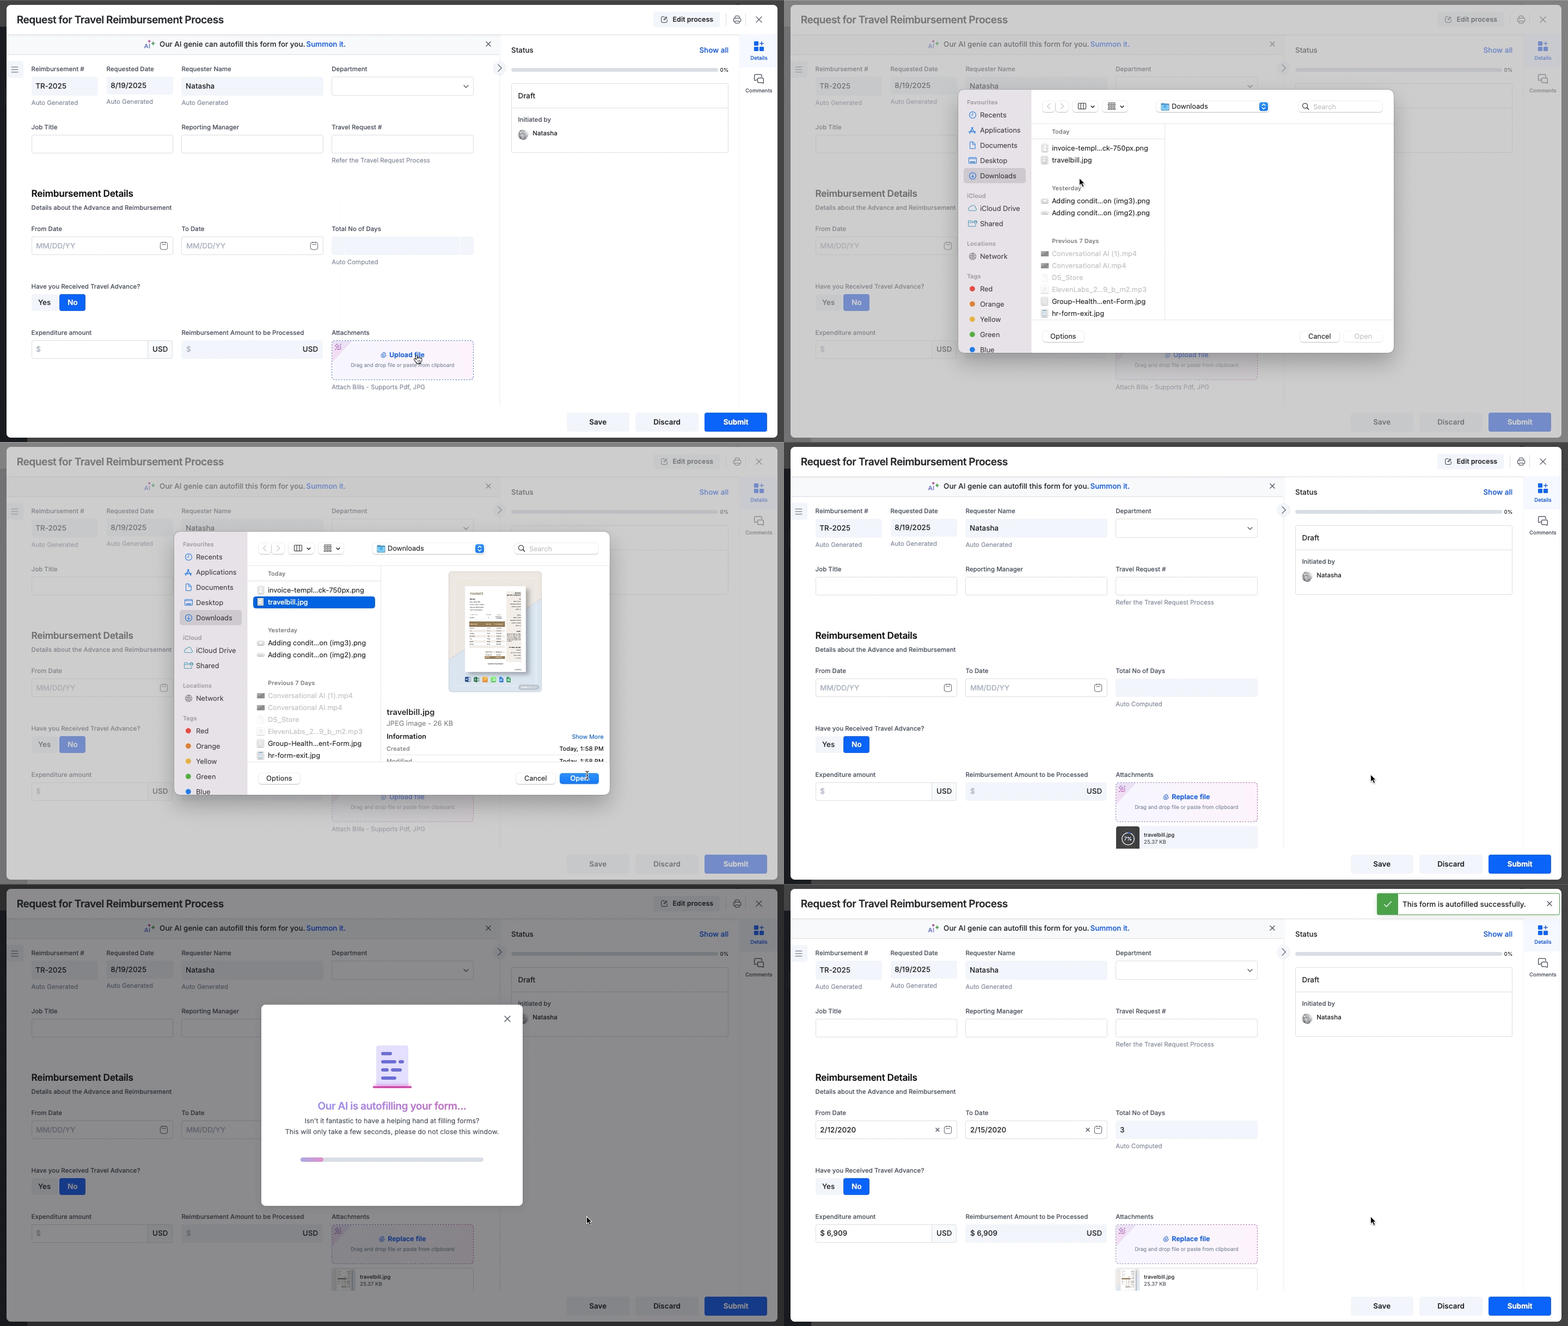
Review the extracted information. You can edit field values manually or choose AI-suggested data from the dropdown.
To include information from another document, upload it to the same Smart attachment field. Each new document triggers autofill, and suggestions from previously uploaded documents remain available for review.
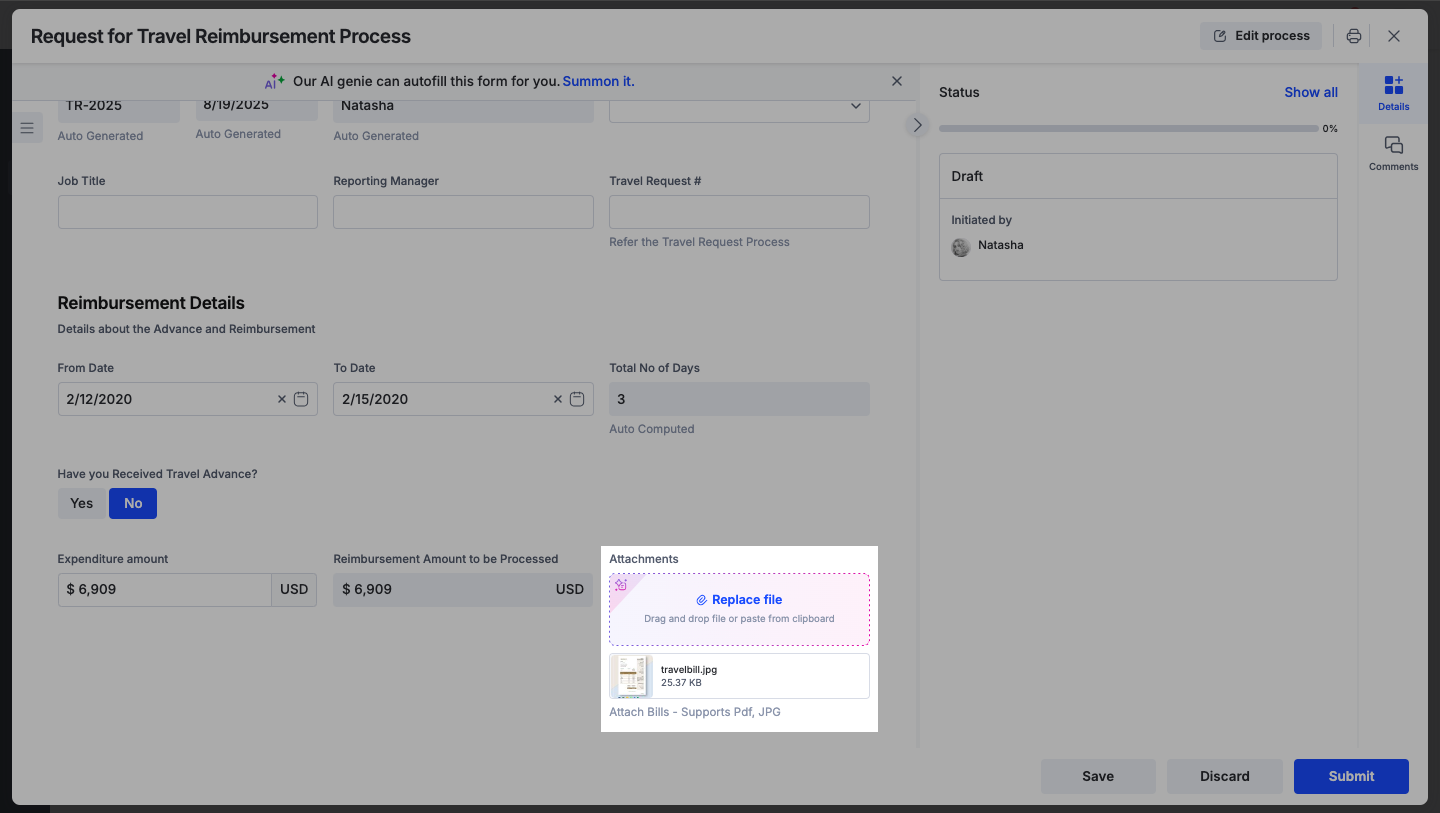
Smart attachment supports the following:
- Automatic autofill: Autofill is enabled by default. You can cancel it while the document is being processed.
- Multiple languages: Extract information from documents in different languages.
- Handwritten content: Upload handwritten documents in a supported file format.
- Guided autofill: Add instructions to help extract the information you need. Learn about guided autofill.
Learn more about using multiple files in a Smart attachment field.
Usage credits: Initial usage is covered by free credits. Further usage may incur charges. Contact Kissflow support for details.
Image field
Use an Image field to upload and display one image directly in a form.
In the live form, click Upload image and choose an image from your device or an available cloud storage provider. Grant access if prompted.
To change the image, click Replace image and choose another file. You can also annotate the image before submitting the form.
To remove the image, hover over it and click Remove ().
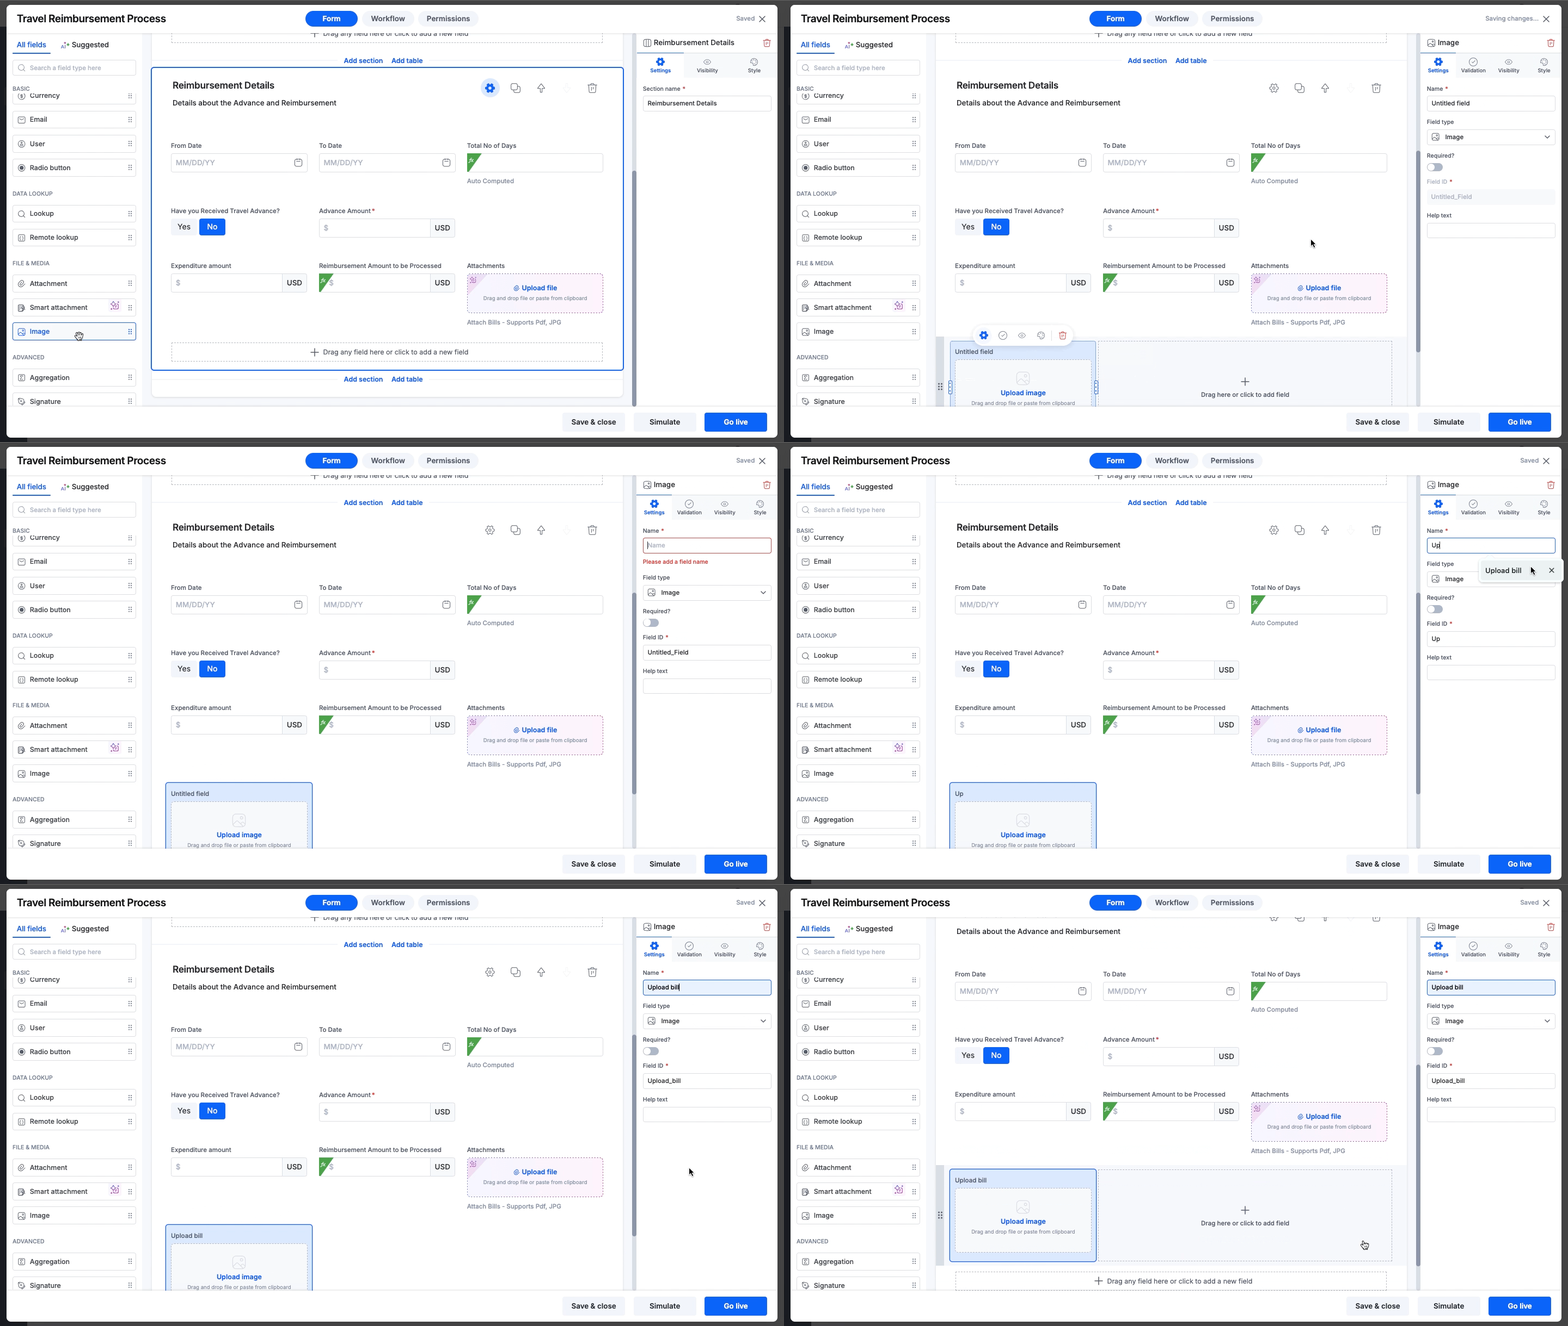
Validations
Form creators can restrict the image format to JPG, JPEG, PNG, GIF, or BMP and set a maximum image size of up to 100 MB. A lower configured limit applies to that field. Learn more about field validations.
Mobile settings for Image and Attachment fields
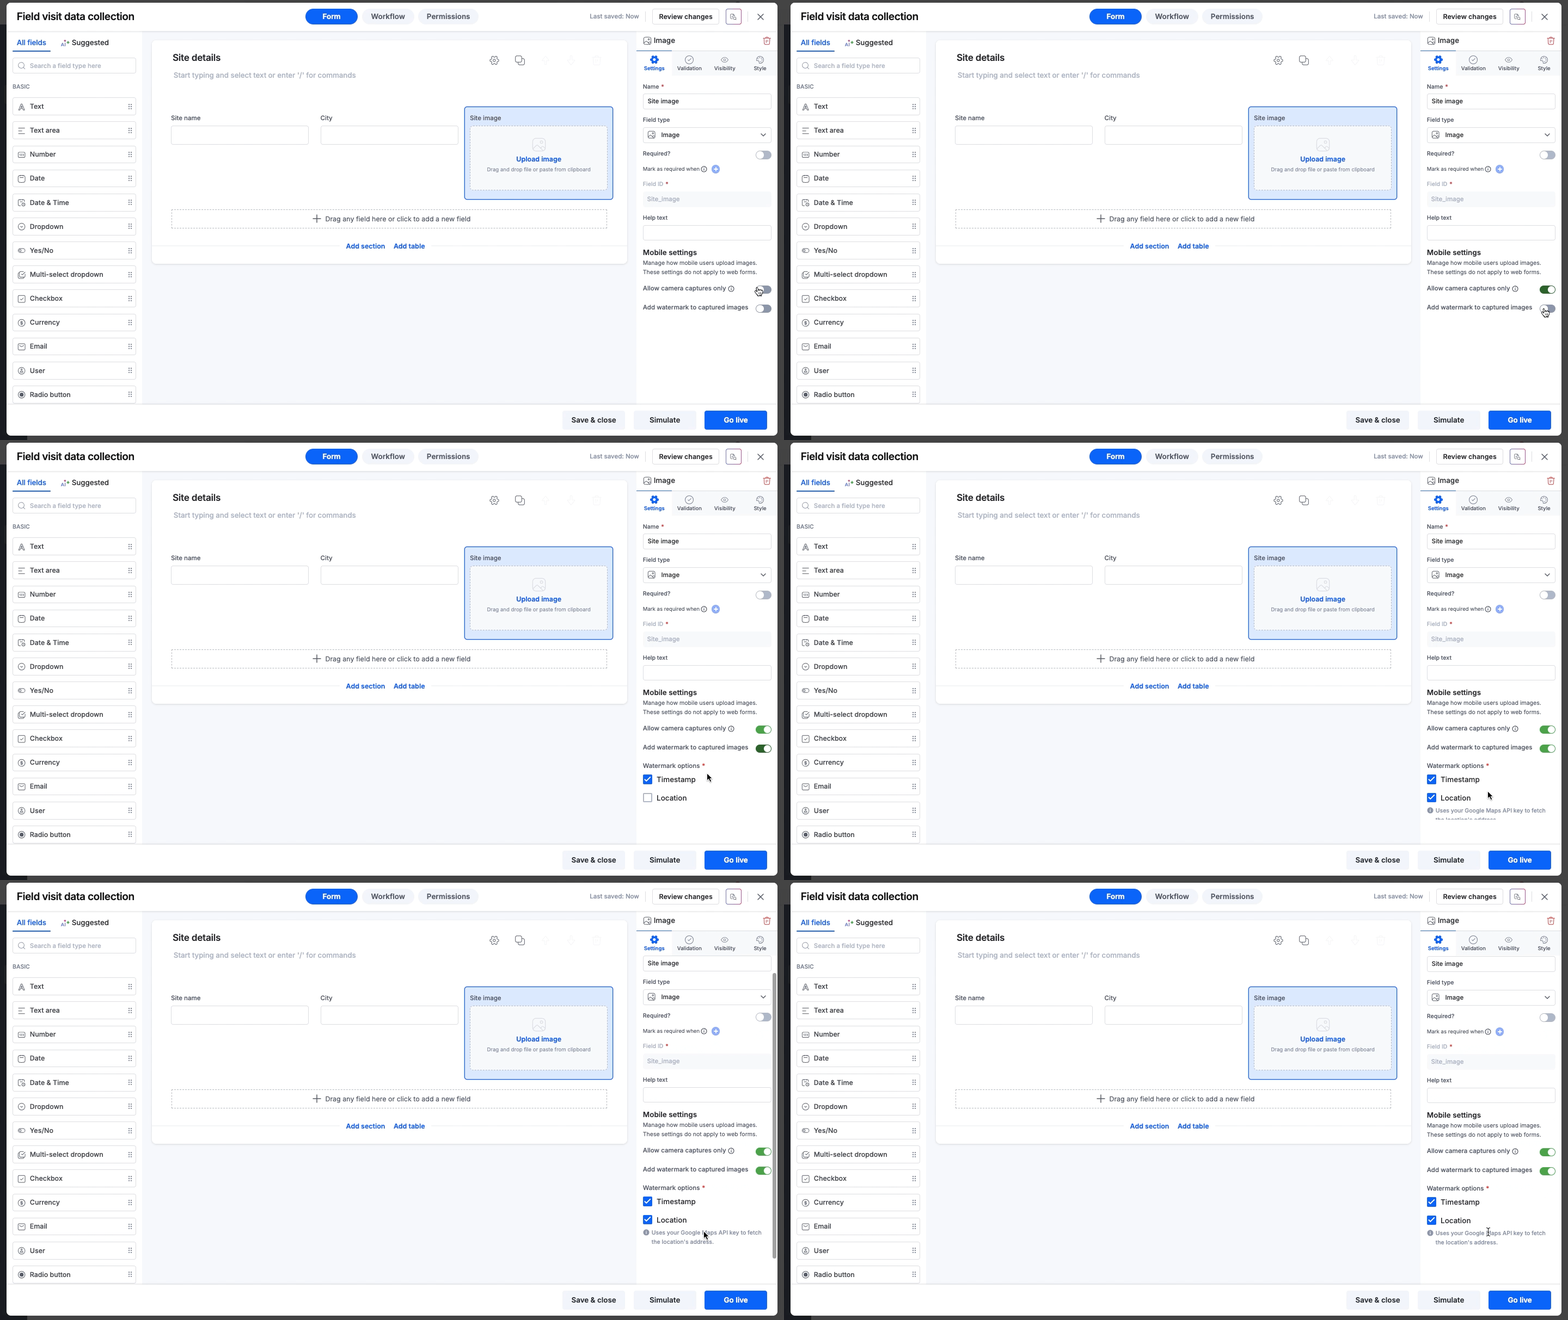
Form creators can control how users capture and upload images on mobile devices. Select an Image or Attachment field in the form builder, then find Mobile settings in the right-hand Settings panel.
- Allow camera captures only: Turn this on to require a new camera capture. Users cannot select an existing image from their device or cloud storage.
- Add watermark to captured images: Turn this on to add capture details at the bottom-right of the image. The watermark position is fixed. Choose one or both of the following:
- Timestamp: Include the date and time the image was captured.
- Location: Include GPS coordinates. To show a physical address, add your Google Maps API key in Account settings.
When watermarks are enabled, select at least one detail: Timestamp or Location.
Summarizer for Image, Attachment, and Smart attachment fields
Use the built-in AI summarizer to get an overview of an attachment's content.
- Open the attachment: Click an uploaded file to open its preview. You can also open it from the Files panel.
Generate a summary: Click the Generate summary icon (
 ) in the top-right toolbar.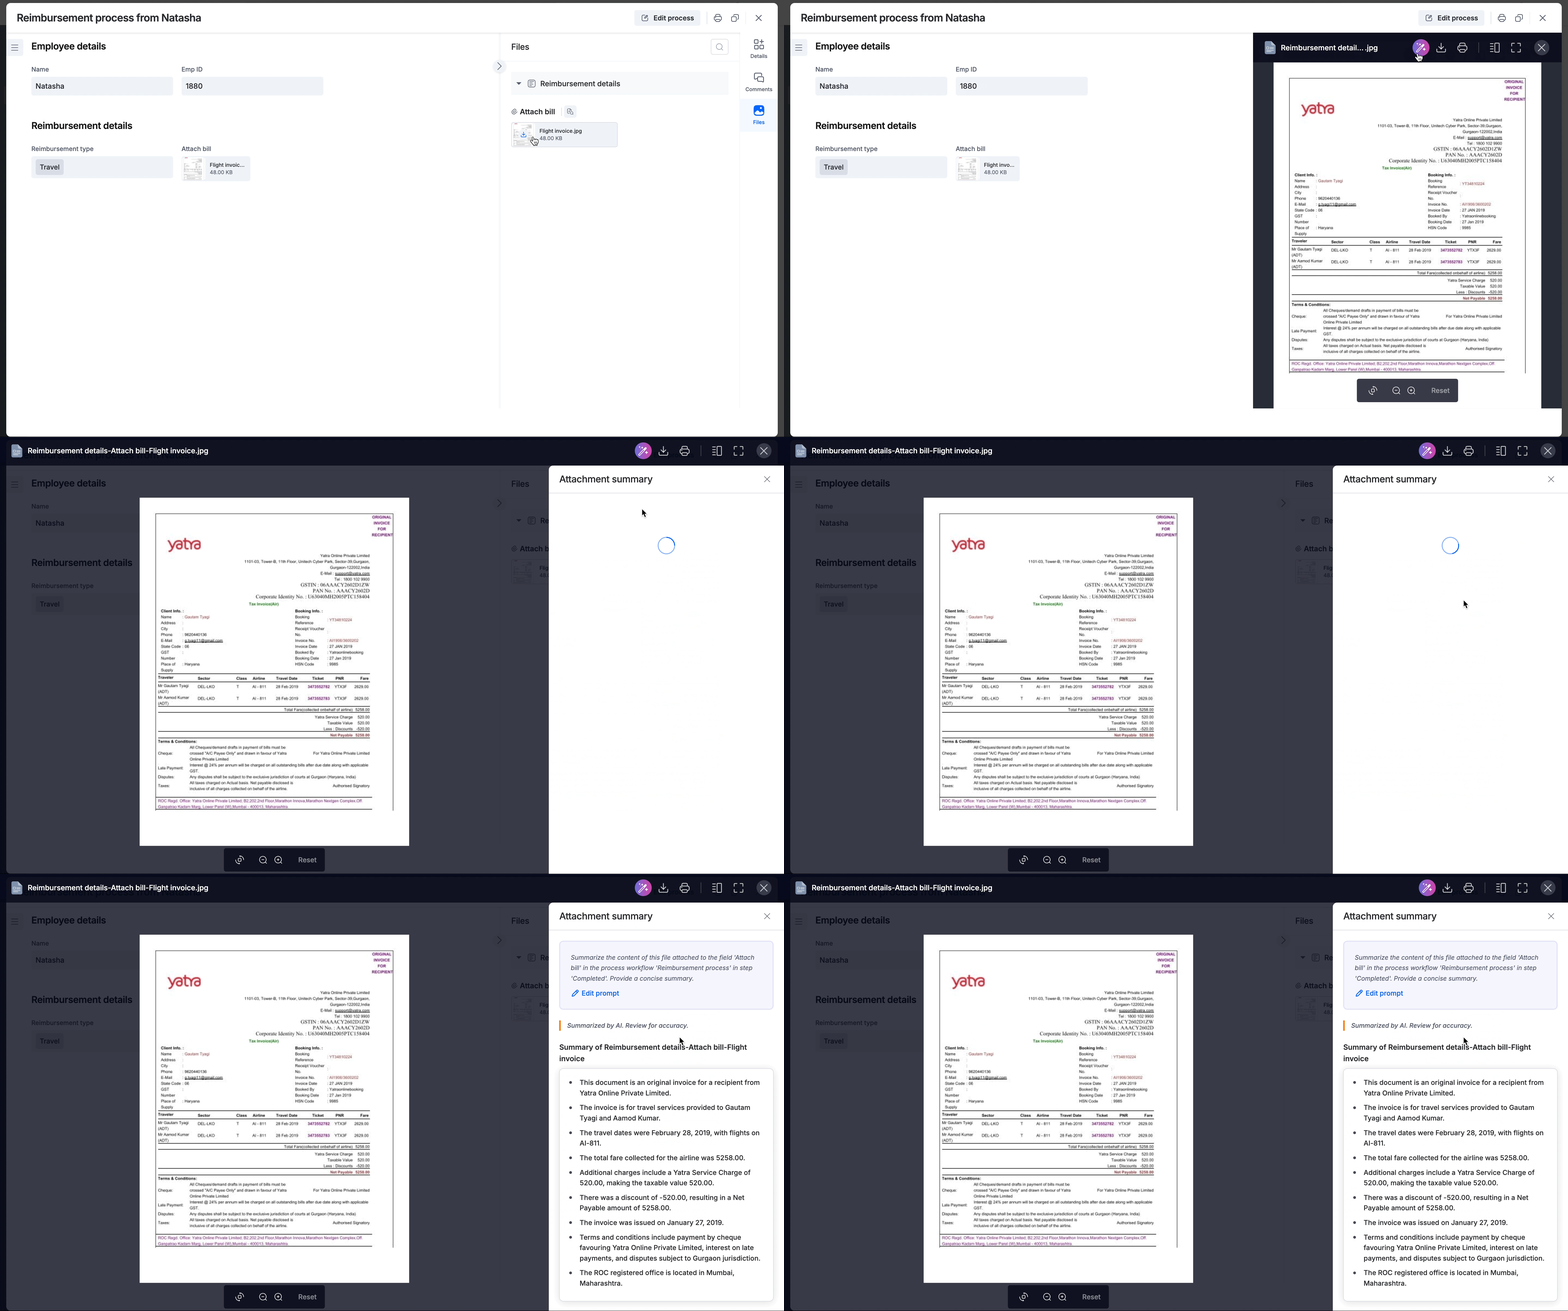
- Review the summary: The Attachment summary panel opens on the right with the file's key details.
Refine the summary: Click Edit Prompt, enter what you want to know, and click Generate again.
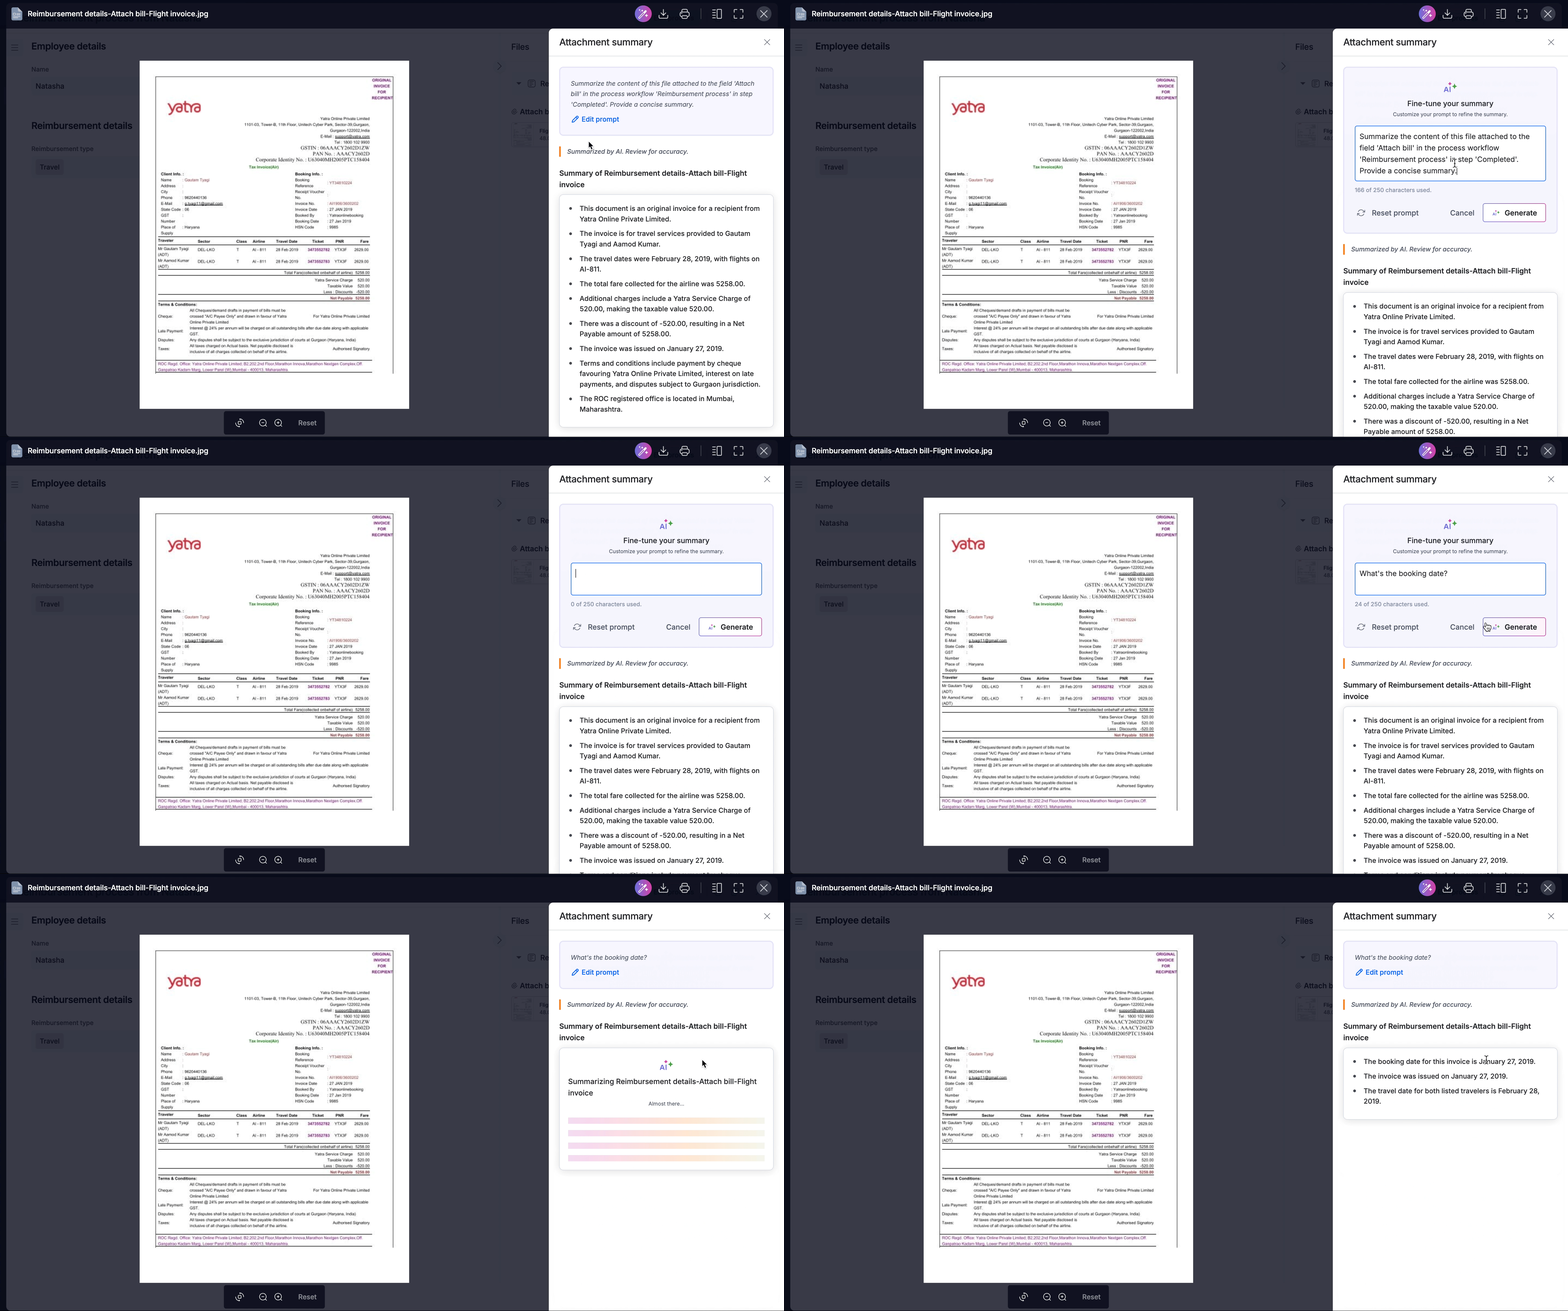
When you navigate between files:
- Within the same field: Your custom prompt is retained, but the summary is not. Click Generate again when you return to a file.
- Across different fields: Both the summary and your edited prompt are cleared. Enter your prompt again if needed, then generate a new summary.
The summarizer is available through the Files panel across Process and Board stages. It is also available within Dataforms.
Signature field
Use a Signature field to collect an electronic signature. Users can:
- Draw a signature with a mouse or on a touch screen.
- Insert a signature saved under My profile > About me.
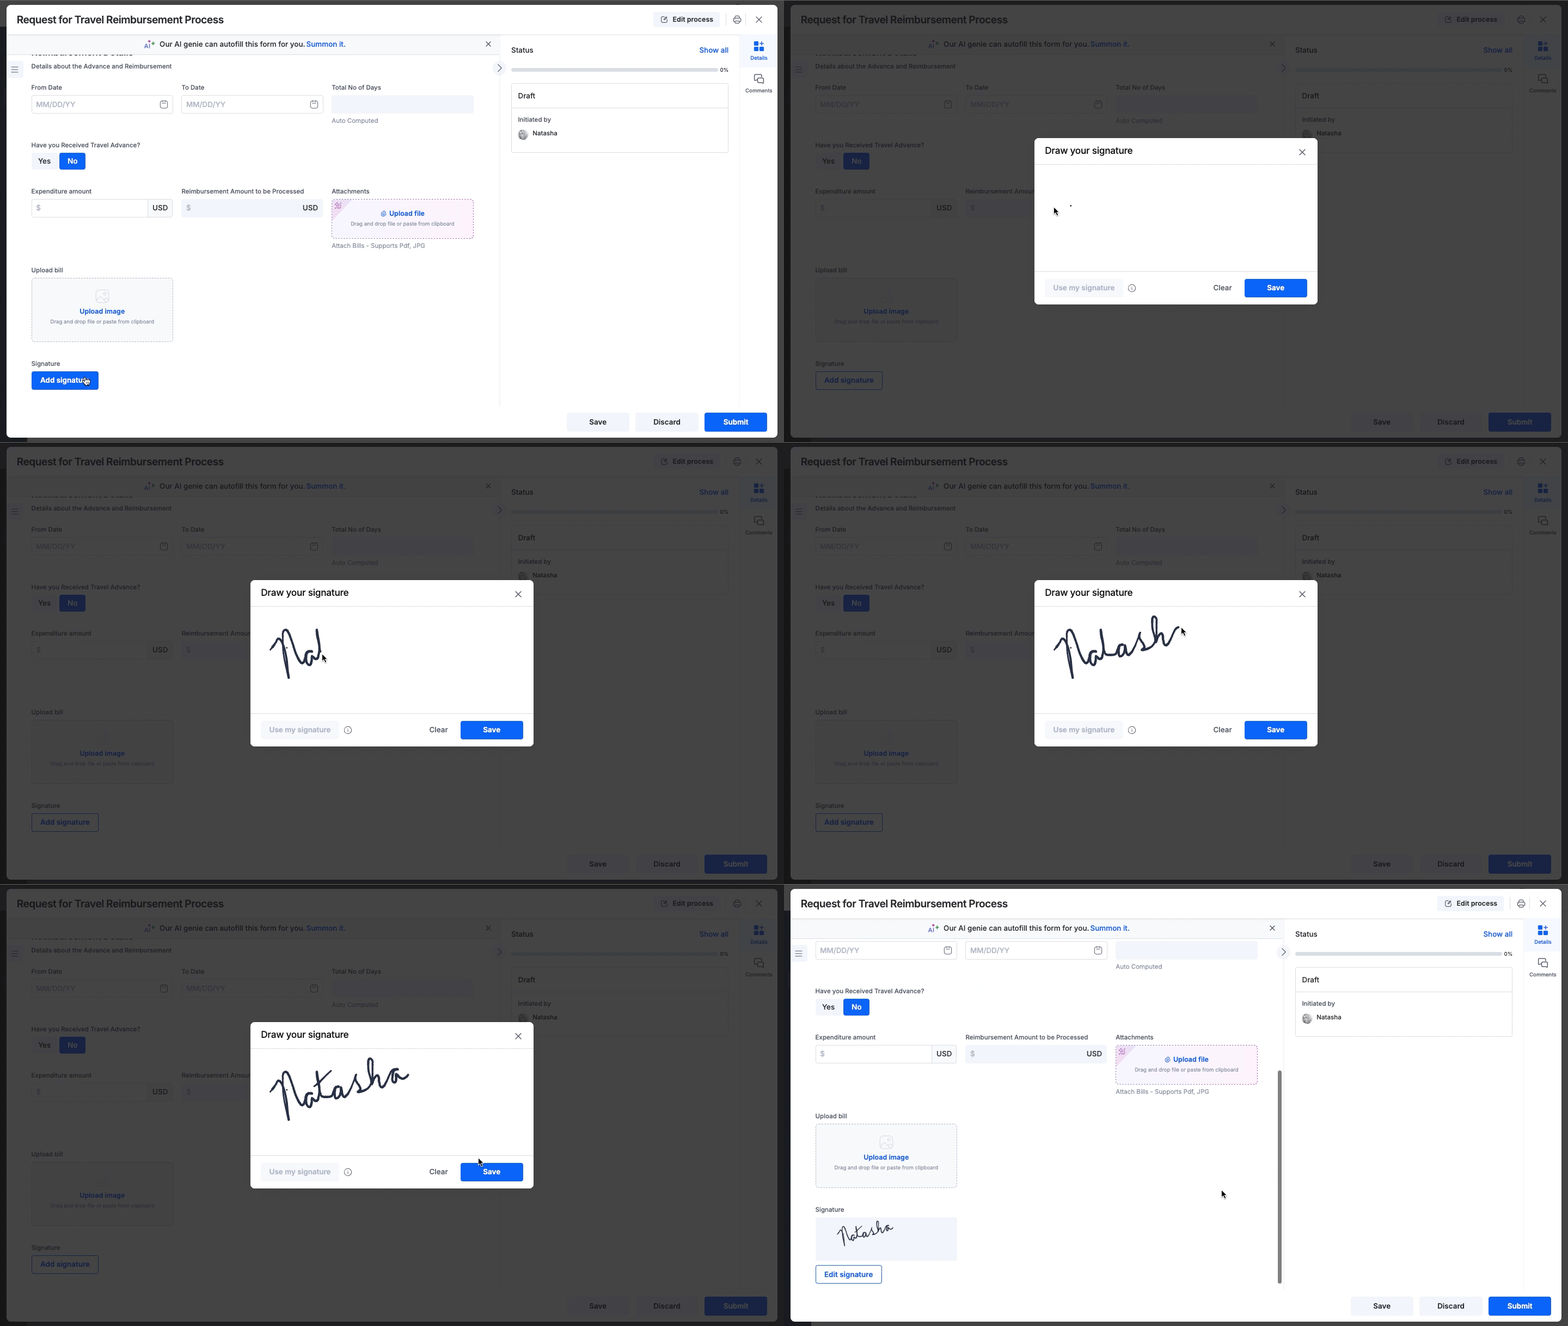
To require a saved profile signature, turn off Allow user to draw signature in the Signature widget's settings.
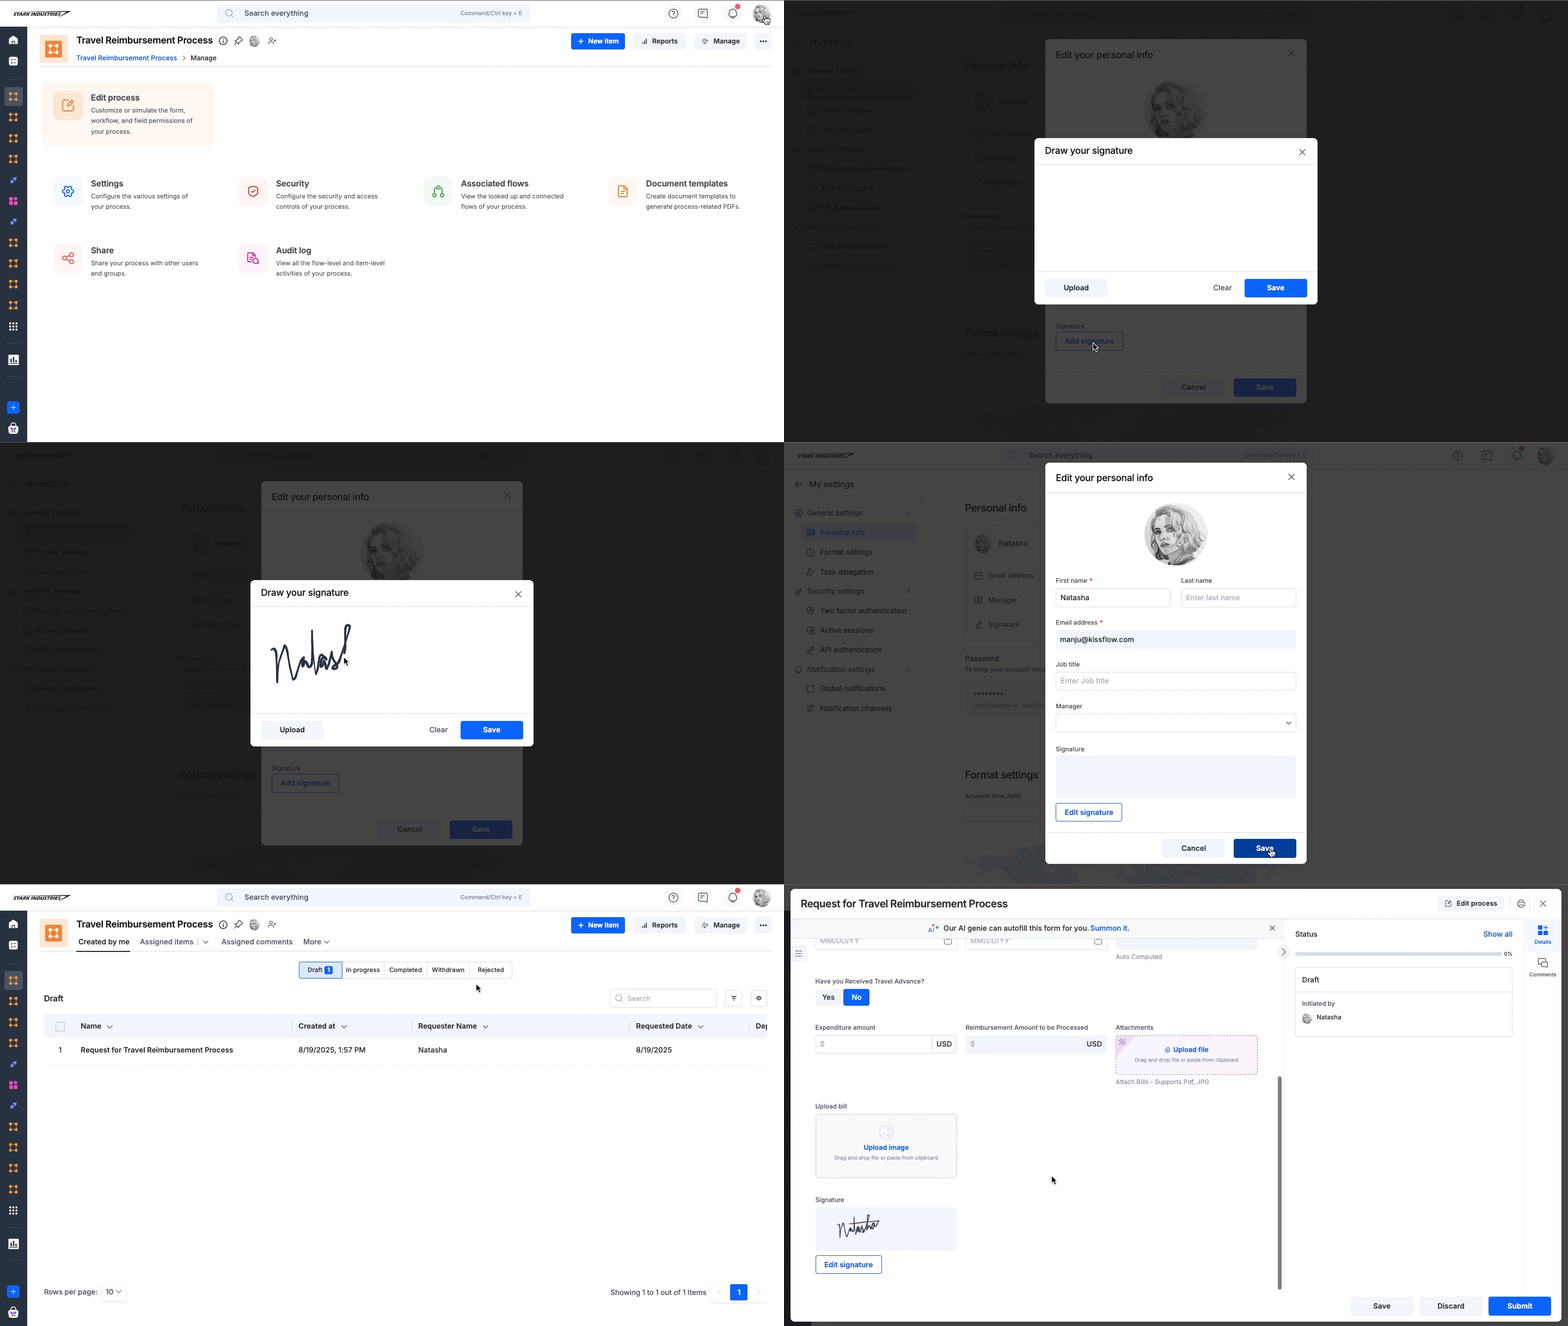
This setting applies to the individual widget. Other Signature widgets can still allow drawing unless you disable it for them too.
If drawing is disabled and a user has no saved signature, they must add one to their profile before completing the form.