
Delay connector
The delay connector allows you to control the timing of your actions by adding pauses between steps in your integration.
Why use delay?
The delay connector is essential for scheduling actions to occur at specific times or after certain periods, enhancing the precision and effectiveness of your integration without the need for creating additional integrations. For example, instead of sending a follow-up email immediately after receiving a new lead, you can delay it by two days. The delay connector offers three types of delay, each suited to different scenarios:
Delay for: Pauses your integration for a specified duration.
Delay until: Pauses your integration until a specified date and time.
Delay on occurrence: Delays based on specific events or conditions.
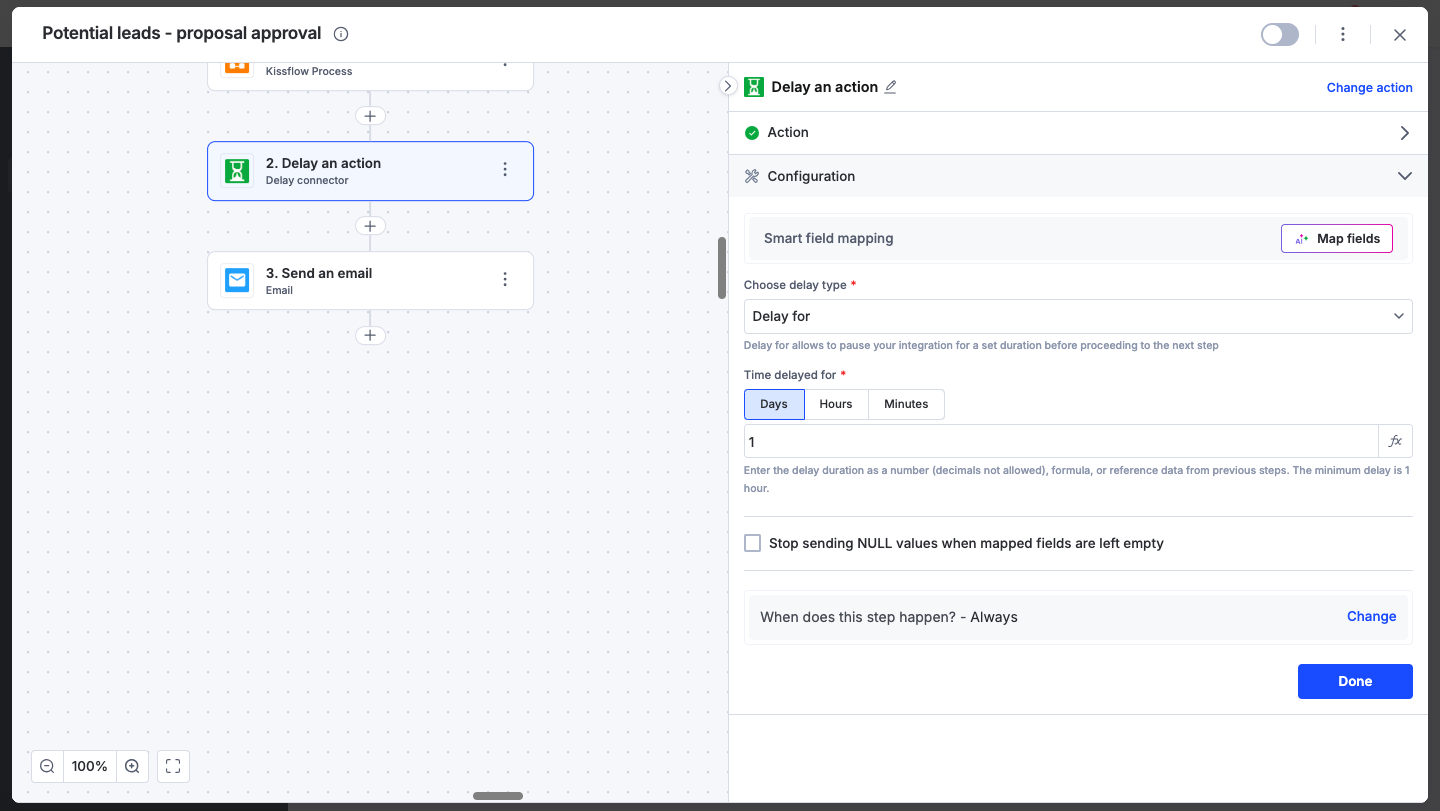
Delay for
This option allows you to pause your integration for a specified duration before proceeding to the next step. Here's a detailed explanation of how to configure it:
Choose delay type:
Select "Delay for" from the dropdown menu to specify a fixed duration for the delay.
Time delayed for:
This section allows you to set the duration of the delay.
You can choose any one unit of time for the delay: Days, Hours, or Minutes.
Duration input:
Enter the desired delay duration as a whole number in the input field.
Note that decimals are not allowed. You can also use formulas or reference data from previous steps to set this value.
The minimum delay allowed is 1 hour, and the maximum delay limit is 90 days
Example: After a customer submits a support ticket, you might want to send an initial acknowledgement email immediately. Using the "Delay For" connector, you can then pause the workflow for 60 minutes before sending a follow-up email to inform the customer that their issue is being reviewed by a support agent.
Delay until
Delay Until pauses your integration until a specified date and time, allowing precise control over when subsequent actions are executed. Here's a detailed explanation of how to configure it:
Choose delay type:
Select "Delay until" from the dropdown menu to set a specific date and time for the delay.
Choose calendar date:
Enter the desired date and time in the format “YYYY-MM-DDTHH:MM".
You can either type the date and time directly or use the calendar and clock icons to select them.
Alternatively, you can provide a value dynamically from a previous step using the formula icon.
Choose account time zone:
Select the appropriate time zone for the delay.
In the example, the time zone is set to UTC+5:30 Asia/Kolkata - IST.
This ensures that the delay is accurately based on the specified time zone.
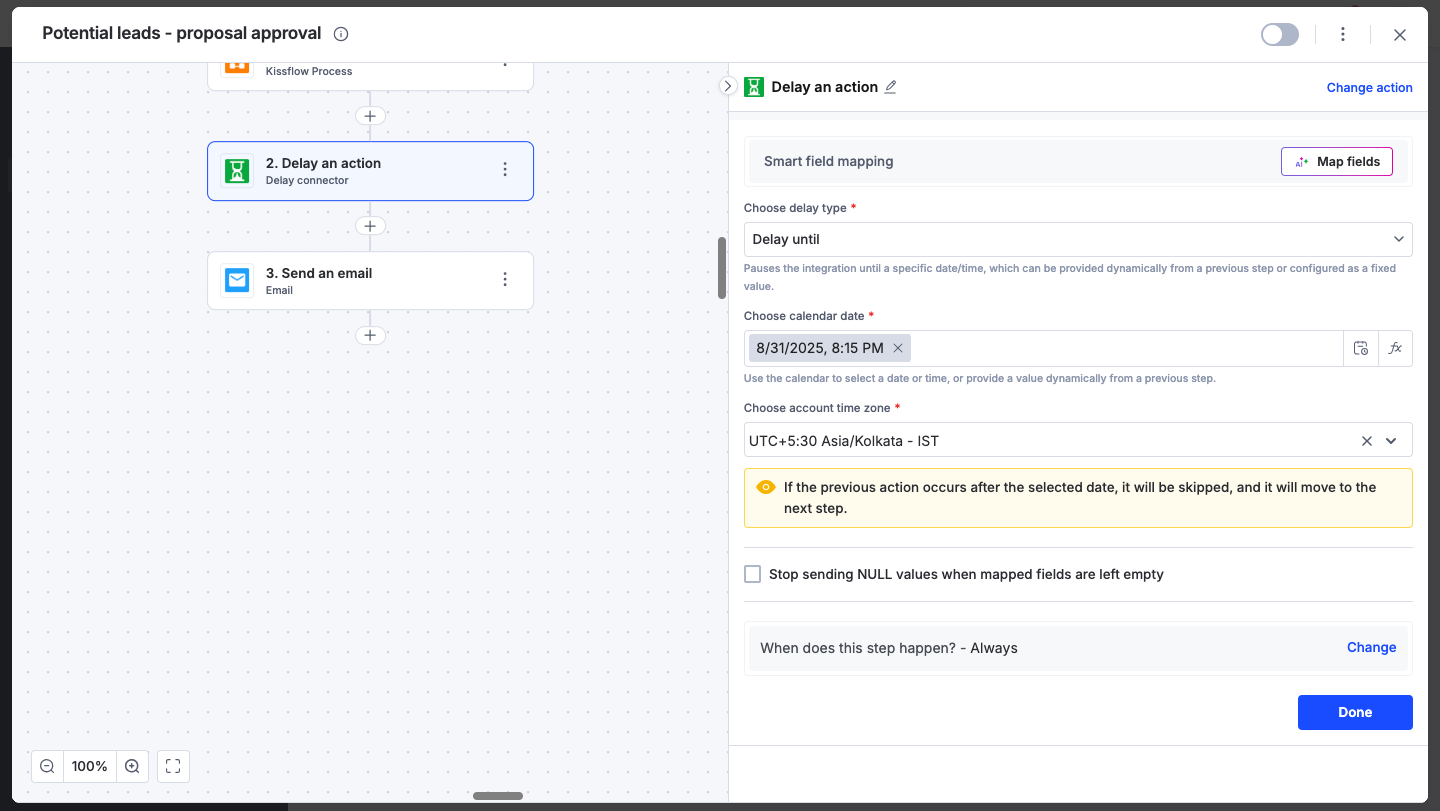
Note:
If the previous action in your integration occurs after the selected date and time, it will be skipped, and the workflow will move to the next step automatically.
Example: You want to send a promotional email to your subscribers on a specific date and time. Using the "Delay Until" connector, you can pause the integration until 2024-09-01 at 15:15 IST. This ensures the email is sent exactly at the desired time, maximizing the impact of your promotion.
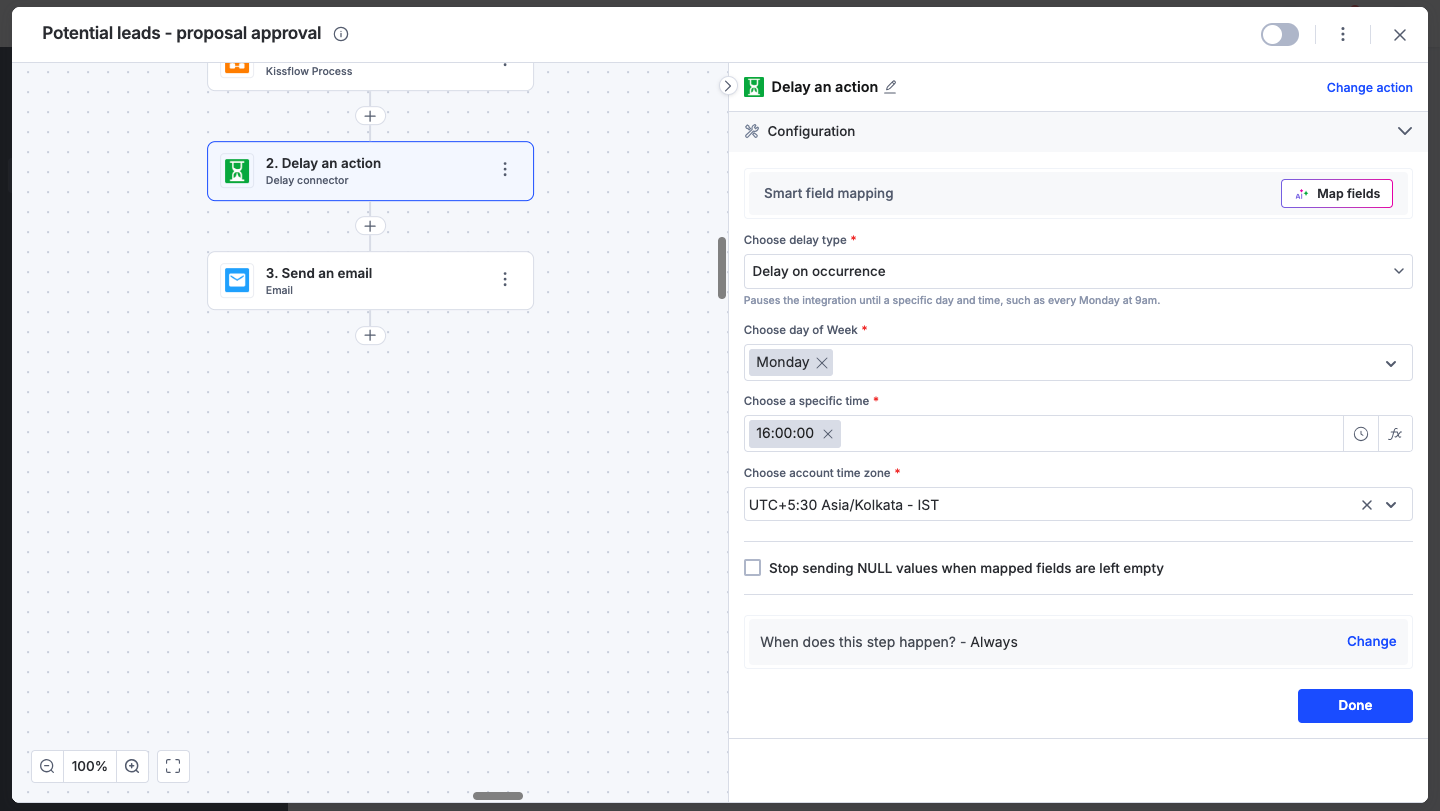
Delay on occurrence
Delay on occurrence pauses your integration until a specific day and time, such as every Monday at 9 AM. This allows you to schedule recurring actions at consistent intervals. Here's a detailed explanation of how to configure it:
Choose delay type:
Select "Delay on occurrence" from the dropdown menu to specify recurring days and times for the delay.
Choose day of Week:
Select the days of the week on which you want the delay to occur.
Choose specific time:
Enter the time of day when the action should occur in the format "HH:MM".
You can either type the time directly or use the clock icon to select it.
Alternatively, you can provide a value dynamically from a previous step using the formula icon.
Choose account time zone:
Select the appropriate time zone for the delay.
This ensures that the delay is accurately based on the specified time zone.
Example: You want to generate and send a performance report to your team three times a week. Using the "Delay on Occurrence" connector, you can pause the workflow until Monday, Thursday, and Saturday at 15:15 IST each week. This ensures the reports are generated and sent consistently at the same time, helping your team stay informed and organized.
Resetting a Delay
To reset a delay and move immediately to the next action, use the "Execute now" button. This performs a hard reset of the delay.
Status
When a delay is successfully set, you'll see the status as Delayed and once the action is executed the status will change to Success.
To ensure your integrations are properly configured and tested, review our best practices guide for tips on building robust and maintainable solutions.