Kissflow Dataform connector
App members can use the Dataform connector to send data from a dataform to other flows in Kissflow or third-party apps.
For example, you have an employee PII dataform. You want to initiate an automated email whenever an employee submits the form. This email assures them their data will be treated with utmost confidentiality. You can implement this setup by configuring an integration that initiates an email each time an employee submits the dataform.
Triggers in Dataform
Trigger |
Description |
When an item is added to a Dataform |
Triggers when a user submits an item after clicking the New item button or a form in the draft queue. |
When an item is updated in a Dataform |
Triggers when a user updates an item that has already been submitted using the Edit option. |
When an item is deleted in a Dataform |
Triggers when a user deletes an item that has already been submitted using the Delete option in the Dataform |

Note:
The above-mentioned triggers are not compatible with data import operations.
Actions in Dataform
Action |
Description |
Create and submit an item |
This action creates and submits a dataform item using the inputs passed into this step. |
Update an item |
This action updates the fields in a dataform item. |
Fetch an item |
This action retrieves a specific item from your dataform with its item ID. |
Fetch one or more items |
This action retrieves multiple items from your dataform. |
Delete an item |
This action deletes a specific item from your dataform with its item ID. |

Using connector as a trigger
Create a new integration in your app.
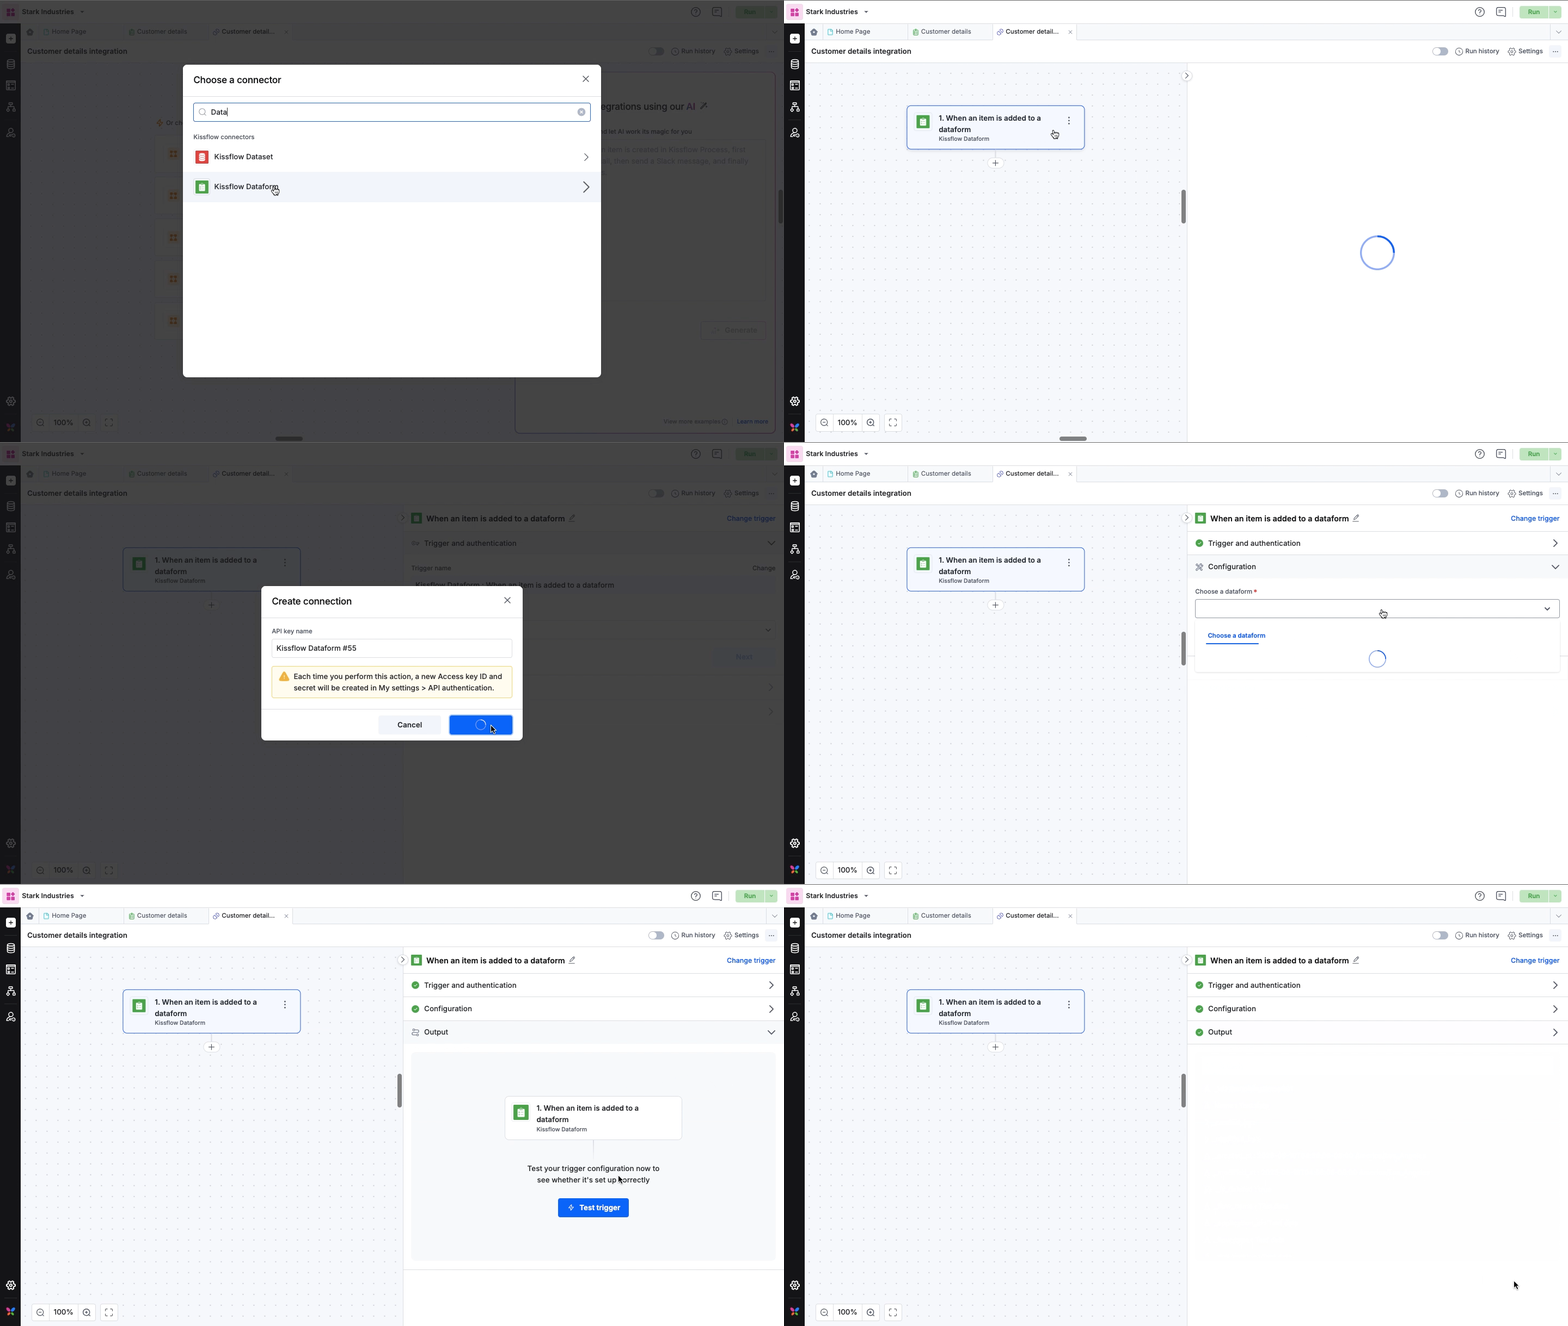
Select the Kissflow Dataform connector and then choose a trigger.
Create a new connection or use an existing connection in your account. You can connect to another Kissflow account or use your own Kissflow account. Connection is authenticated using your Access keys and secret tokens. After authenticating the connection, click Next.
Select the Dataform that you want to work with. Click Next.
Test whether your trigger is set up correctly by clicking the Test trigger button. The connector will pull data from your selected Dataform and display it in JSON format. If there's an error with the setup, you'll receive a message regarding the same. Retest the trigger after making necessary changes.

Using connector as an action
Click the Dataform connector and select an action step from the available options.
Similar to how you would set up a trigger, set up a connection with the required account.
After choosing a Dataform, add relevant values against the form fields. You can specify the number of items to be fetched and the page number from which you want to fetch the items. If left unspecified, by default 200 items will be fetched from page 1. The maximum limit is 500 items per request.
You can also map form fields from your trigger step or fields from your previous action steps. After the action is executed, these values will be automatically added to the fields.

5. Test whether your action step is set up correctly by clicking the Test action button. Errors, if any, are notified to you right away. Fix them before retesting the action.
After setting up the required triggers and their corresponding actions, go to the top right corner of the editor to turn on the integration so as to activate it.
To ensure your integrations are properly configured and tested, review our best practices guide for tips on building robust and maintainable solutions.

