
Webhooks by Kissflow
Basics of webhook
A webhook (also known as a web callback) is a method for any software to provide real-time information to other applications. Webhooks allow you to build or set up integrations, which subscribe to certain events on your application. When one of those events is triggered, we'll send an HTTP POST payload to the webhook's configured URL. It differs from typical APIs in that you would not need to poll for data very frequently in order to get it in real-time.
Working with Webhooks by Kissflow
Kissflow can integrate with third-party applications through webhooks, or user-defined HTTP callbacks. For third-party applications to consume Kissflow's webhook, we provide a URL to deliver requests to. Locate the webhooks' settings page for the app you want to connect to Kissflow.
In your application's webhook settings, you'll typically choose to add a new webhook connection. Paste the webhook URL you copied from Kissflow Webhooks connector, select any options that the application offers—including which data you want to receive via the webhook—and save your changes.
Note
For integration Webhooks, the supported payload size is limited to 2MB.
For example, you can set up an integration where every time a new purchase request is raised in your ERP software, you can start an approval process in Kissflow (action). Or, you can set up an integration where any new email subscriber in MailChimp can be added to your Google sheet automatically. You're only limited by your imagination.
Note
Learn how to send data to other applications using HTTP webhook connectors.
Triggers in Webhook connector
Trigger |
Description |
Catch a webhook (POST) |
This generates a callback URL and listens it to receive payload from other applications |
Configuring your webhook
In your Kissflow account, click the Create button in the left navigation panel and select Integration from the list. Enter a unique name and description for your integration and click Create.
In the editor, select the Webhooks by Kissflow trigger. You can also use the search to find the trigger directly.
- Click the Trigger dropdown menu, select Catch a webhook (POST) and click Next
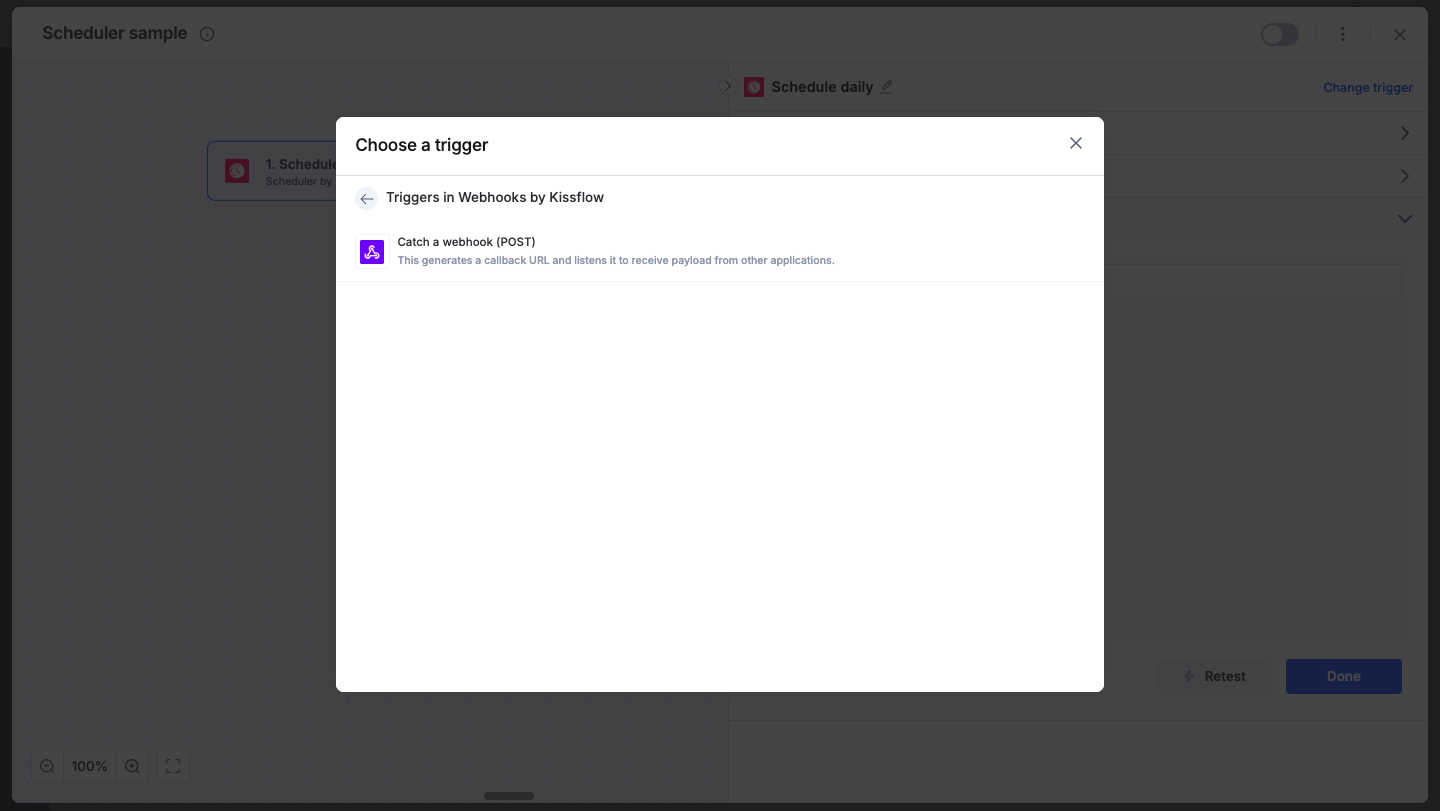
- Catch a webhook works by giving you a unique URL that you can make POST requests to. Copy the URL and paste it in your application's core settings or options page. If you can't find it, look through your app's help and support documentation. Click Next.
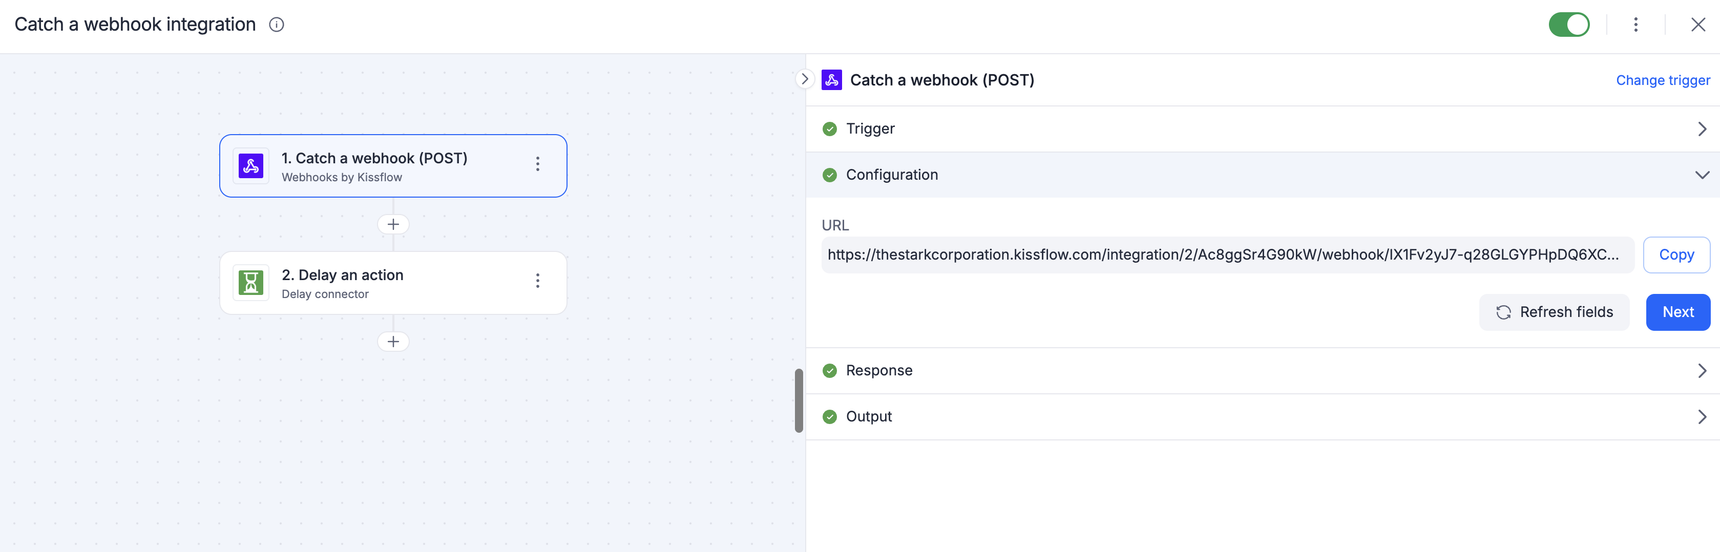
- The app that's connected to your webhook URL will send data to it whenever something new is added. To test a webhook trigger, you must first add something new to your app. For example, if you're connecting to Trello, you could add a new card to your Trello board. The connector will start listening to the URL and fetch any payload from the application.
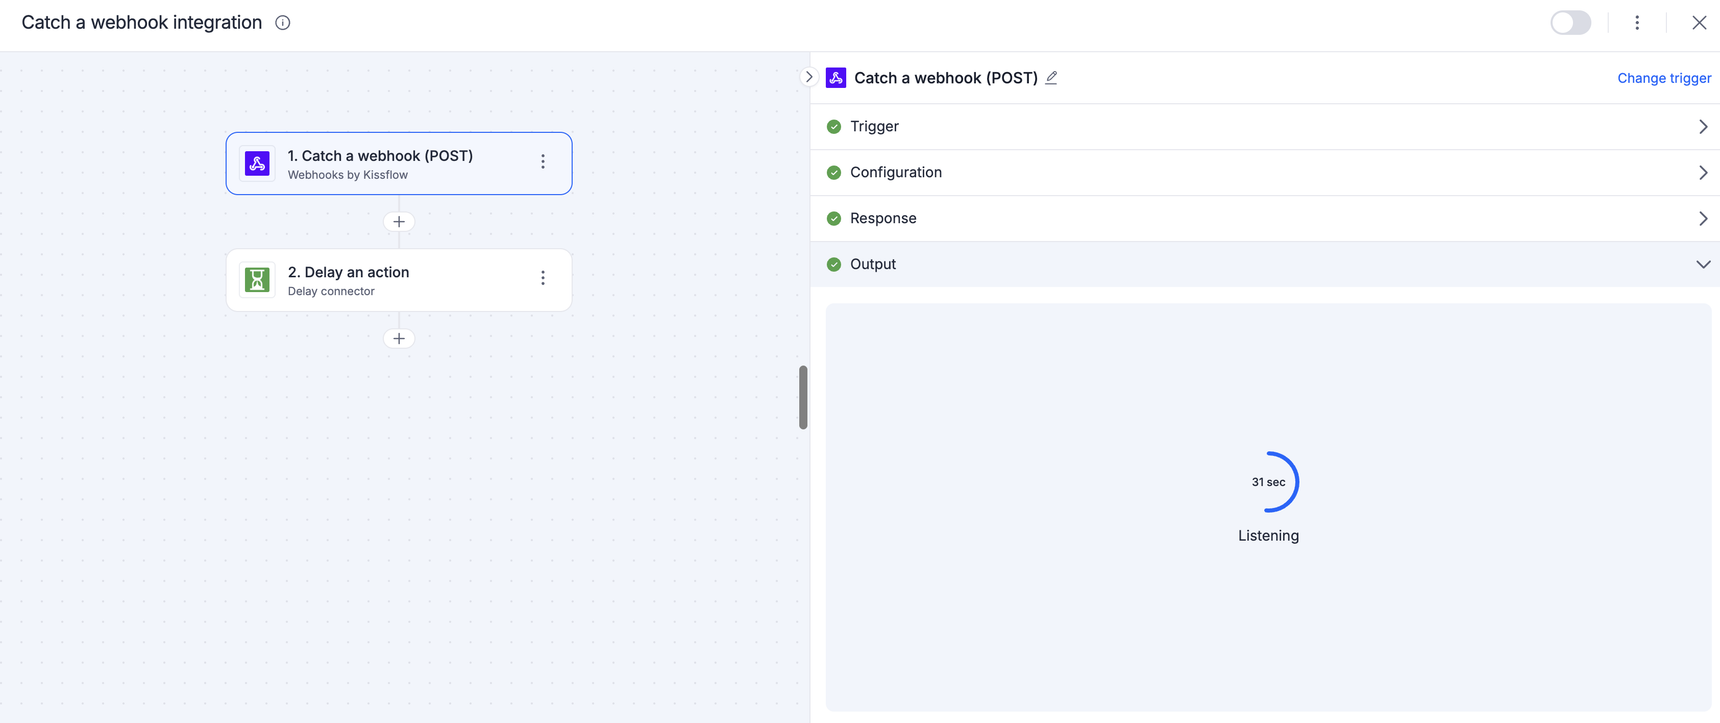
- If your data sent to the webhook URL is found, the step will show it was successful as well as the data received.
- The data received by the webhook connector can then be consumed by other applications to perform specific actions.
Customizing the response
By default, a webhook trigger returns a 200 OK response to the system that calls it. When the caller needs more than an acknowledgment, such as a reference ID or value from the request it sent, define your own response inside the trigger. Your customization covers the headers, content type, and body, and the step holds no status code setting.
Kissflow sends the response as soon as it receives the request, before the actions in the integration run. A response confirms that the request arrived, and it carries no result from a later step.
To customize the response,
- Open the integration and select the trigger, Catch a webhook (POST).
- Select Response.
- Turn on Customize response.
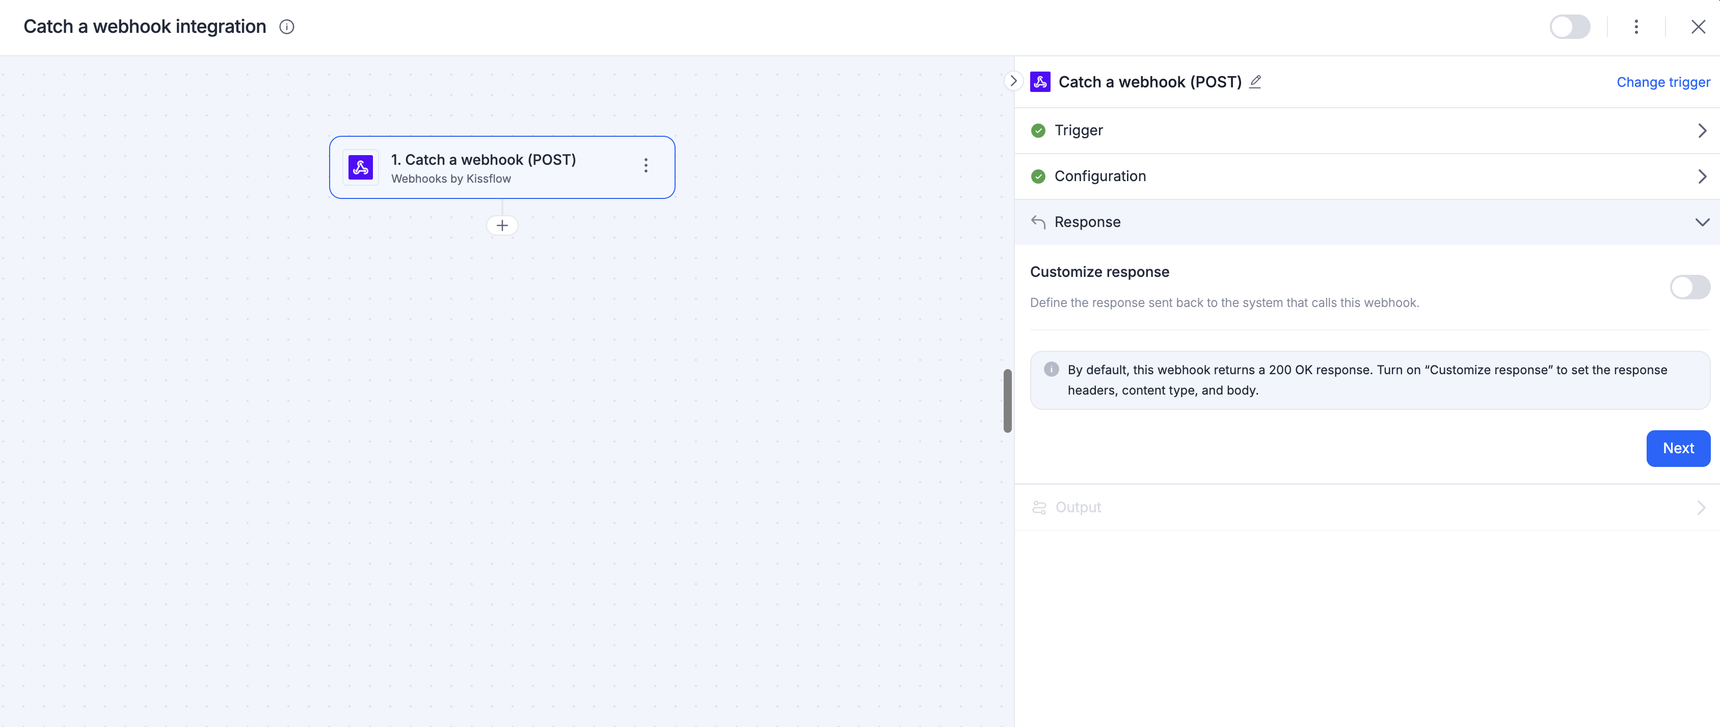
The step now holds two sections:
| Section | Description |
| Incoming request | A sample of the request that the webhook receives. Kissflow reads the sample to build the list of fields you can insert. Live requests always use their own values. |
| Response | The headers, content type, and body that the caller receives. |
Adding a sample request
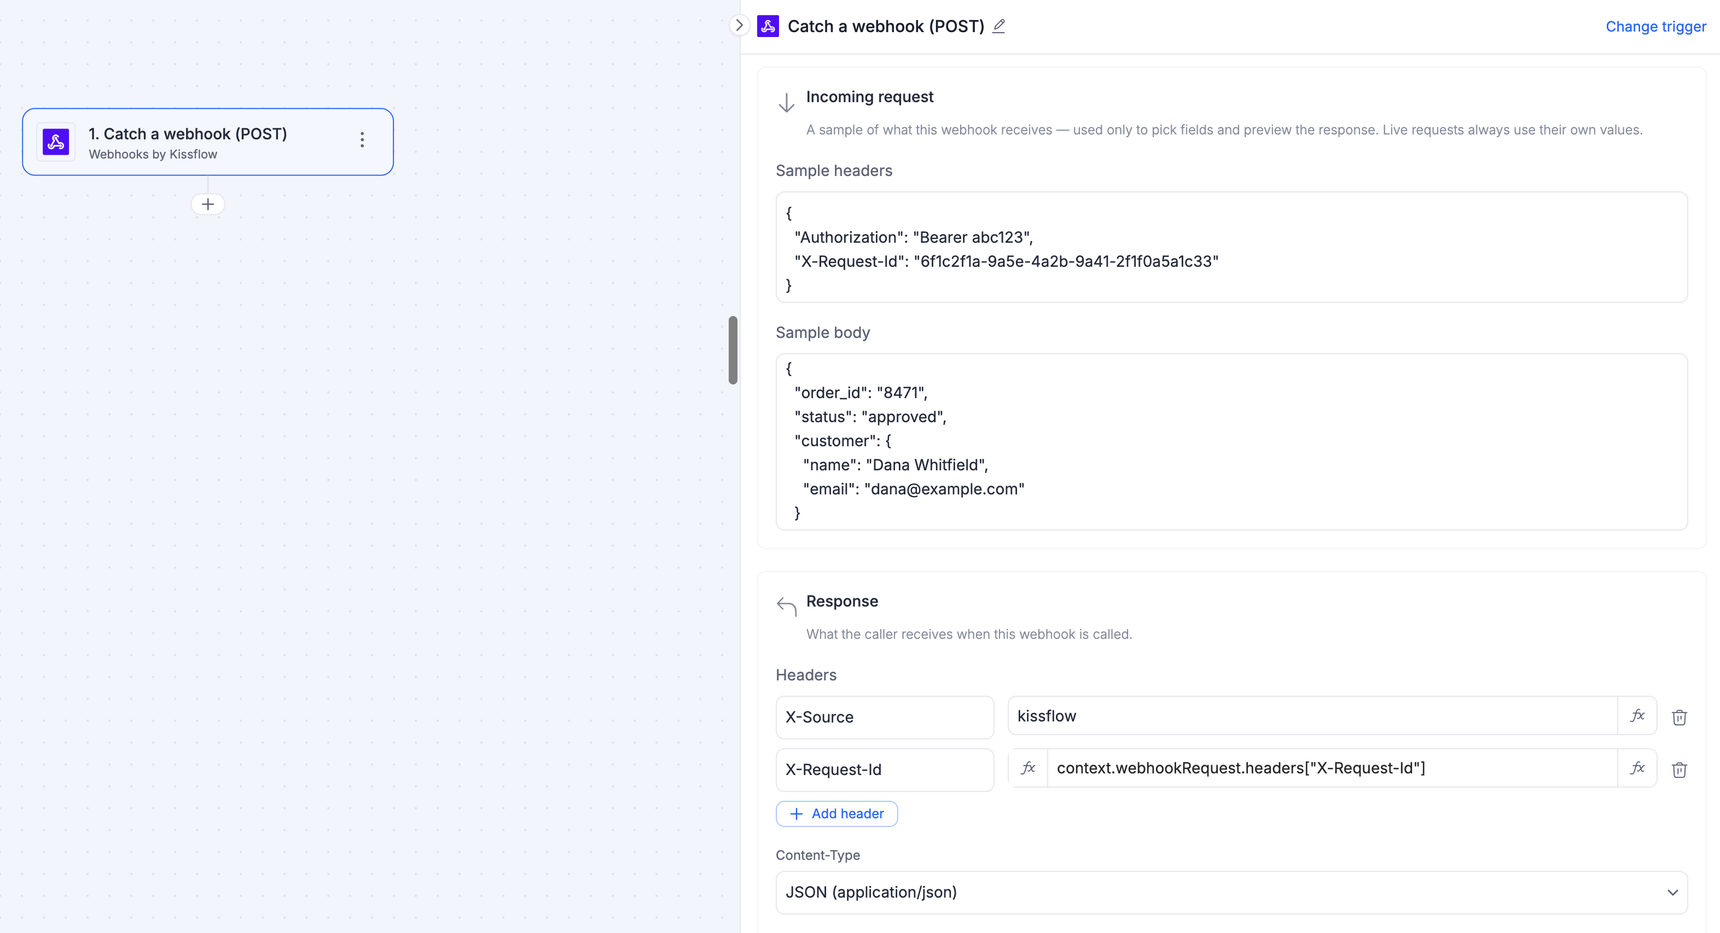
Copy a request from the application that calls the webhook, or from the payload captured during the trigger test.
1. Paste the request headers under Sample headers:
Sample headers
{
  "Authorization": "Bearer abc123",
  "X-Caller-Ref": "a1b2c3"
}
2. Paste the request body under Sample body:
Sample body
{
  "order_id": "8471",
  "status": "approved",
  "customer": {
    "name": "Dana Whitfield",
    "email": "dana@example.com"
  }
}
Note:
Both fields read a JSON object alone. A sample that holds an array, a single value, or a syntax error returns no fields.
Both values appear under Webhook request, grouped as body and headers. Nested values are available through their path, such as customer.name.
Note:
Your response can only use values that the sample contains. A header or a body key that is missing from the sample cannot be inserted, and a formula that names one is rejected. Add everything you plan to use to the sample before you build the response.
Inserting a value from the request
A response header and a body field both take static text, a value from the incoming request, or a combination of the two. Values from the request are built in the formula builder.
- Click fx beside the value you are building.
- Under Integration fields, open Webhook request and select the value you want. Kissflow inserts its path, such as context.webhookRequest.body.order_id.
- To join text and request values, use concatenate, listed under Text in Functions.
- Click Evaluate to see the result against your sample, and then save.
A combined value
concatenate("Order ", context.webhookRequest.body.order_id, " received for ", context.webhookRequest.body.customer.name)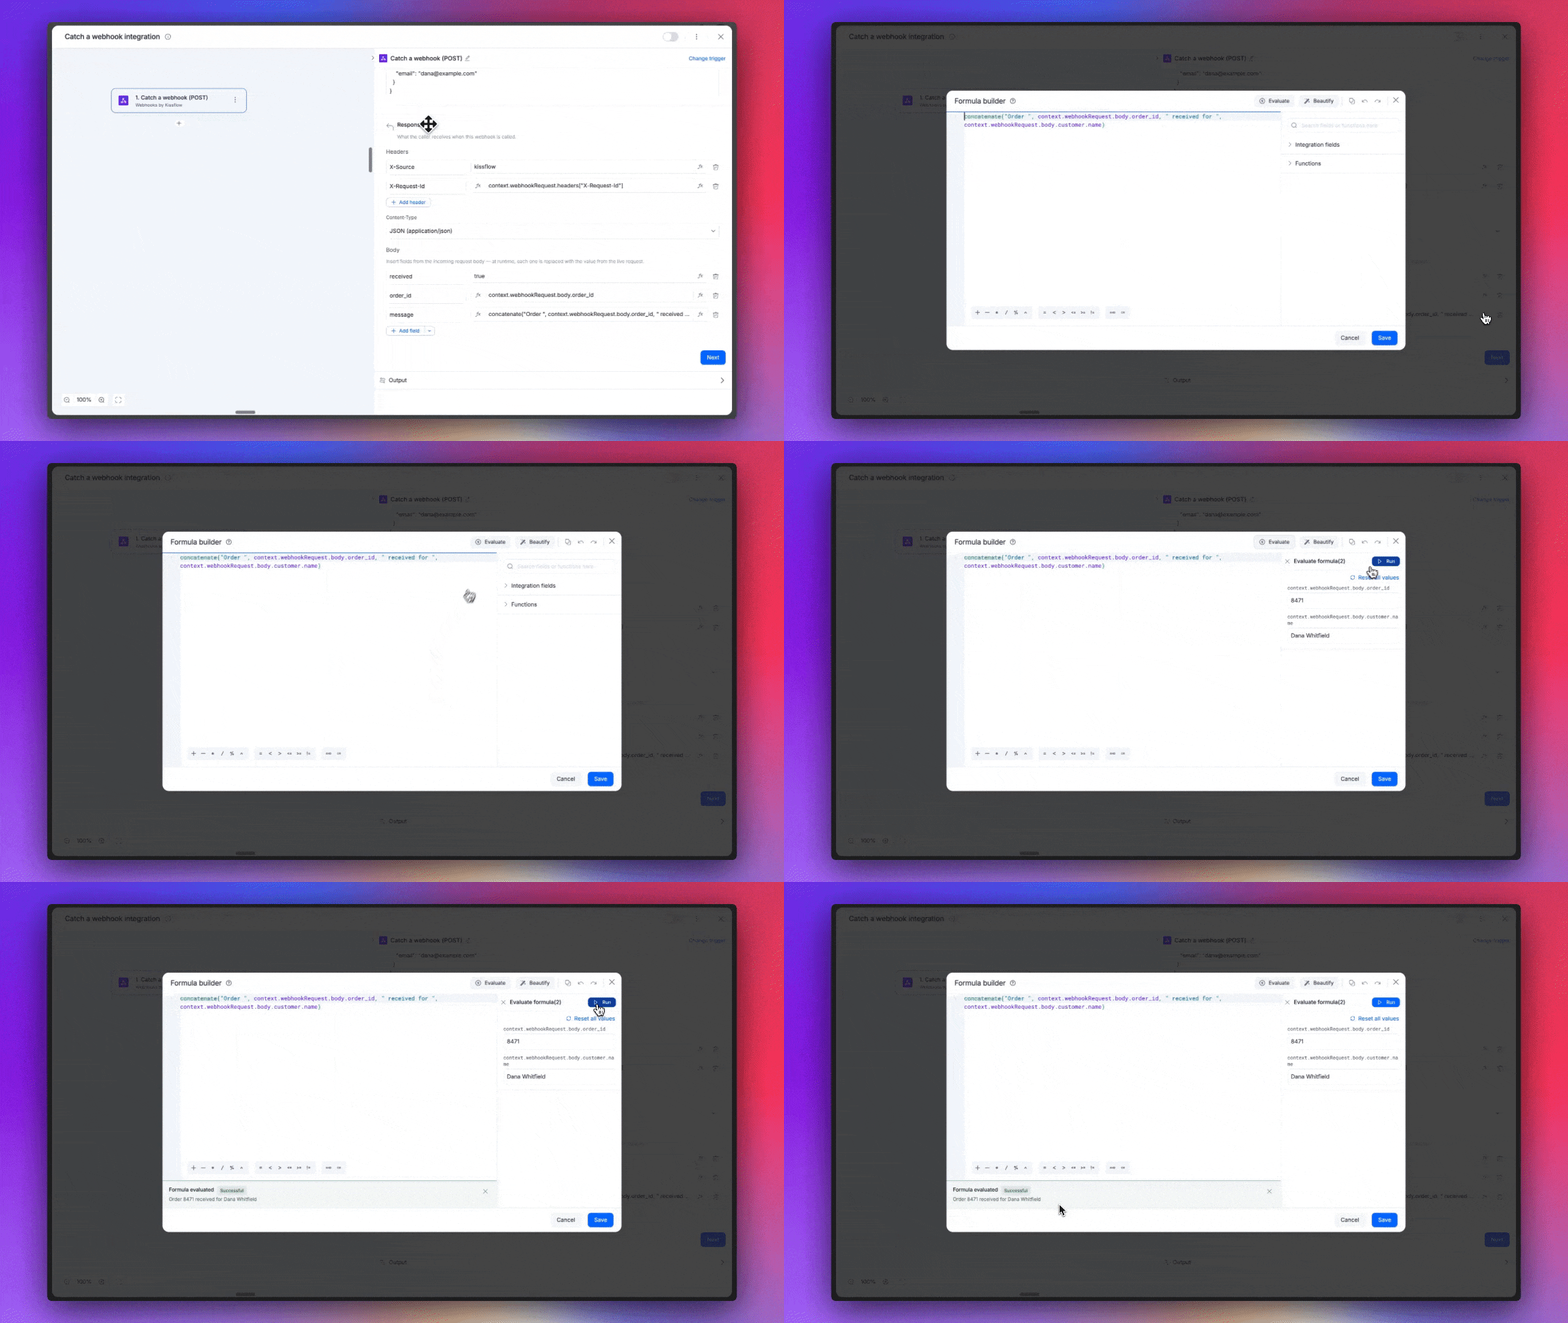
Against the sample above, this returns Order 8471 received for Dana Whitfield. Spaces belong inside the quoted text, because concatenate joins its values with nothing between them.
Note:
Kissflow manages a few request headers itself, and X-Request-Id is one of them. A response that reads X-Request-Id returns Kissflow's own value rather than the one the caller sent. To return a caller's reference, agree on a header name of your own, such as X-Caller-Ref.
Adding response headers
Under Response, click Add header, and then enter a Key and Value for every header the caller receives.
| Key | Value |
| X-Source | kissflow |
| X-Caller-Ref | context.webhookRequest.headers["X-Caller-Ref"] |
An incoming header resolves whatever case the caller sends it in, so a value read from X-Caller-Ref still resolves when the request carries x-caller-ref.
Note:
Header names take the characters that HTTP allows in a header name: letters, numbers, and the symbols! # $ % & ' * + - . ^ _ ` | ~. Both X-Caller-Ref and X_Caller_Ref are valid. When a name holds any other character, such as a space or a colon, the row is flagged after you click Next.
Selecting a content type
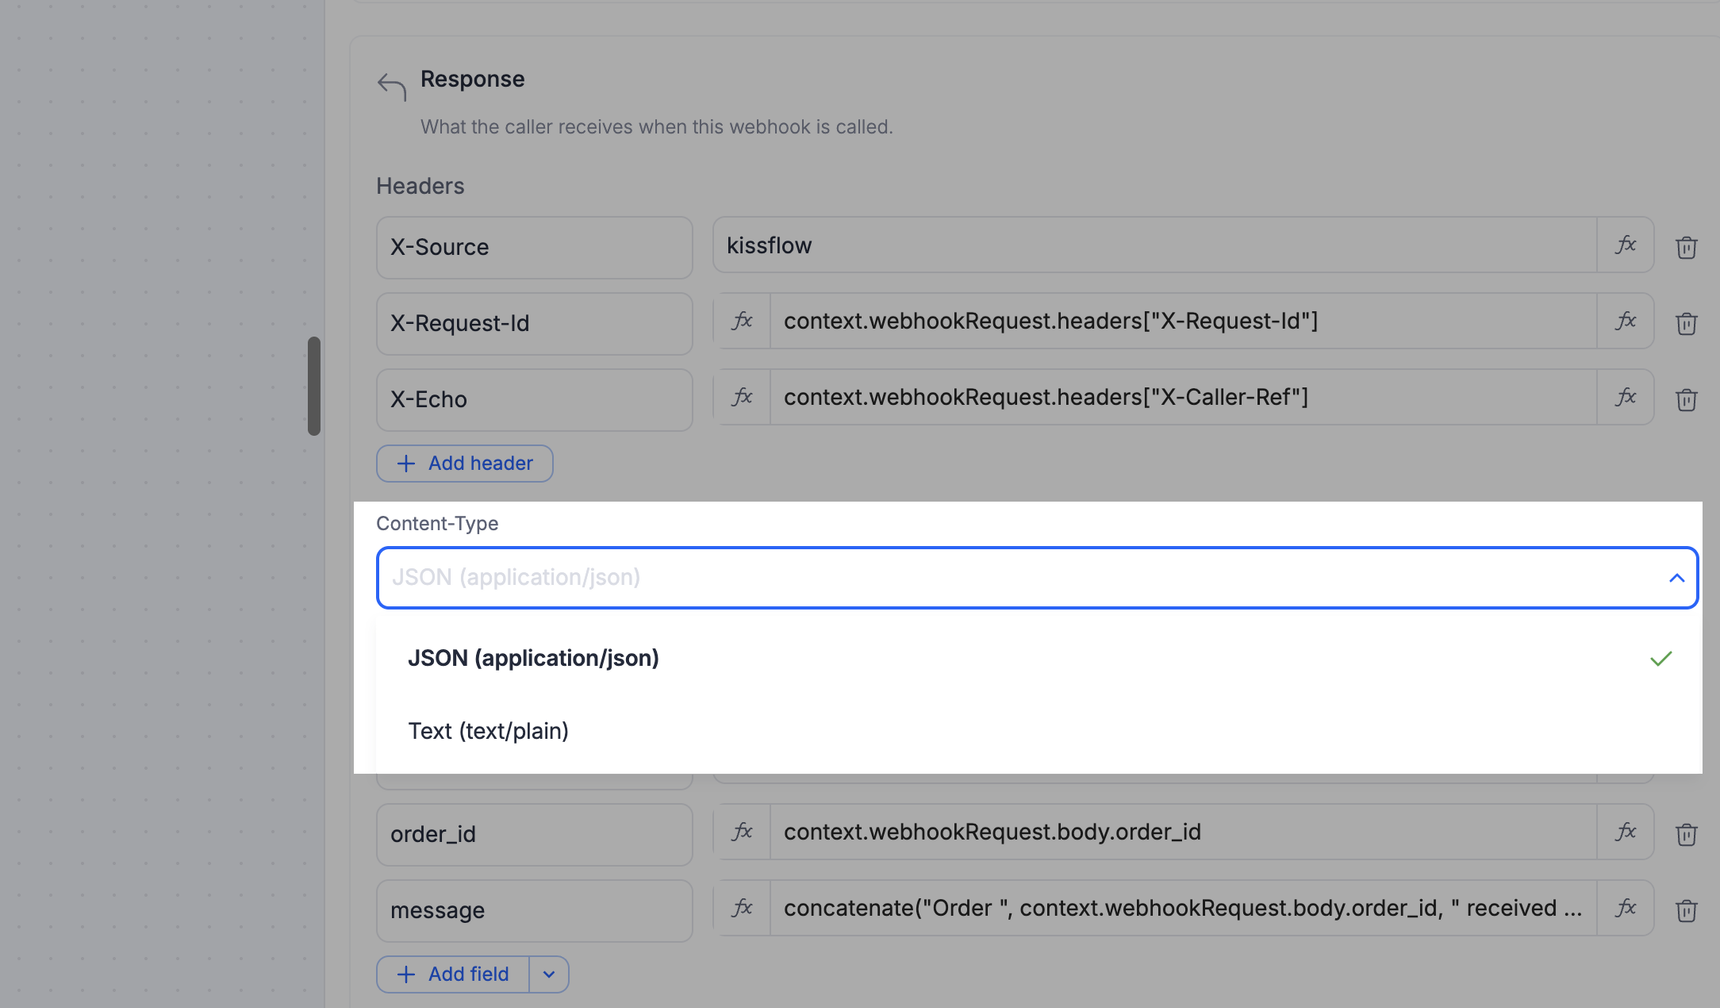
Select one of two options under Content-Type:
| Content-Type | Body editor |
| JSON (application/json) | A list of fields. Click Add field to add one, or select the arrow beside it to choose String (text), Number, or Boolean (true/false). |
| Text (text/plain) | A single text box, with an Insert field list for adding values from the request. |
Important:
Switching the content type clears the body you already built. So, it's advisable to select the content type first.
Building the response body
Every field in a JSON body forms one key in the response. Give each field a Key and Value.
| Key | Value |
| order_id | context.webhookRequest.body.order_id |
| message | concatenate("Order ", context.webhookRequest.body.order_id, " received for ", context.webhookRequest.body.customer.name) |
The caller then receives:
Response body
{
  "order_id": "8471",
  "message": "Order 8471 received for Dana Whitfield"
}
A text body holds the same values inline, and the caller receives:
Order 8471 received for Dana WhitfieldClick Next to save the response, complete the remaining steps, and turn on the integration.
Note:
Inserted values resolve against the live request when the webhook runs, so the sample stays inside the trigger and never reaches the caller. Outputs from the actions that follow the trigger are unavailable here.
When a request cannot be answered
Inserting a request value into your response makes that field required. Kissflow builds the response before it runs the integration, so a request that does not carry every inserted field cannot be answered, and it is rejected rather than answered in part.
| What the request does | What the caller receives |
| Leaves out a field that the response inserts | 400 Bad Request, naming the fields that are missing. |
| Sends a field whose type the response cannot use | 400 Bad Request. |
| Carries every field, but the response still cannot be built | 500 Internal Server Error, asking the caller to contact the owner of the webhook. |
In each case the integration does not run and nothing is recorded in the run history, so the caller can correct the request and send it again.
Note:
A field that the request sends as empty is not missing. Kissflow uses the empty value and the response is built. A response that holds only static text rejects nothing, because it reads no value from the request.
Insert a request value when the caller always sends it, or when a request without it should be turned away. To answer every request whatever it carries, build the response from static text.
Activating the webhook connector
After configuring your connector, turn on the toggle button on the upper-right corner of the editor to activate the integration.
To ensure your integrations are properly configured and tested, review our best practices guide for tips on building robust and maintainable solutions.